





Enjoying this article? Add us as a preferred source on Google.
- The hero dies in the first few minutes and comes back in somebody else’s body. That’s Devil Summoner.
- Saturn vs. PSP: what changed, and which version this guide follows
- Loyalty, magnetite cash-ins, demon crystallization and the other systems that decide your run
- Full dungeon order and boss list
- Maps for all 30 areas and 115 floors, with chest contents
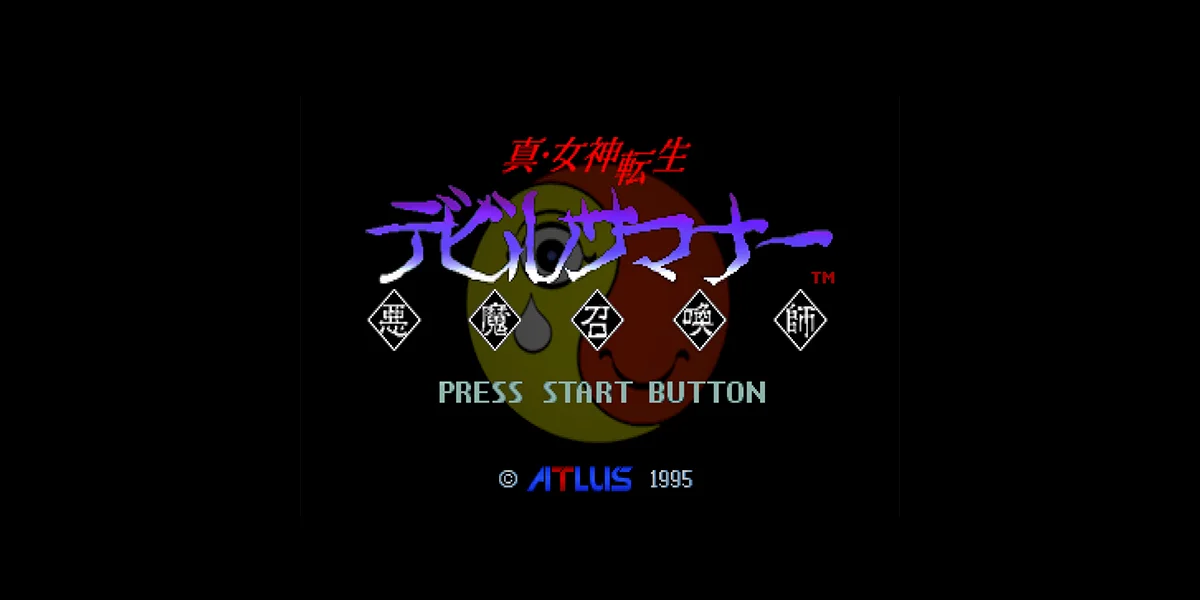
The game barely gets started before the hero is murdered. He wakes up inside the body of a detective he has never met: Kyoji Kuzunoha. That is how Shin Megami Tensei: Devil Summoner, released for the Sega Saturn on December 25, 1995, opens its story.
The setting is the fictional city of Hirasaki. You take jobs out of your base in Yarai Ginza and work through one warped location after another, from office buildings to a university to a TV station. There are more than 25 first-person 3D dungeons, packed with warps, pitfalls, one-way doors, and warp tiles that only trigger depending on which direction you step onto them. There’s automapping, sure. You will still get lost.
This guide is built on the Sega Saturn version, covering dungeon order, boss tactics, and the traps that stop people cold. Further down you’ll find maps for all 30 areas and 115 floors. Hover a marker and it tells you what’s in the chest or which staircase you’re looking at.
Back when the Saturn version was new, I lost two hours to the looping corridors of the Pseudo-Astral Plane with my COMP dead in my hands. I’d love to hand these maps to my younger self.
*Prices in this article are converted from Japanese yen at ¥153 = US$1 (September 2026 rate).
What kind of game is Shin Megami Tensei: Devil Summoner? Story and basic data
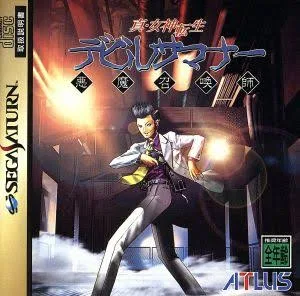
Shin Megami Tensei: Devil Summoner is an Atlus RPG in which a murdered protagonist borrows the body of devil summoner Kyoji Kuzunoha and chases down the supernatural incidents tearing through Hirasaki City.
| Item | Details |
| Title | Shin Megami Tensei: Devil Summoner |
| Release date | Sega Saturn: December 25, 1995 / PSP: December 22, 2005 |
| Publisher / price | Atlus / Saturn version about US$44 |
| Character design | Kazuma Kaneko |
| Setting | Hirasaki, a fictional regional city (home base is Yarai Ginza in Yarai Ward) |
| Dungeon scale | 30 areas and 115 floors of 3D dungeon (including 5 sewer systems and the Otherworld) |
| Final goal | Stop the resurrected ancient vengeful spirit in the depths of the Kofun Labyrinth |
The hero is out with his girlfriend, Kumiko Hatano, when they’re caught up in an incident, and he is killed by Sid Davis, a dark summoner dressed as a priest. Charon, the ferryman of the Sanzu River, pulls a few strings: the hero’s soul is placed into the body of Kyoji Kuzunoha, another of Sid’s victims. He comes back to life as “Kyoji.”
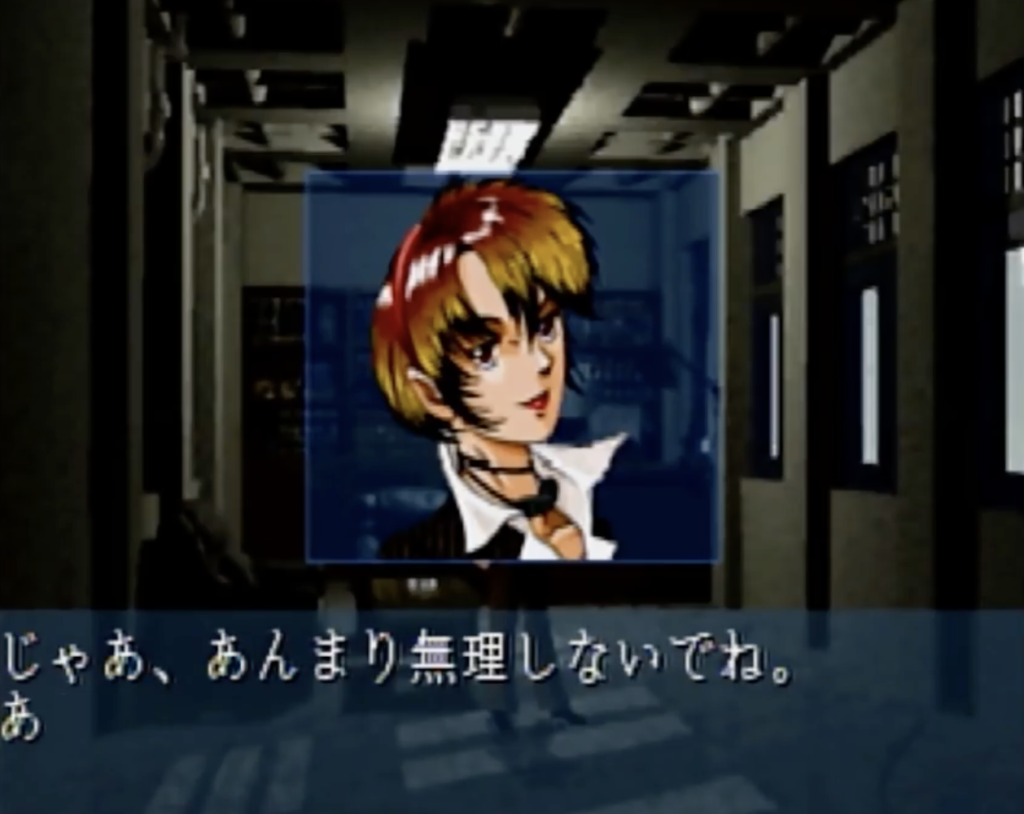
His partner is Rei Reiho, the spirit medium who worked alongside the real Kyoji. The two of them keep the job going with the hero wearing Kyoji’s face. Take a case at the detective agency, crack it, collect the fee: the loop is pure hardboiled detective fiction. Laying that detective drama over the Megaten skeleton of talking demons into joining you is the invention that makes this game what it is.
Saturn version vs. PSP version: what’s different, and which one does this guide follow?
This guide follows the Sega Saturn version. Map layouts are identical across both releases, but the PSP version rebalanced the numbers heavily, so treat its boss fights as a different beast entirely.
| Item | Saturn (1995) | PSP (2005) |
| Difficulty | Single setting | Choice of Normal or Hard |
| Extra bosses | None | Four added bosses in the Otherworld |
| Magic | Modest damage | Fire magic and the Megidola line hit far harder |
| Gear | — | Weapons mostly buffed, armor mostly nerfed |
| Demon names | Kantei Seikun, Gogmagoku, etc. | Corrected to Kansei Teikun and Gogmagog |
On PSP, demon MP pools are also up by roughly 20 across the board, so enemy magic can nearly wipe you out in the early game. Walk into the Library with Saturn instincts and Agi and Bufu will teach you a lesson. The Saturn version, on the other hand, gives you sturdier armor and noticeably lighter incoming damage.
Which systems actually decide your run? Demons, money, and gear
Devil Summoner rests on three pillars: raising your demons, generating cash, and shutting down ailments and instant death. Here are the mechanics worth knowing before you get deep.
| System | What to remember |
| Loyalty | Demons fall into greedy types, level-gap types, and companionship types. Low loyalty means they ignore your orders. Feed them magic stones and jewels until loyalty sits at 3 or 4 and they settle down |
| Money | Case rewards are skimmed by Marie before they reach you, so they’re thin. Your real income is selling battle-earned magnetite at the Bio-Energy Association (roughly 10 MAG for about US$1, and the rate moves) |
| Saving | Normally only at the detective agency. With the Backupper from Kinno-ya you can save inside dungeons too. Buy it first, before anything else |
| Demon crystallization | Turns a demon into equipment. The standouts are Hairy Jack into Shadow Jack (your early-game workhorse), Dun into Leoheal (blocks death magic), and Spriggan into the Spriggan Vest (reflects skills) |
| Demon fusion and sword fusion | Handled at the Hotel Goumaden. Fuse a demon into a blade such as the Mumei Sword, Renki Sword, or Kesho Onmito to create a powerful fusion sword |
| Rei’s deity channeling | During the Mt. Kasagi event you choose which god Rei channels. The choice is permanent. For a first run, Amaterasu’s balance of offense and healing is the safe pick |
| Escape magic | Traesto yanks you out of a dungeon instantly. Recruit the Vouivre in the Museum and the Cerberus in the New City Hall without fail |
The rule people forget: the moment the hero goes down, it’s game over. Rei and your demons being in perfect health means nothing. So in any dungeon where demons cast Mudo, carrying Final Guard from Kinno-ya at all times is non-negotiable. Damage floors can be nullified with Core Shield, so keep one or two of those on hand as well.
Your home base in Yarai Ginza has everything: Maruse Real Estate for weapons, Self Defense for armor, Kinno-ya for items, and Haguruma-do Honpo for medicine. Shopping essentially happens nowhere else. Maruse and Self Defense rotate their stock as the story advances, so drop in every time you close a case.
Shin Megami Tensei: Devil Summoner walkthrough chart: dungeon order and boss list
The story runs in the order below. Follow the “objective” column alone and you’ll never be stuck wondering where to go next.
| Dungeon | Objective and route | Boss |
| Yato Building | Head in to pick up the tickets. A mysterious man handles the fighting for you | Pisaca x4 |
| Construction Site | Sid corners you. Event B pushes the story forward | — |
| Library | Your first job. Climb to 4F, then take the elevator down to B1F | Fuguruma the Kijo |
| Professor’s House area | Settle things with Takashi at Professor Azuma’s house. Watch for damage floors | Yakou the Wraith |
| Casa Inui | Ride the elevator up to 3F, then walk the stairs back down to 1F | Inui the Vengeful Spirit |
| Kitayama University grounds to Main Building | The grounds are just a corridor. Clear Event A on Main Building 1F before heading to 4F | P-Gargantua / Sid the Fiend / Shikiouji the Wicked Demon |
| Kasagi-so Apartments | Wall-to-wall warps, pitfalls, and damage floors. Not many floors, though | Kashiyama the Vengeful Spirit |
| Mt. Kasagi | The path to the mountain lodge. Rei’s deity channeling event happens here | — |
| Kumiko’s House area | Fastest route is Warp 3 to Warp 2 to Kumiko’s house | Strigoii & Striges |
| Hikawa Shrine | Warp 1 to 2 to 6 to 4 (5 or 9 also work) to reach the center. Audience with Susano-o | No battle |
| Museum | Collect the art objects. Rei temporarily leaves the party at Event B | Dantalian the Fallen Angel |
| Toa TV to Radio Tower | Take the EXIT on TV station 8F to the Radio Tower. Inside the tower you advance via pitfalls | Yuria plus 3 others (optional) / Orgone Ghost |
| Police Station | The B1F warps send you somewhere different depending on your facing | Kubanda the Wraith |
| Chinatown | Warps 1-2-3-4-5-6-7 in that order to reach the Kanteibyo temple | Kantei Seikun |
| Tendo Tenzan Mansion | Dropping through Pitfall 3 on 4F and working back down is the shortcut | Tendo the Wraith |
| New City Hall | Mayor’s office on 60F first, then the assembly hall on 40F | Demiurge the Tyrant |
| Pseudo-Astral Plane | No COMP, and the edges loop around. Kyoji joins temporarily. Warp 2 to 5 to 7 | Sid the Fiend |
| Muken Hell | Enter Warps 1 through 11 in numerical order. Answer Charon’s questions | — |
| Demon Forest | The EXIT at the center leads to the final dungeon | — |
| Kofun Labyrinth | The final dungeon, with no save or recovery points. The last battle is on B8F | Oomagatsuhi & Yasomagatsuhi / Sid into Inaruna |
| Otherworld (bonus) | Once you reach the antechamber on Kofun B8F, you can enter from Yarai Ward Sewer B2F | Nanto Seikun & Hokuto Seikun |
On top of that there’s the optional Rinkai Hospital and the five sewer systems that run under Hirasaki. The sewers are your demon-hunting and leveling grounds, and they’re where you can fight Doctor Thrill’s artificial-demon Gargantua series.
When do the sewers open up?
Sewer doors unlock in stages as the story advances. The game never tells you which, so use the table below.
| Sewer | B1F-B2F | B3F and below |
| Yarai Ward | After clearing the Library | After clearing Kitayama University |
| Mt. Kasagi | After meeting Professor Azuma on Mt. Kasagi | After meeting Susano-o at Hikawa Shrine |
| Asahi Ward | After the Strigoii fight | After clearing the Museum |
| Rinkai Park | All floors after clearing the Radio Tower (which also opens the Rinkai Park-side doors in every other sewer) | |
| Hibarigaoka | Reachable from other sewers after clearing Tendo Tenzan Mansion. Accessible from the field after clearing Muken Hell | |
Six places where Devil Summoner players get stuck
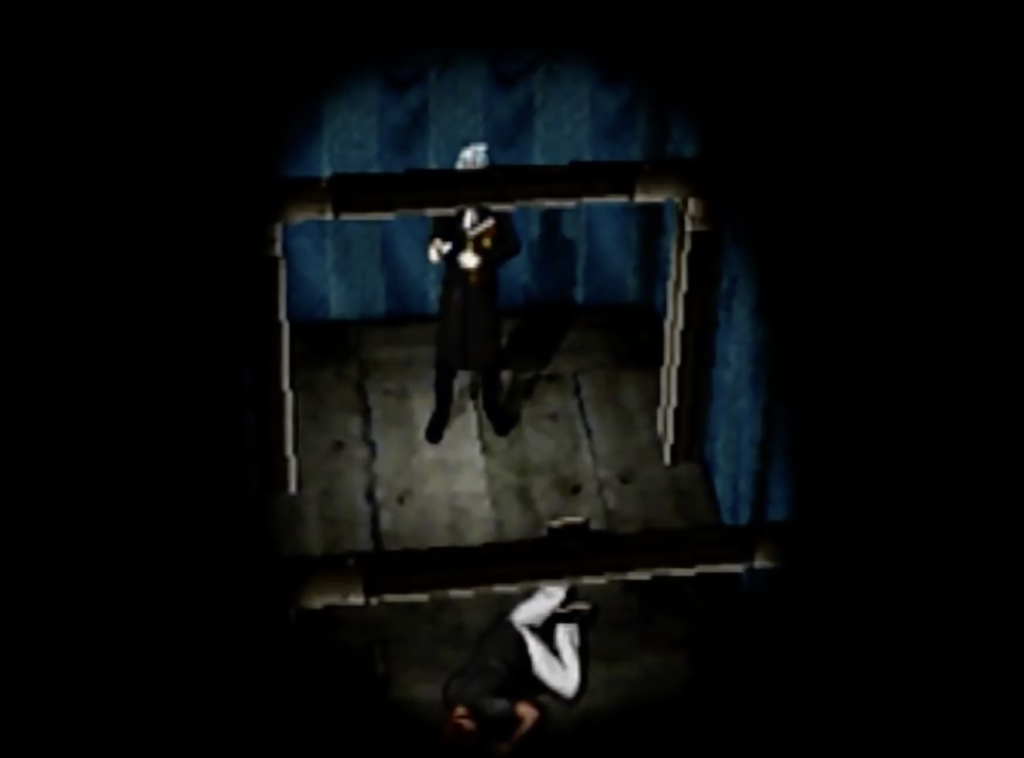
1. If the hero dies, it’s over, even with the party alive
The Katakirauwa around Kitayama University show up in packs and chain-cast Mudo. Rei can be untouched and it won’t matter; one death spell on the hero ends the run instantly. In any dungeon with Mudo users, make Final Guard your top priority and save constantly with the Backupper.
2. Some boss fights end after 8 turns
The Yakou fight near the Professor’s house and the Sid fight at Kitayama University both cut off at turn 8. Losing doesn’t block the story, but if you don’t beat Yakou you don’t get the Incense of Strength. Clear the front-row escorts first, then dump everything into Yakou in the back row.
3. At Kitayama University, do Event A first
Event A on Main Building 1F lets you fight Doctor Thrill’s artificial demon P-Gargantua and earn the artificial demon base. Beat the 4F boss first and this event disappears for good. It’s genuinely missable, so always handle 1F before you climb.
4. Warps that behave differently based on your facing
The warps on Police Station B1F, Tendo Tenzan Mansion 2F, New City Hall 40F, and Kofun Labyrinth B7F may or may not trigger depending on which direction you enter from. On Kofun Labyrinth B7F, for example, warp 6 fires when you enter facing east, while 5, 8, and 11 fire facing north. Memorize the warp numbers together with their directions and you’ll stop stomping blindly on the same tile.
5. VAMP status only clears at a healing facility
Take the Mothman’s Drain attack in the Radio Tower and you’re hit with VAMP status, draining your party’s HP with every step. No item cures it, so escape with a Traesto-capable demon and go straight to Clover Gym.
6. Your COMP doesn’t work in the Pseudo-Astral Plane
No automap either, and the edges of the map loop back on themselves. Summoning demons depends entirely on the Sabbath skill of the temporarily-joined Kyoji, so guard his MP carefully. Keeping this guide’s maps open beside you is by far the surest way through.
Map Guide: Floor Maps for Every Dungeon and What Is in Every Chest
From here on you get maps for all 30 areas and 115 floors, laid out in the order you will clear them. Gray bands are walls, red dashed lines are doors, and green dashed lines are doors that only open through story events. Hover a marker with the cursor (tap it on mobile) and it will show you what is inside that chest or the name of the boss waiting there.
Every map is drawn from the Sega Saturn version. Stairs, pitfalls and warps that share a number connect to each other (up-stairs 3 leads to down-stairs 3 on the floor above). Chest numbers run in sequence within each dungeon, and the contents of any one chest can only be taken once.
Map Symbol Legend
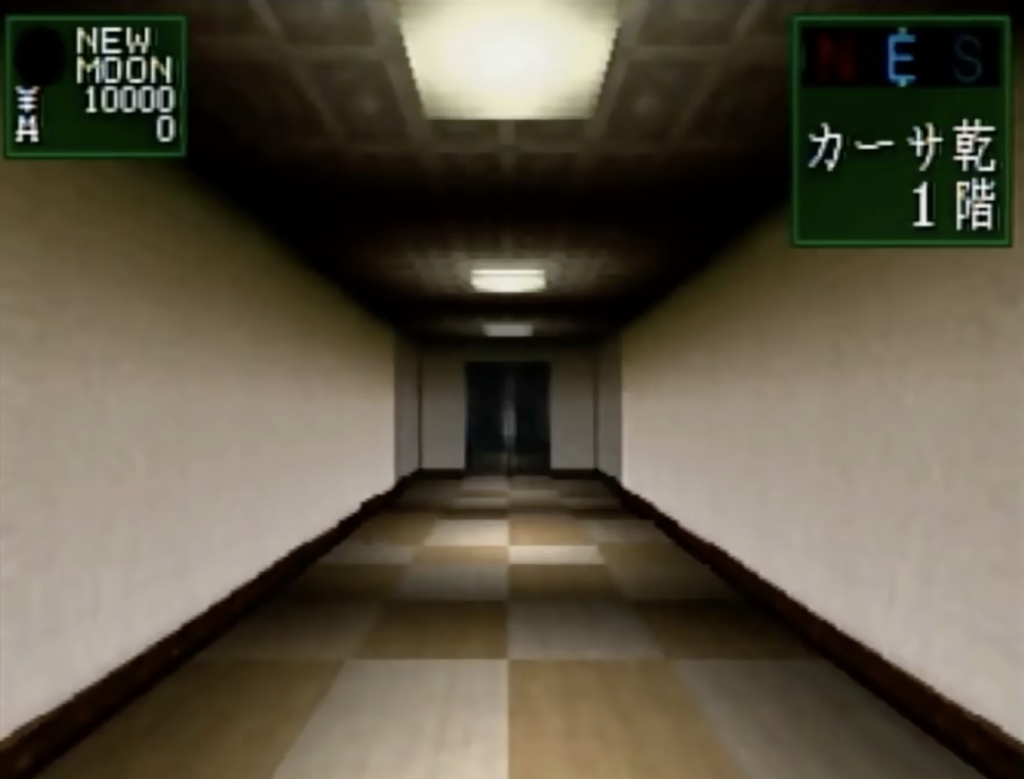
Yato Building: Where the Story Begins
You walk in to pick up a ticket and demons jump you on the spot. The boss fight is over in an instant thanks to a mysterious man (the real Kyoji Kuzunoha), so all you have to do is hold down a button. The one thing worth slowing down for is the level-up afterward: think hard about which stat you want to raise.
Open the Yato Building maps (3 floors)
Yato Building — 1F
Yato Building — 2F
Yato Building — 3F
Construction Site: A Half-Built Tower With No Way Out
Sid Davis tells you he will let you go if you can slip away, but there is no exit here. Head for the Event B marker and the story moves forward. Event A is just Sid hurrying you along.
Open the Construction Site maps (1 floor)
Construction Site — Map
Rinkai Hospital: An Optional Detour
Nothing here is required by the main story. Still, a certain young man and his parents are sitting in a hospital room on 2F. Come back after you know the truth at the heart of the plot and the scene is going to hurt a little.
Open the Rinkai Hospital maps (2 floors)
Rinkai Hospital — 1F
Rinkai Hospital — 2F
Yarai Ginza: The Shopping District You Will Call Home
This is your hub, packing in the Kuzunoha Detective Agency, the fortune house, the Goumaden demon fusion hall and every shop you need. The chests only become lootable after Marie hands you your first job. The event marker near the office is a coin locker, and late in the game you will come back to pull an item out of it.
Open the Yarai Ginza maps (1 floor)
Yarai Ginza — Map
Library: Your First Otherworld
You cannot drop straight into the basement. Climb the stairs from 1F up to 4F, then ride the elevator down to B1F and you are in Fuguruma’s room. The boss puts you to sleep with Dormina and then burns you with Agi, so keeping a Pixie who knows Dia in the back row makes the fight far more stable.
Open the Library maps (5 floors)
Library — 1F
Library — 2F
Library — 3F
Library — 4F
Library — B1F
Professor’s Neighborhood: Damage Floors and Yakou
There are four entrances, and every one of them eventually reaches the professor’s house. Core Shield nullifies the damage floors outright. The Hairy Jack that spawns here becomes Shadow Jack through magnetite transformation, so it is well worth recruiting one as a demon ally.
Open the Professor’s Neighborhood maps (1 floor)
Professor’s Neighborhood — Map
Casa Inui: Soldiers Who Shoot Back
The correct route is to ride the elevator up to 3F and then walk the stairs back down to 1F. The escorts in the Inui fight use gun skills and the self-destruct move “Sange.” Buy a Plate Bandana at Self Defense, equip it, and leave any demon that is weak to gunfire on the bench.
Open the Casa Inui maps (4 floors)
Casa Inui — 1F
Casa Inui — 2F
Casa Inui — 3F
Casa Inui — 4F
Kitayama University Grounds: The Road to the Main Building
All this area does is funnel you into the main building through the EXIT at the center. The path winds around, but it is close to a straight line. Packs of Katakirauwa are the one thing to watch for.
Open the Kitayama University Grounds maps (1 floor)
Kitayama University Grounds — Map
Kitayama University Main Building: Do Not Skip Event A
There is a heal spot right inside the entrance. Clear Event A on 1F to take down P Gargantua first, then move upstairs. The Sid fight ends once you survive eight turns. Shikiouji has a body made of paper, so fire tears straight through it, but bring Disparalyze to answer its paralyzing “Arachno Wire.”
Open the Kitayama University Main Building maps (4 floors)
Kitayama University Main Building — 1F
Kitayama University Main Building — 2F
Kitayama University Main Building — 3F
Kitayama University Main Building — 4F
Kasagi Apartments: A Trade Show of Traps
Warps, pitfalls and damage floors are crammed in everywhere, but at four floors it is a small dungeon. The boss Kashiyama fights in formation with six Enku escorts. The standard opener is to use the Stinger you picked up on turn one and shock the whole Enku line at once.
Open the Kasagi Apartments maps (4 floors)
Kasagi Apartments — 1F
Kasagi Apartments — 2F
Kasagi Apartments — 3F
Kasagi Apartments — 4F
Mt. Kasagi: Rei’s Divine Summoning
No boss lives here, it is just a corridor, but six chests are waiting. While the area has not turned into an Otherworld, the event marker is where you choose which god Rei calls down. Professor Azuma’s story goes to the root of the plot, so do not skim past it.
Open the Mt. Kasagi maps (1 floor)
Mt. Kasagi — Map
Kumiko’s Neighborhood: The Warp Shortcut
Warps are everywhere, but warp 3 to warp 2 to Kumiko’s house is the shortest line. The boss Striges mirrors your party with the Expel-element “Mirror Prison,” then Strigoii smashes the mirrors with “Killing Step.” Bring LIGHT-alignment demons, who take nothing from Expel.
Open the Kumiko’s Neighborhood maps (1 floor)
Kumiko’s Neighborhood — Map
Hikawa Shrine: An Audience With Susano-o
Take warp 1 to 2 to 6, then use any of 4, 5 or 9 to reach the center. You never fight Susano-o, so there is no need to ration items or MP. Do grab the ¥15,000 in chest 6 and the Renki Sword in chest 7.
Open the Hikawa Shrine maps (1 floor)
Hikawa Shrine — Map
Museum: Throw the Art
Art objects such as vases and statues can be hurled at the boss Dantalian to freeze it for three turns. They also sell for ¥10,000 each, so there is no downside to collecting them. Rei leaves the party at Event B, so have a replacement healer ready before then.
Open the Museum maps (4 floors)
Museum — 1F
Museum — 2F
Museum — 3F
Museum — 4F
Toa TV: A Long Haul of Warps and Pitfalls
Eight floors in all. You can walk past the three bosses on 5F, but beating them weakens the boss waiting in the Broadcast Tower. The EXIT on 8F feeds directly into the tower, so bring a demon with Traesto and push through in one push.
Open the Toa TV maps (8 floors)
Toa TV — 1F
Toa TV — 2F
Toa TV — 3F
Toa TV — 4F
Toa TV — 5F
Toa TV — 6F
Toa TV — 7F
Toa TV — 8F
Broadcast Tower: Falling Is the Way Forward
You start from the EXIT on 8F. The whole tower is built so that dropping through pitfalls to the floor below is how you advance. Encounter rates are brutal on some floors, so watch for Mothman’s drain attack and Basilisk’s petrifying gaze. The Kesho Onmi Sword in chest 6 is material for sword fusion.
Open the Broadcast Tower maps (8 floors)
Broadcast Tower — 1F
Broadcast Tower — 4F
Broadcast Tower — 8F
Broadcast Tower — 13F
Broadcast Tower — 15F
Broadcast Tower — 17F
Broadcast Tower — 19F
Broadcast Tower — 20F
Police Station: Warps That Read Your Facing
Warp 1 on B1F drops you near the stairs if you enter from the east or west, and onto the path leading to the elevator if you enter from the south. Zombie Cop appears nowhere else in the game, so put one down if you are filling out Devil Analyze.
Open the Police Station maps (4 floors)
Police Station — 1F
Police Station — 2F
Police Station — 3F
Police Station — B1F
Chinatown: The Gateway to Warp Hell
To reach the Kantei Temple where the boss waits, simply follow warps 1 through 7 in numerical order. Arman’s “Chomp” can be bounced back with the Spriggan Vest. Kantei Seikun uses nothing but physical attacks, so Tetrakarn reflects everything and it finishes itself off.
Open the Chinatown maps (2 floors)
Chinatown — Normal
Chinatown — Otherworld
Tendo Tenzan Mansion: The Pitfall Shortcut Down
Loot the chests on 1F, then take stairs 2 up to 4F. Drop through pitfall 3 on 4F into the dark zone on 3F, then run pitfall 2 to warp 10 to pitfall 1 and you will come out right in front of stairs 1. The warps on 2F trigger differently depending on whether you face west or south, and solving that floor honestly is a slog.
Open the Tendo Tenzan Mansion maps (9 floors)
Tendo Tenzan Mansion — 1F
Tendo Tenzan Mansion — 2F
Tendo Tenzan Mansion — 3F
Tendo Tenzan Mansion — 4F
Tendo Tenzan Mansion — 5F
Tendo Tenzan Mansion — 6F
Tendo Tenzan Mansion — 7F
Tendo Tenzan Mansion — 8F
Tendo Tenzan Mansion — 9F
New City Hall: A 60-Story Labyrinth
From pitfall 3 on 15F, ride the elevator up to 20F, then chain stairs and pitfalls through 25F, 40F, 35F, 30F, 45F and 50F on the way to the mayor’s office on 60F. After the meeting, head for the assembly hall on 40F. The warps on 40F fire 3 and 5 when you face north, 4 and 6 when you face east.
Open the New City Hall maps (12 floors)
New City Hall — 1F
New City Hall — 10F
New City Hall — 15F
New City Hall — 20F
New City Hall — 25F
New City Hall — 30F
New City Hall — 35F
New City Hall — 40F
New City Hall — 45F
New City Hall — 50F
New City Hall — 55F
New City Hall — 60F
Pseudo-Astral Plane: A Looping Space Where the COMP Is Dead
The pink tiles mark the zone where your COMP will not work, and the opposite edges of the map wrap around into each other. Kyoji joins you at Event A, and Event B hands you his equipment. Warp 2 to 5 to 7 is the shortest line to the boss room.
Open the Pseudo-Astral Plane maps (1 floor)
Pseudo-Astral Plane — Map
Avichi Hell: Warps in Numerical Order
You begin at the marker in the center where a figure is standing. Follow warps 1 through 11 in numerical order and you will arrive at Charon the ferryman. How you answer Charon’s question decides whether you make it back to the world of the living.
Open the Avichi Hell maps (1 floor)
Avichi Hell — Map
Demon Forest: The Woods Before the Final Dungeon
It is a wide area, but the encounter rate is on the low side. Step into the EXIT at the center and you are on your way to the final dungeon. Cerberus, who comes with Traesto, shows up here, so this is the place to recruit one as a demon ally. My impression is that it turns up most often around the EXIT on the north side.
Open the Demon Forest maps (1 floor)
Demon Forest — Map
Tomb Labyrinth: The Final Dungeon
There is no save point and no healing anywhere inside. On B1F, pitfall 2 carries you onward; on B2F, move in the direction of the red arrows. The Event A door on B6F opens once you beat the two bosses flanking it. B7F’s warps fire based on your facing, and the fastest route is stairs 14 into warp 4 to 5 to 6. B8F is a run of back-to-back fights, so do not sit on your Soma or Balm of Rising.
Open the Tomb Labyrinth maps (9 floors)
Tomb Labyrinth — 1F
Tomb Labyrinth — B1F
Tomb Labyrinth — B2F
Tomb Labyrinth — B3F
Tomb Labyrinth — B4F
Tomb Labyrinth — B5F
Tomb Labyrinth — B6F
Tomb Labyrinth — B7F
Tomb Labyrinth — B8F
Otherworld: The Optional Dungeon to Clear Before the Ending
Once you have walked up to the burial chamber on B8F of the Tomb Labyrinth, you can enter from the far end of B2F in the Yarai Ward Sewers. Your COMP is dead inside. The Tyrant Shu, who appears near warp 4 in the lower right, hands out a colossal amount of experience. The two bosses have to die within 16 turns or you get thrown back to the EXIT.
Open the Otherworld maps (1 floor)
Otherworld — Map
Yarai Ward Sewers: The US Military Base
Event A on B3F is the US military base, and if you obtained the forged ID card during the Chinatown case, you can buy weapons there. To reach the base you have to descend all the way to B5F and climb back up. The EXIT on B2F leads to the Otherworld.
Open the Yarai Ward Sewers maps (5 floors)
Yarai Ward Sewers — B1F
Yarai Ward Sewers — B2F
Yarai Ward Sewers — B3F
Yarai Ward Sewers — B4F
Yarai Ward Sewers — B5F
Mt. Kasagi Sewers: A Gargantua Rematch
The EXITs on B3F connect, from the north, to the Hibarigaoka, Asahi Ward and Rinkai Park sewers. The boss, the artificial demon Gargantua, can be shocked with the Pixie Knife and killed without taking a single point of damage.
Open the Mt. Kasagi Sewers maps (5 floors)
Mt. Kasagi Sewers — B1F
Mt. Kasagi Sewers — B2F
Mt. Kasagi Sewers — B3F
Mt. Kasagi Sewers — B4F
Mt. Kasagi Sewers — B5F
Asahi Ward Sewers: The Book of Shuffler
Meet Takashi at Event B on B5F, then head back to the office to receive the Book of Shuffler. Gargantua Q resists physical attacks and even carries Tetrakarn, so come at it with magic.
Open the Asahi Ward Sewers maps (5 floors)
Asahi Ward Sewers — B1F
Asahi Ward Sewers — B2F
Asahi Ward Sewers — B3F
Asahi Ward Sewers — B4F
Asahi Ward Sewers — B5F
Rinkai Park Sewers: The Hub of the Sewer Network
The EXITs on B3F connect, from the west, to Yarai Ward (two of them), Mt. Kasagi and Asahi Ward. Gargantua X has high speed and is hard to outpace in the turn order, so bring a demon that can cast Sukukaja.
Open the Rinkai Park Sewers maps (5 floors)
Rinkai Park Sewers — B1F
Rinkai Park Sewers — B2F
Rinkai Park Sewers — B3F
Rinkai Park Sewers — B4F
Rinkai Park Sewers — B5F
Hibarigaoka Sewers: Opening the Road to the Tomb
The answer to Professor Azuma’s memo is down here. On B3F, take stairs 3, then 5, then 6, then 4, and make for Event B. The Halo Helm in chest 13 is armor that blocks Curse attacks, so there is no excuse for leaving it behind.
Open the Hibarigaoka Sewers maps (6 floors)
Hibarigaoka Sewers — B1F
Hibarigaoka Sewers — B2F
Hibarigaoka Sewers — B3F
Hibarigaoka Sewers — B4F
Hibarigaoka Sewers — B5F
Hibarigaoka Sewers — Path to the Tomb
Can You Still Play Shin Megami Tensei: Devil Summoner Today? A Platform-by-Platform Guide
The bottom line: as of September 2026, Shin Megami Tensei: Devil Summoner has not been ported to Nintendo Switch, PS5, Xbox, or Steam. To play it, you need original hardware and either the Sega Saturn or the PSP version.
1. Titles Available Through Subscriptions or for Free
No subscription service includes this game. There is no Sega Saturn mini console either, so right now there is simply no easy, official way to play it.
2. Titles You Can Buy Individually
The PSP download version (part of the Atlus Best Collection) is still listed as a purchasable title on the PS Vita’s PlayStation Store, and Atlus announced in June 2021 that sales would continue. That said, the PS Vita is no longer a current platform, and there is no guarantee the store will stay up. There is no version of this game you can buy outright on a current-generation system.
| Title | Platform | Status |
| Shin Megami Tensei: Devil Summoner (PSP download version) | PS Vita | Released January 21, 2010. Continued availability announced June 2021 |
3. Titles Playable as Remasters or Remakes
There is no remaster of this game, but other entries in the Devil Summoner lineage are playable on current hardware. If the detective-story-meets-demon-summoning flavor is what you are after, start with these two.
| Title | Release date | Platform |
| RAIDOU Remastered: The Mystery of the Soulless Army | June 19, 2025 | Switch 2 / Switch / PS5 / PS4 / Xbox Series X|S / Steam (standard edition $43) |
| Soul Hackers 2 | August 25, 2022 | PS5 / PS4 / Xbox / Steam |
4. Titles That Are Hard to Get on Current Hardware
For the game itself, you will be hunting down a used copy of either the Saturn version or the PSP version.
| Version | Release date | In a nutshell |
| Sega Saturn version | December 25, 1995 (Saturn Collection reissue, June 20, 1997) | The version this guide follows. Armor defense is rock solid |
| PSP version | December 22, 2005 (Best reissue, March 8, 2007) | Adds difficulty selection and a bonus boss. Magic hits harder and the challenge is steeper |
If you are starting today, the PSP version wins on availability and portability, while the Saturn version is the one for soaking up the original atmosphere. If you still own Saturn hardware, do yourself a favor and play it that way at least once. I still find that a Saturn controller in my hands is the way this game feels most right.
Enjoying this article? Add us as a preferred source on Google.
Final Thoughts: Devil Summoner Is the RPG That Perfected “Detective Drama Meets Demon Summoning”
Shin Megami Tensei: Devil Summoner is a Sega Saturn RPG released on December 25, 1995, with a PSP version following on December 22, 2005. This guide follows the Saturn version and covers maps for all 30 areas and 115 floors.
Three things carry you through: saving often with the Backupper, guarding against Mudo with Final Guard, and funding yourself by cashing in Magnetite. Tackle Event A first at Kitayama University, take Warps 2 to 5 to 7 in the Pseudo Astral Plane, and on B7F of the Ancient Tomb Labyrinth take Stairs 14 and then Warps 4 to 5 to 6. Memorize just those checkpoints and you will not get badly lost.
A gauntlet of back-to-back fights waits for you on B8F of the Ancient Tomb Labyrinth. Farm fusion material in the sewers and line up the Halo Helm and the Spriggan Vest before you go in.
You come back to life in someone else’s body and start solving the city’s strange cases as a detective. That premise locks into the demon conversations and fusion so cleanly that the game still does not feel dated almost 30 years later. On the other hand, warps that behave differently depending on which way you are facing, and a protagonist whose instant death means instant game over, land as pretty unfair by modern standards. Which is exactly why it is worth playing with a map at your side.
If the port is never coming, the least we can do is preserve the maps ourselves.
Read Next
Snicker Kitamura







Leave a Reply