






Enjoying this article? Add us as a preferred source on Google.
- You play as Werdna, the evil wizard, clawing your way up from B10F to the surface
- This guide follows the PC Engine version; know how it differs from the PC original
- All 10 Summon Circle locations, plus how summoning and healing work
- A step-by-step route through the Cosmic Cube (B3F-B1F), the hardest stretch in the game
- Coordinate-labeled maps for all 14 floors, including the hidden B11F
Wizardry IV: The Return of Werdna is the entry that flips the entire series on its head. You are not the adventurer here. You are Werdna himself, the evil wizard who was cut down at the end of the first game, Proving Grounds of the Mad Overlord, and sealed away in the dungeon below. You wake up on B10F. From there you climb toward daylight, killing the adventurers who once killed you.
The game is also famous for being brutally hard, even by series standards. You cannot build a party; your only allies are monsters you call up from magic circles. Doors refuse to open unless you already know the answer to a riddle. And the Cosmic Cube, a tangle of stairs and chutes wired together with no logic to them, is widely considered impossible to escape without a map.
This guide uses the PC Engine version, the most forgiving port, as its baseline, and covers all 14 floors with coordinate-labeled maps, from B10F up through the third floor of the surface and into the hidden B11F. Circle locations, the Cosmic Cube route, and the ending requirements are all here in one pass.
The first time I reached B4F, I pushed ahead without the HHGofAUNTY OCK in my pack, walked into the Cosmic Cube, and lost my way out entirely. This is a game where doing things in the wrong order can strand you for good. Read the flow here before you move.
*Prices in this article are converted from Japanese yen at ¥153 = US$1 (September 2026 rate).
What kind of game is Wizardry IV: The Return of Werdna? You play as Werdna
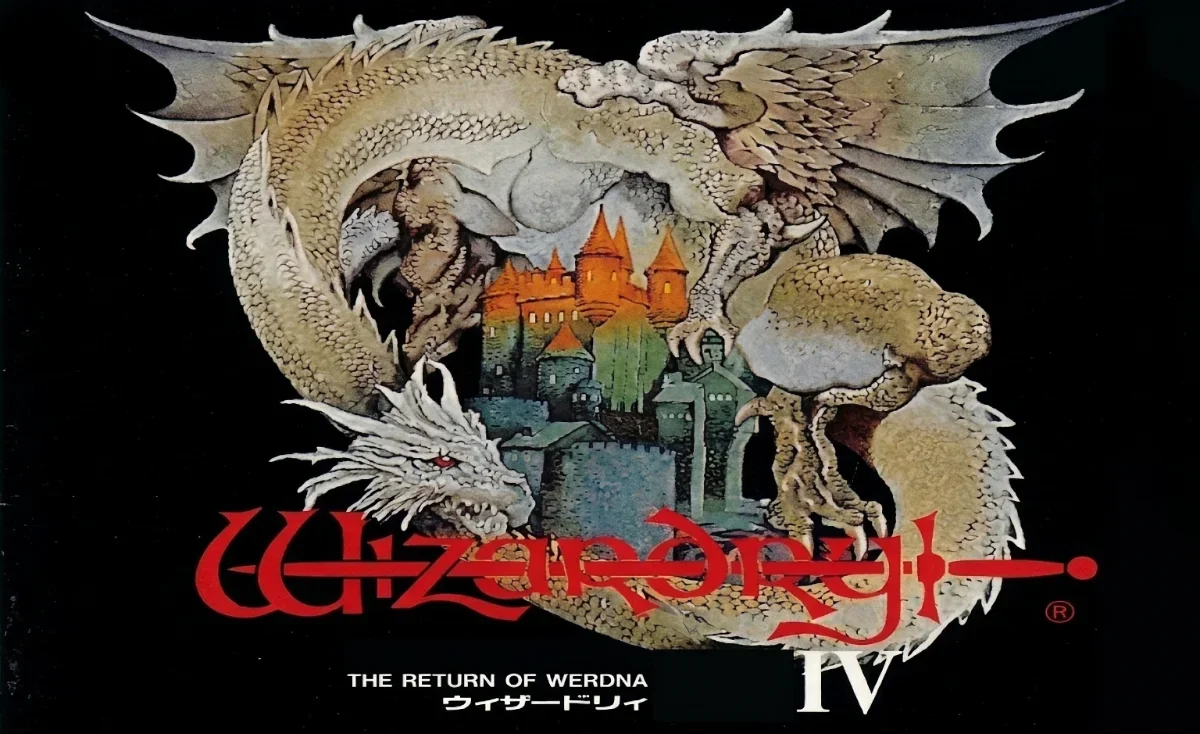
Wizardry IV: The Return of Werdna is the fourth entry in the series, released in North America in November 1987. It is a first-person 3D dungeon crawler in which you control the evil wizard Werdna and escape from B10F up to the surface. In Japan, ASCII released PC-8801 and PC-9801 versions on December 15, 1988, and several other ports followed.
| Platform | Release date | Publisher |
| PC-8801 / PC-9801 | December 15, 1988 | ASCII |
| PC Engine SUPER CD-ROM2, Wizardry III & IV | March 4, 1994 (US$55) | Naxat Soft |
| PlayStation | 1999 | Locus |
| Windows | 2002 | Locus |
In the first game, Werdna stole the amulet and was hunted down by the adventurers King Trebor assembled. This sequel picks up from there, opening as Werdna stirs from a long sleep in his own tomb. Every floor of the maze has been fortified to make sure he never reaches the surface again.
The clever part is that the enemies blocking your path are the adventurers from the first three games. Named parties patrol each floor, announce themselves, and then come at you six at a time. In the original release, characters players had uploaded could show up as enemies. The heroes of yesterday are now the things you have to kill. That inversion is the whole hook.
Which version should you play? PC Engine vs. the PC original
All coordinates and maps in this guide follow the version of The Return of Werdna included in the PC Engine release of Wizardry III & IV. That port streamlines a lot of the original’s puzzle design and is far more playable. The PC-98 and PlayStation versions differ in the details, so keep that in mind if you are playing elsewhere.
Here are the main differences.
- Trebor’s ghost is gone. The original’s time-limit mechanic is absent, and the related events play out differently
- Enemies now give experience. Werdna and his summoned monsters both level up
- Stepping into a Summon Circle no longer disbands your party, and you can keep up to 15 monster types in reserve
- Exchange Circles are new. Trade items for HP restoration or fresh monsters
- All but one of the secret doors are now ordinary doors, among other simplifications to the map’s tricks
If you want the original in all its vicious glory, go PC. If you want to actually finish it, go PC Engine. The SpotGeeks editorial take: if this is your first time, play the PC Engine version, no hesitation. It is still plenty mean.
For the record, the PlayStation and Windows releases each include two versions: “Classic,” which sticks close to the original, and “Arrange,” which adds hints to the puzzles.
What is a Summon Circle? Werdna’s growth and how summoning works
The Summon Circle, the pentagram inscribed on the floor, is the single most important fixture in the game. It handles powering Werdna up, summoning monsters, and restoring HP and spell points all at once. With no inn and no temple anywhere in this game, the circles are your only base.
The first time you enter a circle of a new level, Werdna’s maximum HP goes up by 10 and he gains access to mage spells one tier higher. By the end he is sitting at +100 maximum HP with level 7 spells unlocked. The monsters you can summon scale with the circle’s level, too.
The “new level” circle on each floor is located as follows. These are effectively your progress checkpoints.
| Floor | Circle level | Coordinates |
| B10F | 1 | E2, N6 / E10, N10 |
| B9F | 2 | E0, N6 |
| B8F | 3 | E18, N15 |
| B7F | 4 | E4, N1 |
| B6F | 5 | E1, N7 / E18, N13 |
| B5F | 6 | E5, N5 |
| B4F | 7 (unlocks level 7 spells) | E1, N7 / E12, N0 |
| B3F | 8 | E2, N7 and three others (4 total) |
| B2F | 9 | E8, N9 and three others (4 total) |
| B1F | 10 | E8, N9 / E16, N3 / E16, N14 |
In the PC Engine version, summoned monsters gain experience and level up alongside you. That means you do not have to swap out a well-trained lower-tier monster just because you have reached a higher circle. “Decent and numerous” beats “strong but few” in actual fights, and that is the defining quirk of this port.
The other thing worth committing to memory is the Exchange Circle. Each item you hand over restores 8 HP, and you can also use it to restock monsters. You can hold up to 255 items, so when you farm, farm in bulk.
B10F to B4F walkthrough: which items to grab, and in what order
Beating this game comes down to one thing: whether you picked up the items you will need later while you were still on the lower floors. Miss one and you are dead in the water once you enter the Cosmic Cube. Here are the essentials floor by floor, with coordinates.
B10F: Werdna’s Tomb
- E9, N5 / E3, N9 / E18, N9 … fights with the Inner, Middle, and Outer Guardians
- E11, N19 … Pyramid Guard fight. Win to get the BLACK CANDLE
- E9, N19 … BLOOD STONE
The layout is simple and the only obstacles are the fights. Do not get careless: the Outer Guardian and the Pyramid Guard both cast level 3 mage spells. The BLOOD STONE gets used on B7F, so do not leave without it.
B9F: A floor full of doors, and the Gate of Hell
- E18, N0 … LANDER’S TURQ
- E9, N8 … Hell Hound fight. Win to get the DEMONIC CHIMES
- E9, N10 … the Gate of Hell. Use the DEMONIC CHIMES, then the ARABIC DIARY, then the BLACK CANDLE in that order to open it. If you are carrying the WINGED BOOTS and the DREAMPAINTER KA, you receive the HHGofAUNTY OCK (the Holy Hand Grenade of Aunty Ock)
You cannot progress on this floor without finding a secret door, so use the BLACK CANDLE first. As for the Gate of Hell, you will not have the required items when you first arrive. Write the coordinates down as a place you will definitely be coming back to.
B8F: The minefield
- E1, N1 … Gram fight. Win to get the BLACK BOX
- E14, N1 … a pool of water. Take roughly 15 damage to get the WITCHING ROD
- E0, N9 … GOLDEN PYRITE / E0, N5 … AMBER DRAGON
Nearly every tile on this floor is a mine. There is a forced fight with two options just before the up staircase, and the correct choice is to fight Gram at E1, N1, who carries the BLACK BOX. Anything stored in the BLACK BOX is treated as though you do not have it, which lets you obtain event items more than once.
B7F: The temple altar and the three swords
- E9, N19 … the temple altar. Offer the BLOOD STONE, LANDER’S TURQ, and AMBER DRAGON to receive one of the EAST WIND SWORD, WEST WIND SWORD, or DRAGON’S CLAW
- E6, N18 … HOPALONG CARROT
- E7, N8 … the Dreampainter’s stone statue. Fight it for the DREAMPAINTER KA
The altar swords are critical items that determine your ending. Use the BLACK BOX and you can walk away with all three. The events on this floor cannot be completed without the WINGED BOOTS from B5F, so you will need to head up and come back down.
B6F: Spinners and dummy doors
- E13, N13 … answer “AMULET” to the question to receive the GOOD HOPE CAPE
- E13, N2 … Jesse the Smith fight. Win to get the ARABIC DIARY
Spinners and fake doors will wreck your sense of direction on this floor, so keep DUMAPIC handy. Jesse the Smith casts level 7 mage spells, and if he gets the jump on you it can be a wipe.
B5F: The checkerboard darkzone
- E7, N1 … L-5 Pioneer fight. Win to get the WINGED BOOTS
- E9, N18 … OXYGEN MASK
This is a darkzone laid out in a checkerboard pattern, with a staggering 42 fixed encounters. Getting the WINGED BOOTS opens up the events on the floors below, but it is a lot safer to come here after Werdna has learned level 7 spells. The OXYGEN MASK is your answer to MAKANITO until you hit level 9.
B4F: Every door is one-way
- E14, N9 … AROMATIC BALL
- E5, N14 … the old witch. Trade the AROMATIC BALL, MAGICAN’S HAT, GOLDEN PYRITE, WITCHING ROD, CLEANSING OIL, and BLADE CUSINART’ (six items) for the DABofPUCE
- E6, N5 … a pool. If your alignment is EVIL, it becomes NEUTRAL
Every single door on this floor is one-way. On the maps, a thin dashed line hugging one side of a door shows which way it swings, so check the passable side before you commit. The circle here unlocks level 7 spells. The DABofPUCE trade happens after you clear the Cosmic Cube.
How do you get through the Cosmic Cube (B3F-B1F)? The full route
The Cosmic Cube is a three-level block spanning B3F through B1F where stairs and chutes connect in no discernible pattern, and it is the hardest part of the game. Until you break out onto the surface, MALOR will not move you, and you cannot go back below B4F.
So everything hinges on your prep before you walk in. The HHGofAUNTY OCK (B9F) and at least 50,000 G.P. are mandatory, and you want the OXYGEN MASK, WINGED BOOTS, and BLACK CANDLE too. Go in without the grenade and you cannot blow open the exit wall; you are sealed in.
Here is the route.
- Take the chute at B1F E15, N14 to B3F E19, N15
- Take the chute at B3F E12, N15 to B1F E3, N5
- Take the chute at B1F E3, N9 to B2F E1, N4
- Take the warp at B2F E5, N7 to B2F E3, N11
- At B2F E3, N11, pay 50,000 G.P. and buy the CLEANSING OIL
- Take the down staircase at B2F E10, N8 to B3F E10, N9
- Take the warp at B3F E8, N17 to B3F E2, N17
- Take the chute at B3F E1, N18 to B1F E3, N5
- Take the chute at B1F E3, N9 to B2F E1, N4
- Take the up staircase at B2F E8, N11 to B1F E0, N7
- Take the down staircase at B1F E9, N9 to B3F E11, N5
- Take the chute at B3F E10, N2 to B1F E3, N0
- Take the down staircase at B1F E8, N5 to B3F E3, N8
- Take the chute at B3F E1, N2 to B2F E12, N7
- Take the chute at B2F E8, N2 to B1F E18, N4
- At B1F E15, N15, use the grenade to blow out the north wall
- Take the up staircase at B1F E15, N16 to 1F E0, N0
Step 16, blowing the wall, is where it gets dangerous. At E15, N15, do this in exact order: equip the HHGofAUNTY OCK and invoke its SP, equip the CLEANSING OIL and invoke its SP, drop the HHGofAUNTY OCK, then get out of there. If you are not at least two squares away, the blast kills you. A lot of people have died right here.
The section of B2F blanketed in spinners was the worst part of the cube in the PC version. In the PC Engine version, spinners no longer reactivate when you camp, which makes it dramatically easier. Hug the walls if you have the BLACK CANDLE; lean on DUMAPIC if you do not.
What do you do on surface floors 1F-3F? The ending requirements
The surface is event-driven. You make the rounds of knightly orders and noble gatherings, trading items, and finish at the statue on 3F. Your first objective is the INN KEY (3F E17, N17, obtained by killing the innkeeper).
Before you tackle the surface, you need NEUTRAL alignment; one of the EAST WIND SWORD, WEST WIND SWORD, or DRAGON’S CLAW; the HOLY LIMP WRIST, PENNONCEAUX, and DABofPUCE; and at least 200,000 G.P. Here is the sequence.
- At 1F E9, N1, answer “TREBOR SUX” to pass
- At 3F E17, N17, obtain the INN KEY
- At 2F E15, N13, obtain the MAINTENANCE CAP
- At 2F E14, N11, trade the DABofPUCE for the ARROWofTRUTH
- At 2F E14, N13, trade the PENNONCEAUX for the ORBofDREAMS
- At 1F E5, N16, equip the MAINTENANCE CAP and enter the pool to change your alignment to GOOD
- At 2F E15, N11, trade 100,000 G.P. for the CRYSTAL ROSE
- At 1F E9, N16, trade 100,000 G.P. for the RALLYING HORN
- At 2F E9, N16, accept the offer to obtain the SIGNET RING
- At 3F E9, N15, win the duel, then accept the offer of the throne for the King ending
- At 3F E9, N17, answer “MYTHRIL GLOVE” to obtain the MYTHRIL GLOVES
- At 3F E11, N9, obtain the VOID TRANSDUCER
- MALOR to B10F E10, N9, then to the hidden floor B11F E10, N0
- At B11F E10, N14, obtain the KRISofTRUTH
- MALOR back to B1F E15, N16, then pass through 1F E9, N1 again
- At the statue of Kadorto, 3F E6, N13, trigger your ending
Which ending you get depends on which sword you have equipped when you stand before the statue of Kadorto. The requirements are that you hold the HOLY LIMP WRIST with the MYTHRIL GLOVES equipped, and that you have one of the EAST WIND SWORD, WEST WIND SWORD, DRAGON’S CLAW, or KRISofTRUTH equipped. Secure all three altar swords with the BLACK BOX and you can compare endings side by side.
The single most dangerous thing on the surface is “THE SOFTALK ALL-STARS LESS ONE” at 2F E8, N9, the toughest enemy in the game. It respawns whenever you change floors, so when you come back down from 3F, MALOR underground instead. Also note that on 2F and 3F, stepping out into open air is an instant wipe. Never set foot on the light blue squares on the maps. As for the final enemy, Hawkwind, his weakness is the level 1 monster “A Dink.”
What is the hidden floor B11F? Every riddle answer
B11F is a hidden floor you reach by casting MALOR at B10F E10, N9. The KRISofTRUTH, which shapes your ending, is buried down here. The floor is built around answering riddles as you advance, and partway through you will need the VOID TRANSDUCER from 3F. You can leave any time by casting MALOR to a floor above.
| Coordinates | Answer |
| E10, N0 | FEET (a wrong answer sends you back to B10F) |
| E10, N4 | STOMACH |
| E2, N6 | LEGS |
| E18, N7 | HIPS |
| E12, N9 | BREAST |
| E2, N11 | RIGHT HAND |
| E18, N12 | LEFT HAND |
| E2, N15 | RIGHT CHEEK |
| E18, N15 | LEFT CHEEK |
| E11, N19 | BRAIN |
| E10, N18 | TREE OF LIFE |
At E18, N13, having the VOID TRANSDUCER equipped moves you to E1, N14, and from there E10, N14 yields the KRISofTRUTH. The reason every answer is a body part is that the floor layout itself is shaped like a human body. Realizing that is good for a small laugh.
Maps: All 14 Floors from B10F to 3F, Plus B11F
From here on you get maps for all 14 floors, laid out in the order you actually play them (B10F up to B1F, then 1F through 3F, and finally the hidden floor B11F). Every map is a 20×20 grid running 20 squares east-west and 20 squares north-south. Gray bands are walls and red dashed lines are doors. For one-way doors, the thin dashed line sits on the side you can pass through. Hover over any marker and you’ll see where the stairs lead or what the event does.
The floor colors carry meaning too. Watch out for the light blue “open air” tiles, which wipe out your party the instant you step in, and the gray “rock” tiles, which wipe you out if you MALOR into them. Always check both before you pick a teleport destination. These maps follow the PC Engine version, so a few details differ from other ports.
Map Symbol Legend
B10F
The tomb where Werdna wakes up. The layout is simple, and the only real obstacle is combat.
B10F MAP (horizontal = E 0-19 / vertical = N 0-19)
B9F
A floor packed with doors. Grab the grenade at the Gate of Hell at E9, N10.
B9F MAP (horizontal = E 0-19 / vertical = N 0-19)
B8F
Almost the entire floor is mined. The Gram fight at E1, N1 is the correct play.
B8F MAP (horizontal = E 0-19 / vertical = N 0-19)
B7F
Three swords wait at the temple altar at E9, N19.
B7F MAP (horizontal = E 0-19 / vertical = N 0-19)
B6F
Spinners and dummy doors conspire to make you lose your bearings.
B6F MAP (horizontal = E 0-19 / vertical = N 0-19)
B5F
A checkerboard dark zone with 42 fixed battles scattered across it.
B5F MAP (horizontal = E 0-19 / vertical = N 0-19)
B4F
Every single door here is one-way. Level 7 spells finally open up.
B4F MAP (horizontal = E 0-19 / vertical = N 0-19)
B3F
The Cosmic Cube. Stairs and chutes link up in no particular order.
B3F MAP (horizontal = E 0-19 / vertical = N 0-19)
B2F
The Cosmic Cube. Buy the CLEANSING OIL at E3, N11.
B2F MAP (horizontal = E 0-19 / vertical = N 0-19)
B1F
The Cosmic Cube. Blow up the north wall at E15, N15 to reach the surface.
B1F MAP (horizontal = E 0-19 / vertical = N 0-19)
1F
The ground floor. “TREBOR SUX” is waiting at E9, N1.
1F MAP (horizontal = E 0-19 / vertical = N 0-19)
2F
Trade items at the knights’ gathering. The light blue open air kills your party on contact.
2F MAP (horizontal = E 0-19 / vertical = N 0-19)
3F
The statue of Kadorto at E6, N13 triggers the ending.
3F MAP (horizontal = E 0-19 / vertical = N 0-19)
B11F
The hidden floor. Cast MALOR at E10, N9 on B10F.
B11F MAP (horizontal = E 0-19 / vertical = N 0-19)
Can You Still Play Wizardry IV: The Return of Werdna on Current Hardware? A Platform-by-Platform Guide
The verdict: as of September 2026, there is no legitimate way to play The Return of Werdna on current hardware (Switch, PS5, or Steam). The only entry in the series playable on today’s machines is the remaster of the original game, Proving Grounds of the Mad Overlord.
1. Titles Playable Free or Through a Subscription
None. As of September 2026, the game is not included in Nintendo Switch Online or in the PlayStation Plus Classics Catalog.
2. Titles You Can Buy Outright
| Title | Platforms | Notes |
| Wizardry: Proving Grounds of the Mad Overlord (3D remaster) | Switch / PS4 / PS5 / Xbox / Steam | Released May 23, 2024. The first game in the series, and the prequel in which Werdna is struck down |
3. Titles Playable via Remasters and Remakes
Every port of The Return of Werdna fails to run on current hardware, so you’ll have to hunt one down used.
| Port | Platform | What sets it apart |
| Wizardry III & IV | PC Engine SUPER CD-ROM2 | An experience-point system and the added Exchange Circle make it far friendlier. This is the version our guide follows |
| PlayStation version | PlayStation | Bundles both a Classic and an Arranged version. The Arranged version adds hints to the puzzles |
| Windows version | Windows | Same two flavors as the PlayStation release: Classic and Arranged |
4. Titles That Are Hard to Get on Current Hardware
The PC-8801 and PC-9801 versions deliver something close to the original difficulty, but you’d need both the actual hardware and the floppies, which is a tall order these days. If you just want to dive in, the PC Engine version is the way to go; if you want a taste of the original, the Classic version on the PlayStation release is the realistic pick.
There is reason for optimism, though. In May 2026, Atari was reported to have acquired the rights to Wizardry I through V. Given how warmly the first game’s remaster was received, the entry starring Werdna himself may yet get its turn in the spotlight. While you wait, there’s a certain pleasure in picking up that first game on current hardware and cutting Werdna down yourself. The irony of later controlling the very foe you killed hits so much harder that way.
Enjoying this article? Add us as a preferred source on Google.
Wrapping Up: In The Return of Werdna, the Order You Prepare in Decides Everything
Wizardry IV: The Return of Werdna is the fourth entry in the series, and it hands you control of Werdna, the evil wizard slain in the first game, as he climbs from the tenth basement floor toward the surface. In Japan, the PC-8801 and PC-9801 versions launched on December 15, 1988, and the PC Engine release Wizardry III & IV followed on March 4, 1994. This guide follows the PC Engine version.
Your home base is the Summon Circle on each floor. From Level 1 on B10F to Level 10 on B1F, Werdna grows stronger with every new circle he steps into, and seventh-level spells unlock on B4F.
The toughest stretch by far is the Cosmic Cube spanning B3F to B1F. Before you go in, it is absolutely essential to grab the HHGofAUNTY OCK at the Gate of Hell on B9F and bring at least 50,000 G.P. Buy the CLEANSING OIL at B2F East 3, North 11, then blow up the northern wall at B1F East 15, North 15 and get at least two squares clear of it. Forget any of that and you’ll either be sealed in or caught in the blast.
On the surface, you trade items back and forth, and the Statue of Kadorto at 3F East 6, North 13 gives you an ending based on the sword you have equipped. As for the KRISofTRUTH on the hidden floor B11F, cast Malor at B10F East 10, North 9 and you can go collect it.
The Return of Werdna is the odd one out in the series, the game that flips “the one who slays” and “the one who is slain.” You have no party, there’s no inn, and if you don’t know the answers to the riddles, you simply don’t move forward. Nothing else is quite as unfair. Yet the design, in which an item you scooped up on a lower floor suddenly matters up on the surface, is beautifully thought out, and no other entry pays off with this much satisfaction when you finally reach the end. Play the smoothed-out PC Engine version with a map full of coordinates in hand, and all that unfairness turns into difficulty you can genuinely beat.
Climbing the labyrinth through the eyes of your old nemesis. This is one that longtime series players, above all, deserve to experience.
Read Next
Snicker Kitamura





Leave a Reply