
Enjoying this article? Add us as a preferred source on Google.
- Why the Japanese “II” is actually the third scenario
- Good and Evil reach different floors — the two-party system is the whole game
- Floors 1–6 walkthrough with coordinates (Good route and Evil route)
- All 10 key items, the order to grab them, and where players get stuck
- Can you play it on modern hardware? Where things stand as of July 2026
- Map guide: full floor maps for F1 through F6
The Famicom version of Wizardry II: Legacy of Llylgamyn is a game that confiscates your weapons the moment you walk in the door, especially if you beat the first scenario. That Level 13 Samurai you spent months building? Transfer him over with a Turbo File and he drops straight back to Level 1. Adventurers who show up leaning on raw power get their legs cut out from under them at the entrance.
And the biggest wall here isn’t a monster or a trap. It’s alignment. A Good party can only enter Floors 2 and 4. An Evil party can only enter Floors 3 and 5. To reach the deepest level, Floor 6, both groups have to make separate climbs and then combine the crystals each one brings home. Two campaigns running in parallel off a single cartridge — that’s the architecture of this scenario.
This guide collects everything you need to run the Famicom version of Legacy of Llylgamyn to the end, coordinates included: how it differs from Proving Grounds of the Mad Overlord, the Good and Evil routes, the crystal fusion procedure, and the farewell you exchange with L’Kbreth on the final floor. There’s also a section at the bottom on how to actually play a 1989 cartridge in 2026.
For the record, I skimped on building my Evil party during my first run and hard-stalled at the entrance to Floor 3. Don’t repeat my mistake.
What kind of game is Wizardry II: Legacy of Llylgamyn? The “II” that’s really scenario III
The Famicom release of Wizardry II: Legacy of Llylgamyn is a first-person 3D dungeon crawler published by ASCII on February 21, 1989. And this “II” is not the English-language Wizardry II.
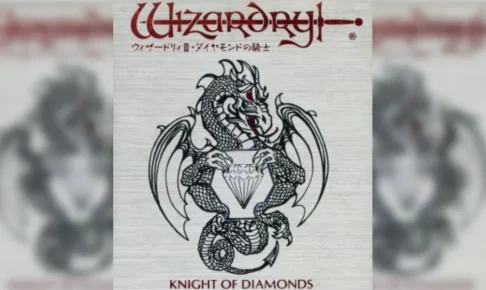
One look at the official title on the box settles it. The Famicom II package reads “WIZARDRY II LEGACY OF LLYLGAMYN THE THIRD SCENARIO.” In other words, what’s inside is the original third scenario, Legacy of Llylgamyn. The Japanese releases shuffled the numbering.
Here’s why that matters. The English Wizardry II — The Knight of Diamonds — arrived on the Famicom later, as “III.” So searching for “Wizardry 2 walkthrough” in Japanese pulls up articles about a completely different scenario. When you’re hunting for guides, always confirm the subtitle “Legacy of Llylgamyn.” Get this wrong and you’ll burn hours looking for a staircase that doesn’t exist.
| Item | Details |
| Title | Wizardry II: Legacy of Llylgamyn |
| Release Date | February 21, 1989 |
| Publisher | ASCII (developed by ASCII Game Studio) |
| Original Version | WIZARDRY II LEGACY OF LLYLGAMYN THE THIRD SCENARIO (the original third scenario) |
| Dungeon Size | 6 floors total (each 20 squares east-west by 20 north-south) |
| Final Objective | Bring back the Orb of Earithin |
| Peripheral Support | Turbo File compatible (character transfer from the previous game) |
Six floors total. Next to the ten-floor maze of Proving Grounds of the Mad Overlord that sounds shallow, but don’t relax. Where the first game drilled a single path down ten levels, this one has you advancing two separate paths, Good and Evil, side by side. The actual amount of exploring is nowhere near as small as the floor count suggests.
Can you import your old characters? The Turbo File and the Level 1 reset trap
Short answer: yes, you can import them, but they get knocked back to Level 1. A Turbo File (the Famicom’s external data storage peripheral) lets you transfer characters from Proving Grounds of the Mad Overlord into this game, but they restart from Level 1.
Misunderstand this and you will absolutely wreck yourself in the opening hours. Dive in thinking “I’ve got a Level 13 Samurai, this’ll be a cakewalk” and you’ll watch him evaporate in the first fight with HP in the low double digits. Whether you bring transferred characters or roll fresh ones, you’re starting from more or less the same place.
So what’s the point of the Turbo File? Stats, race, and class carry over. A character you rolled and re-rolled for high bonus points in the first game keeps that raw potential even though the levels are gone. You still have to grind the levels back, but the ceiling you eventually hit is higher. It’s a matter of taste, honestly — I transferred mine purely because I wanted to bring characters I was attached to. Sentiment over practicality.
One more thing: like its predecessor, this game carries a constant risk of save corruption. A lost character is gone for good. If you’re playing on original hardware, be careful about yanking the power, and if you’re on an emulator or a port, back up often. Nothing has changed on that front since the first game.
Why do you need both a Good and an Evil party? How the alignment restrictions work
The decisive break from the first game is that your characters’ alignment determines which floors they can enter. Descend — or rather, ascend — without understanding that one rule and you will hit a dead end, guaranteed.
The restrictions break down like this.
| Alignment | Accessible Floors | Role |
| Good | F1, F2, F4, F6 | Secure the Staff of Earth, the Amulet of Air, and the Crystal of Evil |
| Evil | F1, F3, F5, F6 | Secure the Gold Medallion, the Holy Water, the Staff of Fire, and the Crystal of Good |
| Neutral | All floors | Universal slot — can be slotted into either party |
This is where the value of Neutral characters kicks in. Neutrals can enter every floor, which means the same faces can serve in both the Good party and the Evil party. Build your front-line Fighters and your Thief as Neutrals and you slash the total number of characters you have to level.
Put another way, the only slots that truly have to be split by alignment are Mage and Priest. Take three Neutral Fighters plus one Neutral Thief as your shared skeleton, bolt on a Good Mage and a Good Priest for the Good party, then swap in an Evil Mage and an Evil Priest for the Evil party. That’s eight characters to raise instead of twelve.
The SpotGeeks editorial team strongly recommends this “Neutral skeleton” approach. The more you played the first game, the more you’ll instinctively want to keep Good and Evil cleanly separated — but this scenario is designed the other way around. How well you exploit Neutrals is what determines your efficiency across both runs.
Recommended party build: a skeleton both alignments can share
| Slot | Good party | Evil party |
| Front row, slots 1–3 | Fighter (Neutral) x3 | Fighter (Neutral) x3 (shared) |
| Front row, slot 4 | Thief (Neutral) | Thief (Neutral) (shared) |
| Back row | Mage (Good), Priest (Good) | Mage (Evil), Priest (Evil) |
Rolling your Thief as Neutral is essentially mandatory. Trapped chests show up on every floor, so both routes need a Thief. Make yours Good and you’ll be stuck raising a second one for the Evil route.
Floors 1–6 walkthrough: the complete Good route and Evil route guide
From here on, we’ll trace the actual route with coordinates. The notation is E (east) / N (north), and every floor is 20 squares east-west by 20 north-south. As in the first game, keep casting DUMAPIC to confirm where you are as you go.
All six floors at a glance: what you get where
| Floor | Party | Main objective |
| F1 | Good and Evil (shared) | The fork toward F2 or F3. This is the one floor anyone can enter |
| F2 | Good | Grab the Staff of Earth and the Amulet of Air. Passage to F4 |
| F3 | Evil | Grab the Gold Medallion and the Holy Water. Passage to F5 |
| F4 | Good | Defeat Delf’s party for the Crystal of Evil |
| F5 | Evil | Grab the Staff of Fire. Defeat Angel’s party for the Crystal of Good |
| F6 | Requires the Crystal of Neutrality | Face L’Kbreth and obtain the Orb of Earithin |
One look at that table and the reason you need two parties should be obvious. Only the Good party can claim the Crystal of Evil, and only the Evil party can claim the Crystal of Good. The irony lands hard. The righteous carry home the crystallized evil, the wicked carry home the crystallized good — the scenario’s central theme is baked directly into its structure.
The Good party’s route: F1 to F2 to F4 to F2
The Good party heads east from Floor 1 and climbs to Floor 4 by way of Floor 2. Here’s the order.
- F1: Move to E19 / N13 and take the stairs up to Floor 2
- F2: Go up to Floor 4 from E0 / N19
- F4: Get the “Ship in a Bottle” from a monster drop
- F4: Defeat Delf’s party at E7 / N17 for the Crystal of Evil
- F4: Return to Floor 2 via E12 / N13
- F2: You emerge at E2 / N11 (the return point from Floor 4)
- F2: Pick up the Staff of Earth at E7 / N1
- F2: Use the Staff of Earth at E7 / N11 to pass through
- F2: Defeat Pole at E11 / N19 for the Amulet of Air
The Staff of Earth nullifies level drain. This scenario throws energy-draining enemies at you, so it’s safer not to push deep before you have it. You also need it to get through E7 / N11, so miss it and you simply can’t advance.
The fight with Delf’s party is the high point of the first half. They’re an adventuring party, which means they sling spells at you exactly like you sling them back. Wipe out the back row fast — that’s the eternal Wizardry rule, and it holds here too.
The Evil party’s route: F1 to F3 to F5
The Evil party enters from the opposite side of Floor 1. These two groups are on separate paths from the very entrance.
- F1: Go up to Floor 3 from E19 / N1
- F3: Trade with Danpei at E7 / N7 for the Gold Medallion
- F3: Trade the Gold Medallion at E10 / N19 for the Holy Water
- F3: Use the Holy Water at E0 / N0 to pass through
- F3: Go up to Floor 5 from E0 / N1
- F5: Get the “Ship in a Bottle” from a monster drop
- F5: Hand over 25,000 G.P. at E4 / N8 to pass through
- F5: Pick up the Staff of Fire at E4 / N7
- F5: Defeat Angel’s party at E12 / N10 for the Crystal of Good
The single biggest roadblock on the Evil route is E4 / N8 on Floor 5, where you’re shaken down for 25,000 G.P. Show up broke and you can’t pass, which means backtracking to farm. Bank enough gold before you clear Floor 3. The Gold Medallion and Holy Water trades are a straight line, so as long as you do them in order there’s nothing to get lost in.
Note that the “Ship in a Bottle” appears as a monster drop on both the Good and Evil routes. You need it to cross over to Floor 6, so make sure one of your parties secures it.
How to make the Crystal of Neutrality: two crystals, one character
This is the game’s central trick. The “Crystal of Evil” your Good party took on Floor 4 and the “Crystal of Good” your Evil party took on Floor 5 — put both in one character’s inventory and they become the “Crystal of Neutrality.”
In practice, you park one crystal with a party in town, then hand it to a character in the other party. It doesn’t matter whether that character is Good or Evil, but they must be holding both crystals at the same time. That Crystal of Neutrality is your key to Floor 6.
Which is to say: you cannot finish this game playing only Good or only Evil. The scenario is designed from the ground up around running it twice. Level only one side without grasping that, and you will grind to a halt in the endgame. Raising both parties in parallel from the start is, counterintuitively, the fastest route.
Floor 6: L’Kbreth and the Orb of Earithin
Once the Crystal of Neutrality is in hand, it’s time for the final floor. Floor 6 boils down to three steps.
- Show the Crystal of Neutrality to L’Kbreth at E10 / N4 to pass
- Trade the Crystal of Neutrality at E17 / N17 for the Orb of Earithin
- Say goodbye to L’Kbreth at E8 / N3 and return to the castle
Notice that the game ends not with a battle but with a farewell. Where Proving Grounds of the Mad Overlord closed on a fight to the death with Werdna, this one closes on a conversation. You don’t slay the dragon and take its treasure; the dragon entrusts it to you. The numbering may have been shuffled around, but as a scenario this is a distinctly different animal from its predecessor.
Carry the Orb back to the castle and Llylgamyn is saved. The moment two long campaigns finally converge into one is, plainly, a great feeling.
Key item list: which floor, and which party
Most items in this game have a designated party that can retrieve them. Here it is, organized.
| Item | Location | Party / Use |
| Staff of Earth | F2, E7 / N1 | Good / Nullifies level drain. Also required to pass F2 E7 / N11 |
| Amulet of Air | F2, E11 / N19 (defeat Pole) | Good / Reward for a forced battle |
| Crystal of Evil | F4, E7 / N17 (defeat Delf’s party) | Good / Component of the Crystal of Neutrality |
| Gold Medallion | F3, E7 / N7 (trade with Danpei) | Evil / Traded for the Holy Water |
| Holy Water | F3, E10 / N19 (trade the Medallion) | Evil / Used to pass F3 E0 / N0 |
| Staff of Fire | F5, E4 / N7 | Evil / Sits just past the 25,000 G.P. toll |
| Crystal of Good | F5, E12 / N10 (defeat Angel’s party) | Evil / Component of the Crystal of Neutrality |
| Ship in a Bottle | F4 and F5 (monster drop) | Either party / Required to cross to F6 |
| Crystal of Neutrality | Give both the Crystal of Good and the Crystal of Evil to one character | Used to pass F6 E10 / N4 and to trade for the Orb |
| Orb of Earithin | F6, E17 / N17 | The final objective. Bring it home to win |
Five places players get stuck
Follow the steps above and you’ll finish the game. In practice, though, players reliably stall in the same spots. Knowing about these in advance cuts down on disasters.
1. Stairs drop you somewhere else entirely
In this game, the coordinates where a staircase starts and where it ends frequently don’t line up. If you carry over the assumption from the first game that “going back down the stairs I came up puts me where I was,” you’ll get dumped in a totally different section. Get in the habit of casting DUMAPIC every single time you use stairs. The classic example: when the Good party comes back down from Floor 4 to Floor 2, they land at E2 / N11 — nowhere near the E0 / N19 they climbed from.
2. Reaching Floor 5 without 25,000 G.P.
This is the toll gate at F5 E4 / N8 mentioned earlier. Come up short and your only option is to turn around. The Evil party should build a war chest before clearing Floor 3. Patiently opening every chest and selling off spare gear pays off here.
3. Leveling only one party
The most common way to get stuck, by far. You grind the Good party up to Floor 4, go to assemble the Crystal of Neutrality, and realize your Evil party hasn’t set foot on Floor 1. Level both parties in parallel. Get into a rhythm from the start: when one side hits Floor 2, push the other side to Floor 3.
4. Rolling your Thief as Good or Evil
Disarming traps is a requirement on every floor. Make your Thief Good and the Evil route has nobody to open chests, so you’re raising a second one. Neutral is the only correct answer for your Thief.
5. Fighting drainers before you have the Staff of Earth
Energy drain steals levels, and there’s no way to get them back — every level lost is grinding time deleted. The Staff of Earth at F2 E7 / N1 nullifies drain, so grabbing it before you head deeper is the safe play. It’s purely a question of sequencing, which means simply being aware of it is enough to avoid the damage.
Map guide: floor maps for F1 through F6
Below are maps of all six floors, traced from the MALOR screen on original hardware. Each map is 20 squares east-west by 20 north-south, with gray bands for walls and red dashed lines for doors. Doors that can only be passed from one side are drawn with the thin dashed line pushed toward the passable side. Hover over a marker and you’ll get the staircase type and its coordinates.
One caveat: watch out for how secret doors are handled. A Wizardry secret door looks exactly like a wall until you find it, so the MALOR screen draws it as a wall too. A corridor that appears to dead-end on the map may actually connect through a hidden door. If you’re stuck, treat that spot as a wall worth searching.
Map symbol legend
F1 (Floor 1)
Stairs up: E19/N13, E19/N14, E7/N6, E7/N7 — Stairs down: E0/N0
F1 MAP (horizontal = East 0–19 / vertical = North 0–19)
F2 (Floor 2)
Stairs up: E0/N19, E10/N8 — Stairs down: E19/N0
F2 MAP (horizontal = East 0–19 / vertical = North 0–19)
F3 (Floor 3)
Stairs up: E0/N1 — Stairs down: E2/N2
F3 MAP (horizontal = East 0–19 / vertical = North 0–19)
F4 (Floor 4)
Stairs up: E19/N14 — Stairs down: E10/N2, E7/N1
F4 MAP (horizontal = East 0–19 / vertical = North 0–19)
F5 (Floor 5)
Stairs up: E0/N13 — Stairs down: E11/N0, E18/N0
F5 MAP (horizontal = East 0–19 / vertical = North 0–19)
F6 (Floor 6)
Stairs down: E14/N0, E5/N0
F6 MAP (horizontal = East 0–19 / vertical = North 0–19)
Can you play Wizardry II: Legacy of Llylgamyn on modern hardware? A platform-by-platform guide
The bottom line: as of July 2026, there is no legitimate way to play Legacy of Llylgamyn on current hardware (Switch, PS5, or Steam). The only entry in the series available on modern platforms is the first game, Proving Grounds of the Mad Overlord.
Let’s get that out of the way up front, because the more you were hoping otherwise, the harder this lands. Here’s the full breakdown by category.
1. Available via subscription or free
None. As of July 2026, Legacy of Llylgamyn is not in the Nintendo Switch Online Famicom library, nor in the PlayStation Plus Classics catalog.
2. Available as a standalone purchase
| Title | Platforms | Notes |
| Wizardry: Proving Grounds of the Mad Overlord (3D remaster) | Switch / PS4 / PS5 / Xbox / Steam | Released May 23, 2024. The first scenario only — Legacy of Llylgamyn is not included |
Digital Eclipse’s remaster is a strong one, modernizing the graphics and UI while leaving the original game design intact. But what’s in the box is scenario one and nothing else.
3. Available via remaster or remake
Three earlier ports include Legacy of Llylgamyn. All of them are dead on modern hardware, which means hunting for used copies.
| Port | Platform | Features |
| Wizardry: Llylgamyn Saga | PlayStation / Sega Saturn / Windows | Collects scenarios 1 through 3. Includes automapping |
| Wizardry: Story of Llylgamyn | Super Famicom (SNES) | Collects scenarios 2 and 3 |
| Wizardry II: Legacy of Llylgamyn | Game Boy Color | A handheld port |
4. Hard to obtain on modern platforms
The Famicom version of Wizardry II: Legacy of Llylgamyn itself can’t be played any way other than sourcing the console and the cartridge. And if you want to recreate the Turbo File character transfers on top of that, original hardware is even more of a necessity.
The outlook is bright, though. In May 2026, reports emerged that Atari had acquired the rights to Wizardry scenarios 1 through 5. Given how well the Proving Grounds of the Mad Overlord remaster was received, there’s every reason to think ports of the following scenarios could get moving. Start hunting down original hardware now, or wait for an official port — that’s the call you have to make.
That said, there’s something to do while you wait. The remaster of the first game is available on current platforms right now, and it’s the ideal place to get fluent in Wizardry’s grammar. Once the fundamentals of combat and exploration are second nature, the two-party alignment system in Legacy of Llylgamyn goes down much easier.

Enjoying this article? Add us as a preferred source on Google.
Final thoughts: Legacy of Llylgamyn is an RPG that makes you walk two different versions of justice
The Famicom version of Wizardry II: Legacy of Llylgamyn is the series’ second Japanese entry, published by ASCII on February 21, 1989. What’s actually inside, though, is the original third scenario, Legacy of Llylgamyn — the Japanese releases swapped the numbering around. Always confirm the subtitle when you go looking for guides.
The heart of the game, to repeat, is the Good and Evil two-party system. Good gets F1, F2, F4, and F6; Evil gets F1, F3, F5, and F6; Neutral gets everything. The Good party takes the “Crystal of Evil” at F4 E7 / N17, the Evil party takes the “Crystal of Good” at F5 E12 / N10, and putting both in one character’s hands creates the “Crystal of Neutrality.” That’s your key to Floor 6.
On the final floor, you pass L’Kbreth at E10 / N4, trade for the Orb of Earithin at E17 / N17, say farewell to the dragon at E8 / N3, and head home to the castle. You don’t fight and plunder; you’re entrusted and you leave — an ending with a texture clearly distinct from the first game’s.
And as of July 2026, there is no legitimate way to play this one on modern hardware. The only option available is the remaster of the first game, Proving Grounds of the Mad Overlord. With Atari having acquired the rights to scenarios 1 through 5, though, there’s real reason for optimism about what comes next.
If Proving Grounds of the Mad Overlord was a game about depth, this one is a game about width. Six floors sounds thin on paper, but because you’re marched down two separate roads — Good and Evil — the exploration actually feels like more, not less. Whether you can hold your leveling costs down by building a Neutral skeleton is what separates a smooth run from a slog.
A Wizardry that ends without killing the dragon. For that alone, this one is worth your time.
Read Next

Snicker Kitamura



Leave a Reply