





Enjoying this article? Add us as a preferred source on Google.
- Shin Megami Tensei if… is the odd one out in the series — a high school RPG where the seven deadly sins become dungeons
- What did the PS version change from the Super Famicom original? Dash, difficulty select, and the added Alice event
- Four partners, four routes — the choice between Charlie, Yumi, Reiko, and Akira
- Walkthrough charts for all 17 dungeons, covering both the main route and the Akira route
- Coordinate-labeled dungeon maps for all 102 floors
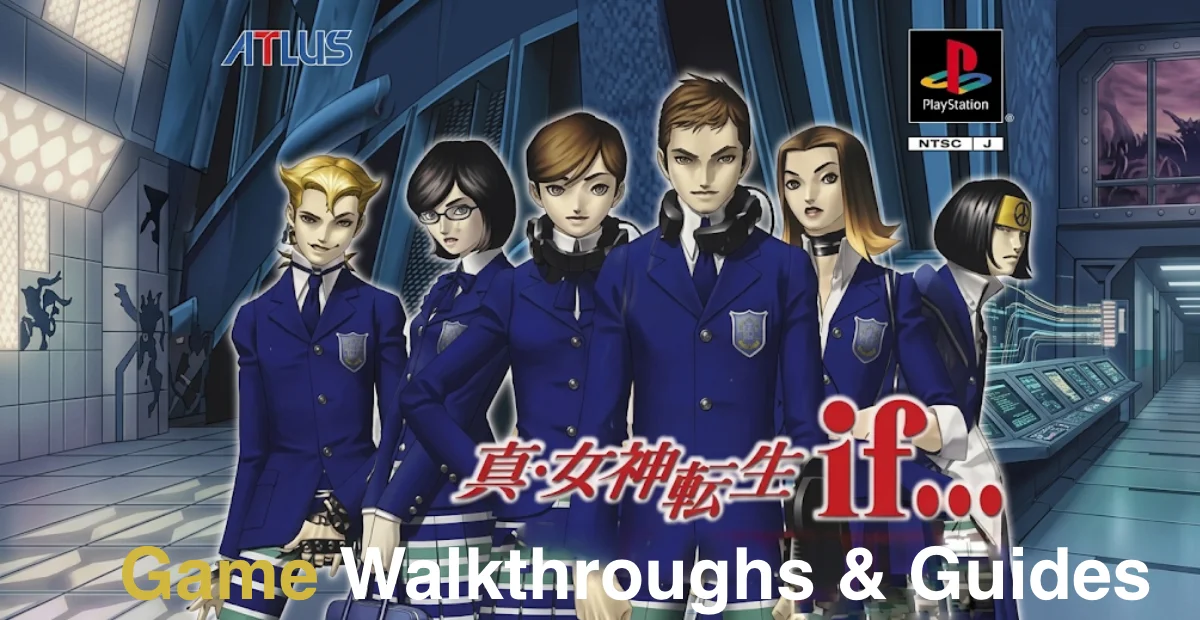
Shin Megami Tensei if… is a strange beast within the Megami Tensei series. The setting isn’t Tokyo, and it isn’t the Expanse — it’s Karukozaka High School. A vengeful classmate drags the entire campus into the demon world, and the students find themselves trapped in dungeons themed on the seven deadly sins. That combination of teen-drama high school story and hardcore Megaten is exactly the line that would eventually lead to Revelations: Persona.
The heart of any playthrough is the partner you pick. Choose one of the four partners early on (Charlie, Yumi, Reiko, or Akira) and the dungeons you’ll actually crawl through change completely. The three main-route partners take you through six realms in sequence, from the Realm of Pride to the Realm of Wrath, while the Akira route sends you down a dungeon set all its own, from the Earth Nomos up to the Heavenly Nomos. Each route also ends differently, so a single playthrough will never show you the whole picture.
This guide is based on the PlayStation version (released December 26, 2002), and it includes coordinate-labeled maps for all 17 dungeons and 102 floors across both the main route and the Akira route. The coordinates line up with the “East ◯ / North ◯” system shown on the in-game automap, so if you get turned around, compare the automap against the coordinates on our maps.
I’ll be honest: I completely lost my sense of direction somewhere around B6 of the Realm of Gluttony. The floors spiral inward and get narrower as you descend, and even with the automap open I couldn’t tell whether I was heading up or down. The person these maps ended up helping most, it turns out, was me.
What kind of game is Shin Megami Tensei if…? The Megaten spin-off where a high school becomes the demon world
Shin Megami Tensei if… is a side story in the Shin Megami Tensei series, a juvenile RPG set at a high school. Alongside a partner, you work your way through demon-world dungeons built around the seven deadly sins.
| Item | Details |
| Title | Shin Megami Tensei if… (PlayStation version) |
| Release date | December 26, 2002 (Super Famicom original: October 28, 1994) |
| Publisher / price | Atlus |
| Genre | RPG (3D dungeon crawler) |
| Dungeon scale | 17 dungeons, 102 floors (51 on the main route, 51 on the Akira route) |
| Partners | Four total — Charlie, Yumi, Reiko, and Akira (your pick branches the route) |
| Final goal | Escape Karukozaka High School after it falls into the Expanse, and defeat Hazama, the one behind it all |
The story takes place at Karukozaka High School. A classmate named Hazama strikes a pact with a demon lord and drags the entire school building into the Expanse. You play as one of the students left behind, and together with your partner you have to escape the demon-warped campus.
The game launched on the Super Famicom in 1994, right on the heels of Shin Megami Tensei II. As the “if…” in the title suggests, it’s a hypothetical: what if demons had appeared in everyday life, before Tokyo was destroyed? That concept carried straight over into Revelations: Persona two years later — a piece of series trivia that just about every Megaten fan knows by heart.
The dungeons are built as demon realms themed on the seven deadly sins (Pride, Gluttony, Sloth, Envy, Greed, and Wrath). By rights there should also be a Realm of Lust, but it never appears in the game. Each realm has gimmicks and bosses that match its theme: the Realm of Gluttony, for instance, is a structure that spirals downward, while the Realm of Envy is a maze of floors that repeat with near-identical layouts.
What’s different between the PS and Super Famicom versions? Dash, difficulty select, and added events explained

The PlayStation release is a port of the Super Famicom version, with a handful of additions that make it friendlier to play. The dungeon layouts themselves are completely identical to the original — no changes to wall placement or floor counts.
| Addition | Details |
| Difficulty select | Two settings, EASY and NORMAL. EASY gives you unlimited ammo |
| Dash and sidestep | R1 lets you dash, L1 lets you strafe sideways |
| Alice event | A new event, triggered under specific conditions, that lets you swap Alice’s Guardian |
| Music | New background music added to the Akira route |
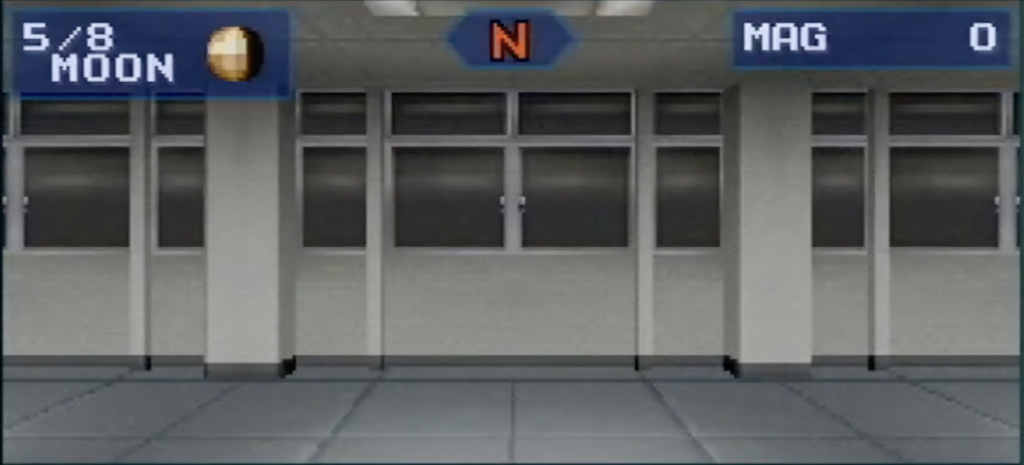
For anyone who played the Super Famicom version, the single biggest gift here is the dash. This game’s dungeons run 102 floors deep, and exploring all of that at normal walking speed takes real patience. On PS, R1 makes getting around dramatically less painful.
EASY mode’s unlimited ammo is seriously strong. On the Super Famicom, managing your remaining bullets was genuinely tight; on EASY you can spam gun skills without ever worrying about running dry. If this is your first playthrough, go with EASY — if you want the game to push back, take NORMAL.
One more time for clarity: wall placement, floor structure, and event placement are all completely identical to the Super Famicom version. The maps in this guide are built from the Super Famicom structural data, but they work just as well on PS.
What does your partner choice actually change? The four route branches and the Guardian system
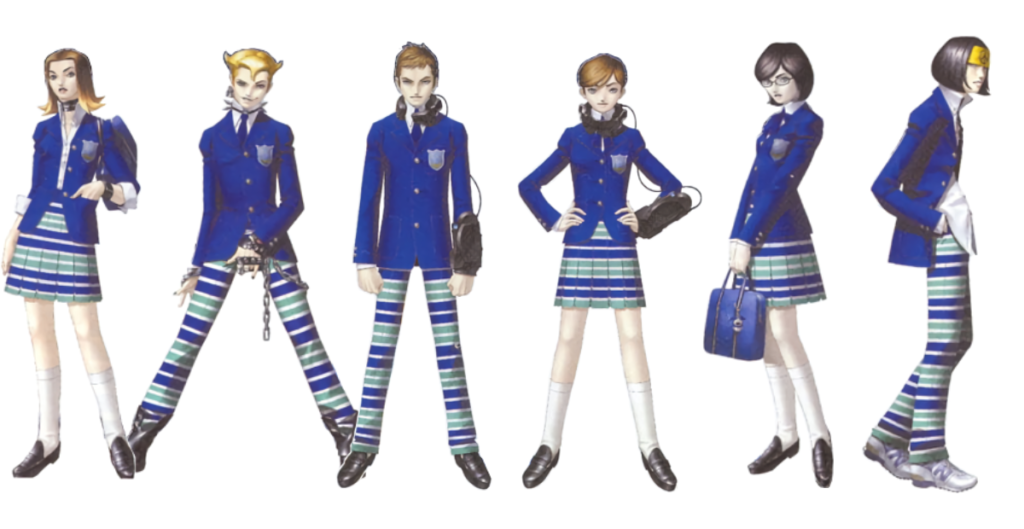
The defining feature of Shin Megami Tensei if… is the partner system. You meet four students while exploring the school early on, and the one you pick locks in your route for the rest of the game.
| Partner | Route | Dungeons |
| Charlie | Main route | Realm of Pride → Realm of Gluttony → Inside Orcus → Realm of Sloth → Realm of Envy → Realm of Greed → Realm of Wrath → upper school floors → the Mental World |
| Yumi | Main route | Same as above (different ending) |
| Reiko | Main route | Same as above (different ending) |
| Akira | Akira route | Earth Nomos → 1st–4th Nomos → Heavenly Nomos (a dungeon set found nowhere else) |
Charlie, Yumi, and Reiko all send you down the same main route through the same dungeons. Story beats and endings differ, but map-wise the crawl is essentially shared. The Akira route, on the other hand, gives you an entirely separate set of dungeons — the Nomos — which effectively amounts to a second game’s worth of content.
What is the Guardian system?
This game has a Guardian system that would go on to become the prototype for Personas. The protagonist is assigned a “guardian spirit,” and it changes as you level up or through story events. The protagonist takes nothing but the stat bonuses from a Guardian, while it’s the partner whose learned spells are dictated by the Guardian. Both of them swap to higher-tier Guardians as their levels climb, so this feeds directly into how you build them.
The Alice event added in the PlayStation version lets you swap in Alice as a Guardian once you meet specific conditions. It’s an element the Super Famicom version never had, which makes it one of the PS version’s signature draws.
What Determines the Protagonist’s Guardian? All 16 Stages, Split by Gender
The protagonist’s Guardian is locked in completely by the three types (Power, Speed, Balance & Luck) determined by Nova’s opening question and your gender. Every time you hit the required level, the next Guardian takes over — and again, all the protagonist gets out of it is a stat bonus. The spell list never changes.
Male Protagonist Guardians (All 16 Stages)
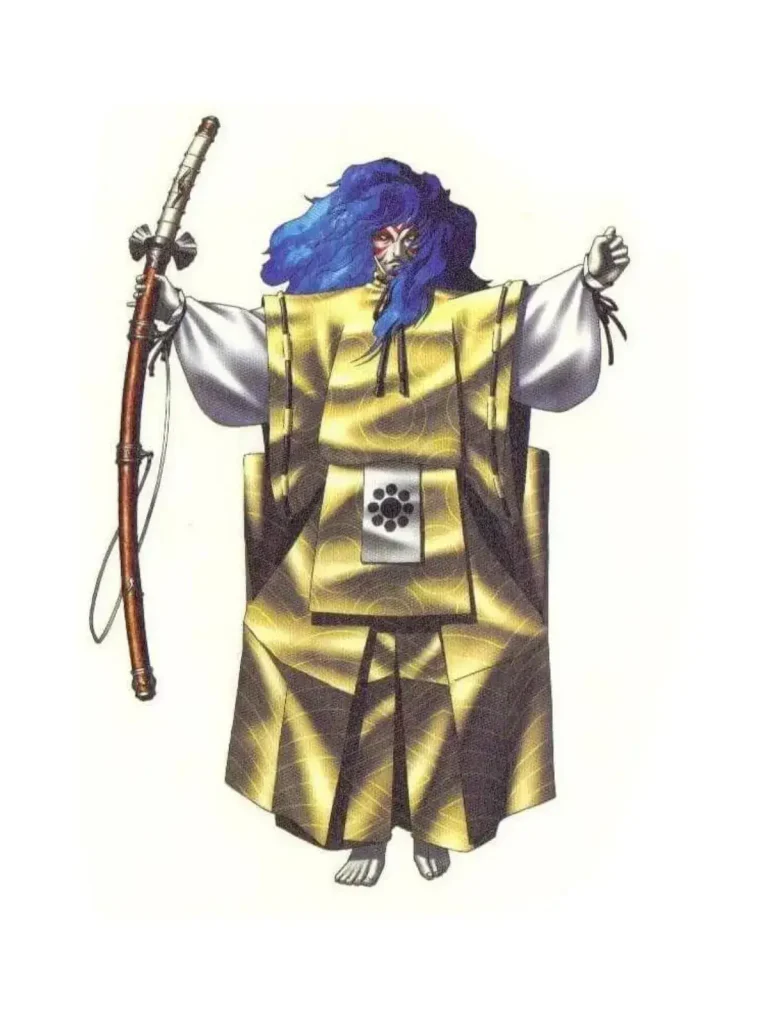
| Stage | Power type | Speed type | Balance & Luck type |
|---|---|---|---|
| 1 | Lv11 Beast Garm | Lv12 Fallen Gagyson | Lv12 Fairy Jack Frost |
| 2 | Lv14 Wild Cait Sith | Lv16 Avian Suparna | Lv14 Divine Angel |
| 3 | Lv18 Jirae Dwarf | Lv17 Fallen Caim | Lv19 Holy Unicorn |
| 4 | Lv22 Element Gnome | Lv21 Avian Hou-ou | Lv22 Yoma Janus |
| 5 | Lv23 Kunitsu Oyamatsumi | Lv24 Element Sylph | Lv24 Divine Archangel |
| 6 | Lv27 Jirae Tsuchigumo | Lv26 Wild Orthrus | Lv29 Herald Ramiel |
| 7 | Lv33 Fury Ares | Lv30 Amatsu Ame-no-Torifune | Lv31 Divine Principality |
| 8 | Lv34 Amatsu Tajikarao | Lv33 Brute Yaksini | Lv36 Divine Power |
| 9 | Lv38 Fairy Troll | Lv39 Wild Dun | Lv40 Herald Raguel |
| 10 | Lv42 Divine Virtue | Lv42 Avatar Narasimha | Lv46 Herald Ophanim |
| 11 | Lv48 Avatar Genbu | Lv46 Brute Yaksha | Lv51 Herald Uriel |
| 12 | Lv54 Kunitsu Takeminakata | Lv57 Deity Indra | Lv55 Fallen Agares |
| 13 | Lv58 Amatsu Takemikazuchi | Lv60 Yoma Hanuman | Lv60 Herald Raphael |
| 14 | Lv63 Dragon Rahab | Lv65 Tyrant Astaroth | Lv66 Kunitsu Arahabaki |
| 15 | Lv70 Fury Masakado | Lv67 Deity Odin | Lv72 Amatsu Amaterasu |
| 16 | Lv76 Deity Kalki | Lv72 Fury Shiva | Lv75 Herald Metatron |
Female Protagonist Guardians (All 16 Stages)
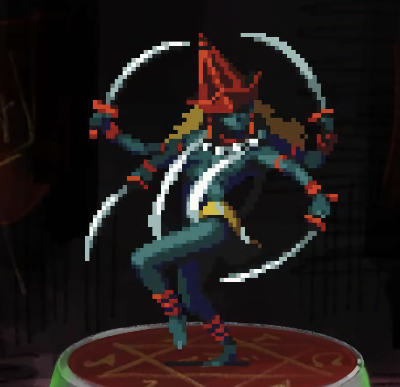
| Stage | Power type | Speed type | Balance & Luck type |
|---|---|---|---|
| 1 | Lv11 Jirae Sudama | Lv11 Wild Ket Shi | Lv12 Element Aquans |
| 2 | Lv14 Beast Bicorn | Lv17 Fowl Furiae | Lv14 Divine Angel |
| 3 | Lv17 Haunt Ghoul | Lv18 Raptor Ocypete | Lv19 Holy Unicorn |
| 4 | Lv23 Snake Nozuchi | Lv22 Raptor Celaeno | Lv22 Yoma Janus |
| 5 | Lv25 Snake Naga | Lv24 Brute Hannya | Lv24 Divine Archangel |
| 6 | Lv28 Element Salamander | Lv28 Raptor Aello | Lv27 Megami Ame-no-Uzume |
| 7 | Lv32 Drake Wyvern | Lv30 Wild Serket | Lv31 Yoma Valkyrie |
| 8 | Lv34 Snake Mizuchi | Lv32 Raptor Nevan | Lv35 Megami Arianrhod |
| 9 | Lv39 Dragon Maya | Lv37 Raptor Macha | Lv38 Snake Otohime |
| 10 | Lv41 Dragon Baek-yong | Lv44 Avian Yatagarasu | Lv45 Dragon Quetzalcoatl |
| 11 | Lv48 Dragon Seiryu | Lv47 Holy Byakko | Lv52 Kunitsu Onamuchi |
| 12 | Lv57 Yoma Ganesha | Lv53 Fury Sun Wukong | Lv56 Avatar Barong |
| 13 | Lv59 Snake Yamata-no-Orochi | Lv59 Femme Rangda | Lv59 Lady Durga |
| 14 | Lv64 Dragon Tianlong | Lv65 Avian Garuda | Lv64 Deity Horus |
| 15 | Lv69 Dragon Ananta | Lv66 Fury Susano-o | Lv68 Herald Gabriel |
| 16 | Lv78 Vile Cthulhu | Lv74 Lady Kali | Lv73 Herald Michael |
No matter which type you land on, everyone starts the game with Foul Jelly Man (Lv2) riding along — that opening is universal. The stage tables above start counting from the Guardian that replaces Jelly Man. And again: the protagonist only receives a Guardian’s stat bonuses, while it’s the partner whose spell list changes. Get that backward and your entire leveling plan goes sideways.
All 7 Rare Guardians: The Hero Types Tie Directly Into the PS Version’s Special Chests
Separate from the standard demon pool, there are seven rare Guardians. Law Hero and Chaos Hero in particular are the keys that change what’s inside the special chests in the Realm of Envy and the Realm of Greed.
| Guardian | Lv | Spells Learned |
|---|---|---|
| Dog Pascal | 7 | Diarama / Penpatra |
| Fiend Little Lama | 15 | Penpatra / Makarakarn / Tetrakarn / Charmdi / Mahama |
| Fiend Sadhu | 25 | Mazanma / Mediarahan / Sabbatma / Liftoma |
| Fiend The Hero | 32 | — (learns no spells) |
| Fiend Law Hero | 32 | Zanma / Zandyne / Mazanma / Mazandyne / Mediarama / Diarahan |
| Fiend Chaos Hero | 32 | Agilao / Agidyne / Maragion / Maragidyne / Penpatra / Posumudi |
| Fiend En no Ozuno | 48 | Hamaon / Makarakarn / Shibaboo / Sabbatma / Trafuri / Samarecarm |
The Realm of Envy and the Realm of Greed each hide a special chest (the white ones) that normally holds a Soma. If the protagonist has Law Hero or Chaos Hero attached when you open it, the contents turn into a piece of powerful gear instead. Sticking the Guardian on a partner does nothing, so line up the protagonist’s Guardian first, then pop the lid.
Partner Guardians and the Spells They Pass Down | 4 Characters × 16 Stages Each
For partners, whichever Guardian is attached becomes their spell list, full stop. In other words, whether a character ends up a healer or an attacker comes down to which stage you decide to stop leveling at.
Yumi (Main Route) — All 16 Guardian Stages
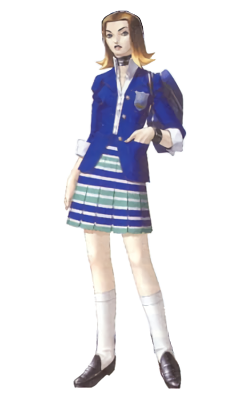
| Lv | Guardian | Spells & Skills Learned |
|---|---|---|
| Lv10 | Night Alp | Dormina / Hama / Makakaja / Zionga / Dia |
| Lv13 | Brute Bogle | Zio / Dia / Zionga / Mapper / Penpatra |
| Lv16 | Fairy Elf | Zan / Hapirma / Dormina / Mazan |
| Lv18 | Lady Vesta | Agilao / Maragion / Rakukaja / Fire Wall |
| Lv20 | Wild Nekomata | Mazan / Marin Karin / Charmdi / Scratch / Flying Kick |
| Lv23 | Fairy Banshee | Mabufu / Dormina / Tarunda / Mudo / Panic Voice |
| Lv27 | Yoma Houri★ | Diarahan / Mediarama / Posumudi / Paraladi / Petradi / Trafuri |
| Lv31 | Yoma Valkyrie★ | Bufudyne / Diarama / Tarukaja / Mabufula / Mabufudyne / Bind Voice |
| Lv34 | Holy Bastet | Mazanma / Mahama / Paraladi / Mediarama / Scratch |
| Lv39 | Lady Kikuri-Hime | Mediarama / Marin Karin / Recarm / Mabufula |
| Lv43 | Megami Freyja | Marin Karin / Dormina / Sabbatma / Necroma / Diarama |
| Lv47 | Avian Suzaku | Maragidyne / Mediarama / Tarukaja / Recarm / Agidyne / Wing Flap |
| Lv52 | Divine Dominion | Megido / Mahama / Mudoon / Makakaja / Divine Punishment |
| Lv55 | Megami Lakshmi | Mediarahan / Rakukaja / Petradi / Recarm / Sexy Dance |
| Lv61 | Megami Norn | Mabufudyne / Mediarahan / Hamaon / Mamudo / Samarecarm |
| Lv70 | Drake Tiamat | Ziodyne / Maziodyne / Shibaboo / Mediarahan / Sexy Dance / Mow Down |
Reiko (Main Route) — All 16 Guardian Stages

| Lv | Guardian | Spells & Skills Learned |
|---|---|---|
| Lv9 | Divine Holy Ghost | Bufu / Zan / Hapirma / Dia / Patra / Mapper |
| Lv12 | Yoma Kinnari | Agi / Agilao / Bufula / Hapirma |
| Lv15 | Night Empusa | Zio / Dormina / Dia / Mapper / Dark Breath / Scratch |
| Lv17 | Holy Heqet | Rakukaja / Diarama / Media / Posumudi / Paraladi |
| Lv21 | Femme Yomotsu-Shikome | Zionga / Mazio / Tarunda / Diarama / Posumudi |
| Lv25 | Lady Taweret | Rakukaja / Tetraja / Mediarama / Charmdi / Crush |
| Lv29 | Femme Lamia | Zionga / Mediarama / Lullaby / Charm Bite / Paral Eye |
| Lv30 | Fairy Naja★ | Marin Karin / Mediarama / Zionga / Recarm / Posumudi / Paraladi |
| Lv36 | Herald Haniel | Mazionga / Hamaon / Mazio / Mediarama |
| Lv38 | Femme Siren★ | Marin Karin / Dormina / Makajama / Diarama / Lullaby / Paralyzing Scratch |
| Lv42 | Raptor Morrigan | Hell Fang / Bind Voice / Deathbound / Hell’s Eye |
| Lv45 | Femme Dakini | Maragion / Mabufula / Mudoon / Necroma / Lullaby |
| Lv50 | Megami Parvati | Mabufudyne / Mahama / Bufudyne / Mediarama / Tarukaja |
| Lv56 | Femme Baubo | Dormina / Makarakarn / Mabufula / Mudoon / Ice Breath |
| Lv60 | Tyrant Hecate | Dormina / Makarakarn / Marin Karin / Mamudo / Samarecarm / Necroma |
| Lv70 | Lady Ishtar | Mazandyne / Mazionga / Dekaja / Mediarahan / Samarecarm / Sexy Dance |
Charlie (Main Route) — All 16 Guardian Stages

| Lv | Guardian | Spells & Skills Learned |
|---|---|---|
| Lv7 | Spirit Hanako | Tarunda / Sukunda / Rakunda / Death Touch / Panic Voice |
| Lv10 | Element Erthys | Tarukaja / Rakukaja / Sukukaja / Diarama / Hell’s Fist |
| Lv15 | Jirae Bugaboo | Bufula / Mabufu / Bufu / Shibaboo |
| Lv19 | Yoma Apsaras | Rakukaja / Makakaja / Media / Makajama / Zanma |
| Lv22 | Night Lilim | Bufula / Diarama / Charm Bite / Lullaby / Death Touch |
| Lv26 | Element Undine | Diarama / Mediarama / Zionga / Marin Karin / Hapirma |
| Lv29 | Fairy Kelpie | Zionga / Shibaboo / Makajama / Mapper / Flying Kick |
| Lv32 | Night Succubus | Dormina / Mabufula / Death Touch / Blood Drain / Sexy Dance |
| Lv35 | Fallen Forneus | Mazionga / Maziodyne / Mediarama / Water Wall / Fog Breath |
| Lv36 | Fiend Alice★ | Dormina / Shibaboo / Mudoon / Mudo / Mamudo / Death Touch |
| Lv40 | Deity Dionysus★ | Marin Karin / Recarm / Mamudo / Tarukaja / Rakukaja / Makakaja |
| Lv43 | Fairy Cu Chulainn | Mahama / Tarukaja / Ziodyne / Tetraja / Deathbound |
| Lv48 | Fairy Oberon | Hapirma / Marin Karin / Mazionga / Makarakarn |
| Lv53 | Deity Krishna★ | Tarukaja / Rakukaja / Makakaja / Zandyne / Ziodyne / Sexy Dance |
| Lv61 | Tyrant Loki | Bufudyne / Mabufudyne / Marin Karin / Maragidyne / Iron Fist |
| Lv71 | Deity Baal | Maziodyne / Mazionga / Mediarahan / Tetraja / Recarmdra |
Akira (Akira Route) — All 16 Guardian Stages

| Lv | Guardian | Spells & Skills Learned |
|---|---|---|
| Lv10 | Foul Jack the Ripper | Shibaboo / Sukunda / Sukukaja / Dia / Mapper |
| Lv13 | Brute Bogle | Zio / Dia / Zionga / Mapper / Penpatra |
| Lv15 | Night Empusa | Zio / Dia / Dormina / Mapper / Scratch / Dark Breath |
| Lv20 | Beast Nue | Tarukaja / Media / Scratch / Bind Voice |
| Lv24 | Fallen Eligor | Agi / Agilao / Maragi / Heat Wave / Hell Fang |
| Lv27 | Jirae Tsuchigumo | Hama / Shibaboo / Estoma / Poison Needle / Lightning Kick |
| Lv28 | Fiend Goto★ | Shibaboo / Diarama / Mazandyne / Spin Slash / Daruma Flip |
| Lv30 | Fallen Baphomet | Hapirma / Bufudyne / Mediarama / Sabbatma / Ninety-Nine Needles / Suction |
| Lv32 | Night Succubus | Dormina / Mabufula / Death Touch / Blood Drain / Sexy Dance |
| Lv36 | Foul Doppelganger | Mazanma / Makajama / Mediarama / Diarahan / Death Touch / Bodhisattva Palm |
| Lv39 | Fallen Decarabia | Tetrakarn / Tarunda / Tetraja / Hell’s Eye / Paralyzing Scratch |
| Lv45 | Fury Hokuto Seikun★ | Mudoon / Mahama / Maziodyne / Estoma / Recarm / Sabbatma |
| Lv50 | Yoma Ifrit | Agilao / Agidyne / Maragion / Maragidyne / Fire Wall |
| Lv53 | Jirae Muspell | Agidyne / Maragidyne / Makarakarn / Fire Wall / Heat Wave |
| Lv62 | Deity Fudo-Myo-o★ | Shibaboo / Agilao / Agidyne / Maragion / Maragidyne |
| Lv69 | Deity Ra★ | Samarecarm / Maragidyne / Megidola / Mahama / Megido |
A ★ marks a Guardian exclusive to that character — the other three will never get it. Just like the protagonist, every character has Foul Jelly Man (Lv2) slotted in ahead of their first stage. The gauge decides the direction: red sends you to a higher-tier Guardian, yellow to a lower one. So if there’s a specific spell you want, holding back on levels is a perfectly valid play.
Demon Fusion and Working With Your Allies
The combat and demon-ally systems follow the Shin Megami Tensei I and II playbook. Talk demons into joining you, then fuse them at the Cathedral of Shadows. Your party is the protagonist plus a partner plus demon allies (roughly four at most), and the partner is a permanent fixture. On the main route a boss is waiting in every realm of the Expanse, so the standard approach is to fuse up allies who can hit the weaknesses before you ever walk through the door.
How Is Spell Inheritance Decided in Demon Fusion? The Priority Order Is Completely Fixed
Whether a spell carries over through fusion isn’t luck — it’s governed by a fixed priority table. Healing and support “universal spells” can be inherited from anyone, while attack spells only carry over when the material demon and the fusion result share the same inheritance affinity.
| Inheritance category | Spells covered | Inheritance conditions |
|---|---|---|
| Universal spells (healing / support) | 27 spells in total: the Recarm line, Dia line, Patra line, -kaja line, -nda line and so on | Inherited in priority order regardless of the fodder demon’s inheritance affinity, as long as the resulting demon has a free spell slot |
| Elemental spells (offensive) | Seven elements: Fire, Ice, Elec, Force, Light, Dark and Almighty | Inherited only when the fodder demon and the resulting demon share the same inheritance affinity and the fodder actually knows a spell of that element |
Inheritance priority for the universal spells (all 27)
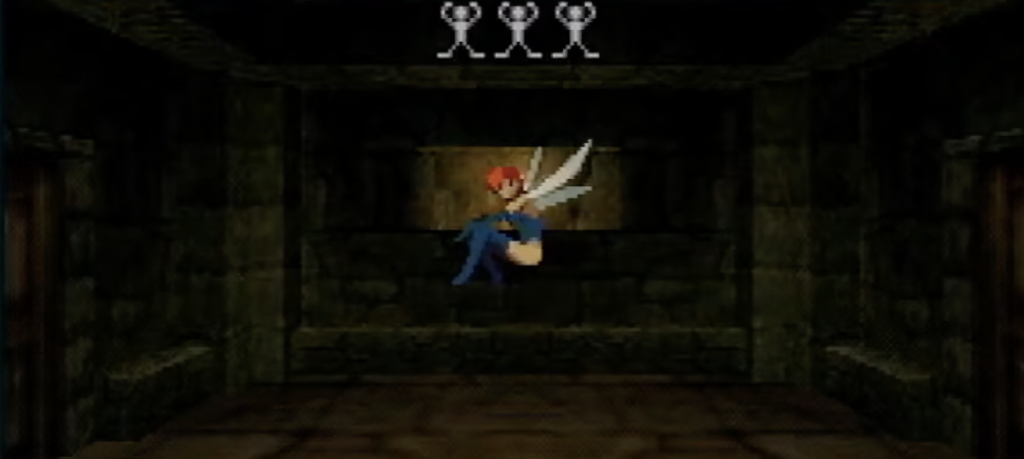
| Priority | Spell |
|---|---|
| 1 | Recarmdra |
| 2 | Samarecarm |
| 3 | Recarm |
| 4 | Charmdi |
| 5 | Petradi |
| 6 | Paraladi |
| 7 | Posumudi |
| 8 | Penpatra |
| 9 | Patra |
| 10 | Mediarahan |
| 11 | Mediarama |
| 12 | Media |
| 13 | Diarahan |
| 14 | Diarama |
| 15 | Dia |
| 16 | Tetrakarn |
| 17 | Makarakarn |
| 18 | Tetraja |
| 19 | Makakaja |
| 20 | Sukukaja |
| 21 | Rakukaja |
| 22 | Tarukaja |
| 23 | Dekunda |
| 24 | Dekaja |
| 25 | Sukunda |
| 26 | Rakunda |
| 27 | Tarunda |
The seven inheritance affinities and the attack spells each one can pass down
| Inheritance affinity | Spells it can pass down (highest priority on the left) |
|---|---|
| Fire | Maragidyne, Maragion, Maragi, Agidyne, Agilao, Agi |
| Ice | Mabufudyne, Mabufula, Mabufu, Bufudyne, Bufula, Bufu |
| Elec | Maziodyne, Mazionga, Mazio, Ziodyne, Zionga, Zio |
| Force | Mazandyne, Mazanma, Mazan, Zandyne, Zanma, Zan |
| Light | Mahama, Hamaon, Hama |
| Dark | Mamudo, Mudoon, Mudo |
| Almighty | Liftoma, Sabbatma, Estoma, Megidolaon, Megidola, Megido (plus the same healing and support spells as the universal list) |
Inheritance has one absolute prerequisite: the resulting demon must have room in its spell and skill list, which caps out at six slots. If the list is already full, nothing gets through — not a single spell. There’s also a trick worth knowing: tossing a Slime into the fusion leaves the demon itself unchanged while still triggering spell inheritance, which makes it a handy back door for bolting an extra spell onto a demon after the fact.
All 17 dungeons walkthrough chart: full coverage of the main route and the Akira route
From here on, I’ve broken down the key points of every dungeon route by route. The coordinates match the “E◯ / N◯” notation used by the game’s in-dungeon automap.
How the main route plays out
| Order | Dungeon | Floors | Boss / objective |
| 1 | Karukozaka High School | 3F | Choose your partner, explore the school |
| 2 | The Sealed Chamber | 1F | Gateway into the Expanse |
| 3 | Realm of Pride | 6F | Belial (demon lord of pride) |
| 4 | Realm of Gluttony | 8F | Orcus (demon lord of gluttony) |
| 5 | Inside Orcus | 1F | Escape after being swallowed by Orcus |
| 6 | Realm of Sloth | 3F | Belphegor (demon lord of sloth) |
| 7 | Realm of Envy | 6F | Leviathan (demon lord of envy) |
| 8 | Realm of Greed | 5F | Mammon (demon lord of greed) |
| 9 | Realm of Wrath | 9 maps | Satan (demon lord of wrath) |
| 10 | Karukozaka High School: Upper Floors | 8F | The road to the final showdown with Hazama |
| 11 | The Mental World | 1F | Hazama (final boss) |
Karukozaka High School (1F–3F)
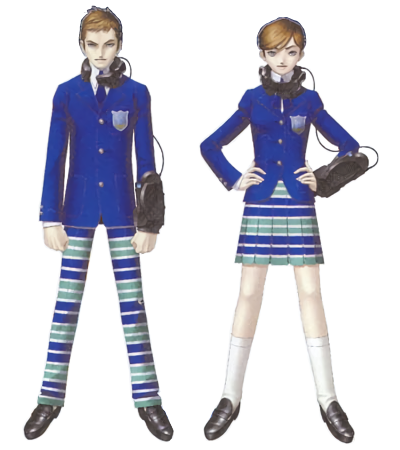
This is the school section that opens the game. You wander the building from 1F to 3F, talking to classmates and triggering events, and this is where you lock in your partner. Make a full circuit of the classrooms, the staff room, the gym and the rest, and clear the events as they come. Enemies do show up, but they’re still weak here, so treat the exploration as free XP.
The Sealed Chamber
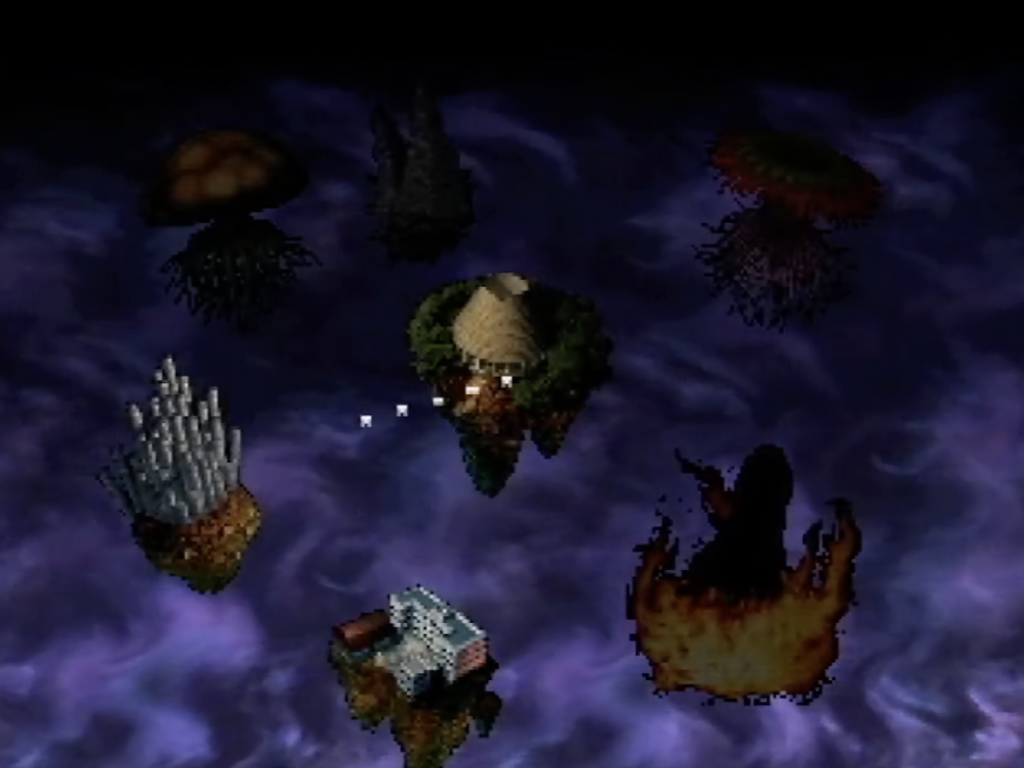
A single-floor area that serves as the doorway into the Expanse. Everything past this point is dungeon crawling for real, so check where your save point and your healing options are before you push on.
Realm of Pride (B1–5F)
The first Expanse dungeon. Six floors isn’t especially large, but you’ll be bouncing up and down between levels constantly. You start on B1 and work your way upward. Belial hits hard with fire, so bring a demon ally with fire resistance.
Realm of Gluttony (B1–B8)
An eight-floor monster of a dungeon with a distinctive spiral layout in which each floor is narrower than the last. B1 is the widest, and the map shrinks steadily as you descend toward B8. One-way corridors and warp zones are scattered throughout, so keep checking the automap as you go. Beat Orcus and you’ll find yourself heading somewhere new: inside Orcus.
Inside Orcus
A special dungeon you enter after Orcus swallows you whole. It’s only one floor, but that floor is big. You pick your way through a layout built to resemble internal organs, hunting for the way out.
Realm of Sloth (B1–B3)
Compact at three floors, but each of those floors is enormous — B3 in particular is a huge map with over 100 tiles of walkable floor. True to his name, Belphegor opens the fight with an asleep animation, but don’t let that fool you. Once he wakes up, the damage is brutal.
Realm of Envy (1F–6F)
A six-floor dungeon whose maps get tighter the higher you climb. Floors with near-identical layouts repeat, which makes it very easy to lose track of which one you’re on. Lean on the automap coordinates to pin down your exact floor. Leviathan specializes in ice, so an ice-resistant demon ally makes this a much smoother fight.
Realm of Greed (B1–4F)
A five-floor dungeon. 1F is the biggest at a sprawling 222 tiles, then the maps contract fast as you ascend — 4F is a mere 12 tiles. This area is stuffed with treasure chests, and in a place called the Realm of Greed you can guess how many of them are trapped. Mammon’s multi-hit attacks are the real threat here.
Realm of Wrath (B2–3F)
The toughest dungeon on the main route. It’s split across nine separate maps, with B2 alone weighing in at 256 tiles. B1 and B2 are divided into west and central sections, while 1F breaks into four pieces — West 1, West 2, Central and East. You’re hopping between maps constantly, and it’s brutally hard to hold the whole thing in your head.
The trick is to start at B2 and climb methodically. Map out the staircases on B2’s huge floor, pass through B1’s A (west) and B (central) sections, sweep the areas of 1F, then push on to 2F and 3F. Satan ranks among the strongest of the main route’s sin-lord bosses, so go in fully prepared.
Karukozaka High School: Upper Floors (4F–11F)
Once you’ve conquered all six realms of the Expanse, the game takes you back to the upper floors of Karukozaka High School. 4F and 5F are gigantic 256-tile floors; from 6F up the maps narrow rapidly, and 10F (12 tiles) and 11F (10 tiles) are essentially single corridors. This doubles as your prep stretch before the final battle with Hazama, so get your party sorted at the Cathedral of Shadows.
The Mental World
The final dungeon: one sprawling 240-tile floor, and the stage for the last showdown with Hazama. Your ending depends on which partner you picked, so every choice you’ve made up to this point pays off right here.
How the Akira route plays out
| Order | Dungeon | Floors | Boss / objective |
| 1 | Earth Nomos | 11F | Climb from B10 to 1F. The trial of earth |
| 2 | 1st Nomos | 6F | Climb from 1F to 6F |
| 3 | 2nd Nomos | 9F | 6F through 14F. Includes the Tapeto revival event |
| 4 | 3rd Nomos | 11F | 14F through 24F. The largest Nomos |
| 5 | 4th Nomos | 6F | 24F through 29F |
| 6 | Heavenly Nomos | 8F | 30F through 37F. The Akira route’s final battle |
Earth Nomos (B10–1F)
The Akira route’s opening dungeon, and a long haul: 11 floors climbing from B10 all the way up to 1F. Individual floors are fairly compact at roughly 60 to 80 tiles, but there are so many of them that the total workload adds up fast. The whole structure is about clawing your way up from deep underground to the surface, so finding the staircases is the core of the crawl.
1st Nomos (1F–6F)
A six-floor dungeon that climbs from 1F (inner section) to 6F. That 6F is a 256-tile behemoth and the hardest part of the 1st Nomos, since you have to hunt down staircases and events across a genuinely huge map.
2nd Nomos (6F–14F)
A mid-sized nine-floor dungeon running from 6F (after the Tapeto revival) up to 14F (inner section). Floor sizes are relatively consistent at around 54 to 63 tiles. A major story beat, the Tapeto revival event, lands partway through. 14F is a large 144-tile floor and your connection point to the 3rd Nomos.
3rd Nomos (14F–24F)
The biggest dungeon on the Akira route. It runs 11 floors and the floor sizes swing wildly: 14F and 24F are large 144-tile affairs, while 21F is a wide, shallow 48-tile layout, and so on down the line. It’s clearly designed to keep things from getting monotonous, but the flip side is that it takes real time to get a read on each floor’s quirks.
4th Nomos (24F–29F)
A six-floor dungeon. 24F is 144 tiles and 25F and 26F are 112 tiles each — a run of mid-sized floors that gradually tapers down to 64 tiles on 29F. This is also your last prep stretch before the Heavenly Nomos, so get your fusions done here.
Heavenly Nomos (30F–37F)
The Akira route’s final dungeon. It’s eight floors, but only 30F and 31F are mid-sized at 63 to 64 tiles; from 32F onward it’s a string of tiny 16-tile floors. The maps contract sharply as you near the top, and on 37F you face the Akira route’s final boss. The PS version adds new music to this route, so the last battle carries a different atmosphere than it does on Super Famicom.
Five places players tend to get stuck
① Your partner choice is permanent
The partner you pick early on can’t be changed later. Choosing Akira in particular locks you out of the main route’s dungeons — the Realm of Pride through the Realm of Wrath — entirely. Conversely, the three main-route partners never set foot in the Akira route’s Nomos towers. If you want to see every dungeon, you need at least two playthroughs. For a first run, I’d go with Charlie or Yumi and soak in the main route’s classic arc.
② Getting lost in the Realm of Gluttony’s spiral
The Realm of Gluttony is a spiral in which the floors get narrower as you go down, shrinking in stages from B1’s 64 tiles to B8’s 16. The problem is the one-way corridors scattered along the way, which constantly leave you unable to backtrack. Watch the automap coordinates and always know which level you’re standing on.
③ The Realm of Wrath’s fragmented maps
The Realm of Wrath is carved into nine separate maps. B1 splits into A (west) and B (central), and 1F splits four ways into A through D — a structure the automap alone will never make legible. Keep this article’s maps open beside you and check which area you’re in as you move.
④ Don’t underestimate how long the Akira route is
The Akira route runs 51 floors, putting it on par with the main route in sheer bulk. Earth Nomos alone is 11 floors, the 3rd Nomos is another 11, and the long slogs just keep coming. Unless you plan your MP usage and your fusion roadmap for the long haul, you will run your resources dry somewhere in the middle.
⑤ Missing the window when your Guardian changes
Your Guardian can change when you level up, but the conditions are convoluted and landing the specific Guardian you want is genuinely hard. The PS version’s Alice event gives you some measure of control, though you’ll need to look up the trigger conditions in advance. On a first playthrough, the realistic approach is not to overthink it and simply roll with whatever Guardian you naturally end up with.
Map Guide: All 17 Dungeons and 102 Floors
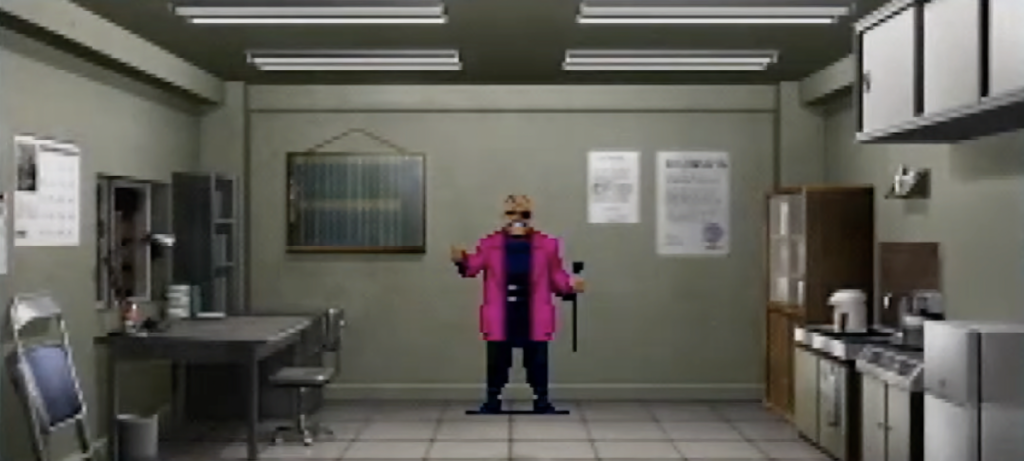
From here on you get dungeon maps for all 102 floors. The gray bands are walls, and the numbers along the left and bottom edges match the in-game automap coordinates (east/north).
The maps are split into the main route (the 11 dungeons shared by Charlie, Yumi and Reiko) and the Akira route (6 dungeons). Tap or click a dungeon name to expand it.
Main Route (Charlie / Yumi / Reiko)
The Akira Route

Can You Play Shin Megami Tensei if… on Modern Hardware? A Complete Platform-by-Platform Guide
✅ The verdict
Shin Megami Tensei if… is still playable on current hardware as of September 2026. The Super Famicom version is available through Nintendo Switch Online, and the PlayStation version can be bought on PS Archives. There’s an iOS release as well, so you have several ways in.
① Titles playable via subscription or for free
| Title | Platform | Price / notes |
|---|---|---|
| Shin Megami Tensei if… (Super Famicom version) | Nintendo Switch Online | Playable with a subscription from 306 yen (about US$2) per month (converted at ¥153 = US$1); added July 28, 2021 |
The easiest way in is the Super Famicom version on Nintendo Switch Online. If you’re already a subscriber, it costs you nothing extra. The SFC release lacks the PlayStation version’s dash and difficulty select, but the dungeon layouts are completely identical — every map in this guide works as-is.
② Titles available to buy individually
| Title | Platform | Price / notes |
|---|---|---|
| Shin Megami Tensei if… (PlayStation version) | PS3 / PSP (PS Archives) | Released digitally in 2010. Also purchasable on PS Vita (from 2012) |
| Shin Megami Tensei if… (iOS version) | iOS | Released in 2013. Available to buy on the App Store |
If it’s the PlayStation version you want, the download release on PS Archives for PS3, PSP and PS Vita is your option. Go this route if you want the benefits of the PS version’s dash and EASY mode. An iOS version exists too, but check device compatibility before you buy.
③ Titles playable as a remaster or remake
As of September 2026, no remaster or remake of Shin Megami Tensei if… has been announced.
④ Titles that are hard to get on current hardware
Physical Super Famicom and PlayStation copies are only available on the secondhand market. There’s no real need to chase the SFC cartridge when the game is on Nintendo Switch Online, but if you insist on the original PlayStation disc, you’ll be hunting used. Even then, the PS Archives release is still purchasable, so the PS version remains available digitally.
If you’re already subscribed to Switch Online, the SFC version is the easy way to dip in. And if you start missing the PS version’s dash, switching over to PS Archives is no problem — the dungeon layouts are exactly the same, so the maps carry straight over.
Enjoying this article? Add us as a preferred source on Google.
Summary: Shin Megami Tensei if… Is the Origin Point of “School Megaten” — and a 102-Floor Labyrinth

Shin Megami Tensei if… (PlayStation version) launched from Atlus on December 26, 2002 as a port of the Super Famicom original (October 28, 1994), adding difficulty select, a dash function, the Alice event and more to make it the definitive edition. The dungeon layouts are completely identical to the SFC version, and the game boasts a staggering 17 dungeons across 102 floors.
The heart of the game is your partner choice. Pick Charlie, Yumi or Reiko and you’ll travel the Expanse’s seven deadly sins on the main route (51 floors); pick Akira and you’ll tackle a unique set of dungeons called the Nomos (51 floors). Both routes run past 50 floors, and your partner also determines which ending you get.
On modern hardware you can play it either through Nintendo Switch Online (SFC version) or PS Archives (PS version). Given that this game’s concept — a demon-summoning RPG set in a high school — was carried forward into Revelations: Persona, it’s a title Persona fans in particular owe it to themselves to play.
Shin Megami Tensei if… is a one-of-a-kind RPG that fuses high-school juvenile fiction with Megaten’s 3D dungeon crawling. Honestly, 102 floors takes real commitment, but with the PS version’s dash and EASY mode the climb is far more comfortable than it ever was back on the Super Famicom. And because each partner sends you down a different route, there’s built-in motivation to run it again. Whether you want to experience Persona’s origin point or just enjoy a Megaten side story, take these maps in hand and dive in.
As someone who sank serious hours into Devil Summoner on the Saturn, looking at if…’s Guardian system feels like meeting Persona’s grandfather. There’s real joy in tracing the family tree.
Read Next
Snicker Kitamura






Leave a Reply