






Enjoying this article? Add us as a preferred source on Google.
- What is The Tower of Druaga on PC Engine? A 1992 remake that’s a different game entirely
- How it differs from the arcade and Famicom versions, plus the four difficulty modes
- Every item’s effect, and which items you’ll need for later-floor conditions
- Treasure contents and reveal conditions for all 60 floors (regular + special)
- Pro Gamer mode treasure list
- Can you play it on modern hardware? How to get it, platform by platform
Say “The Tower of Druaga” and most people picture Namco’s 1984 arcade classic. You couldn’t progress without knowing the secret condition that made each floor’s treasure chest appear, and that design, where strategy info was literally part of the game, blew gamers’ minds back then. The Famicom version was a hit too, and plenty of you probably traded chest tricks with friends on the playground.
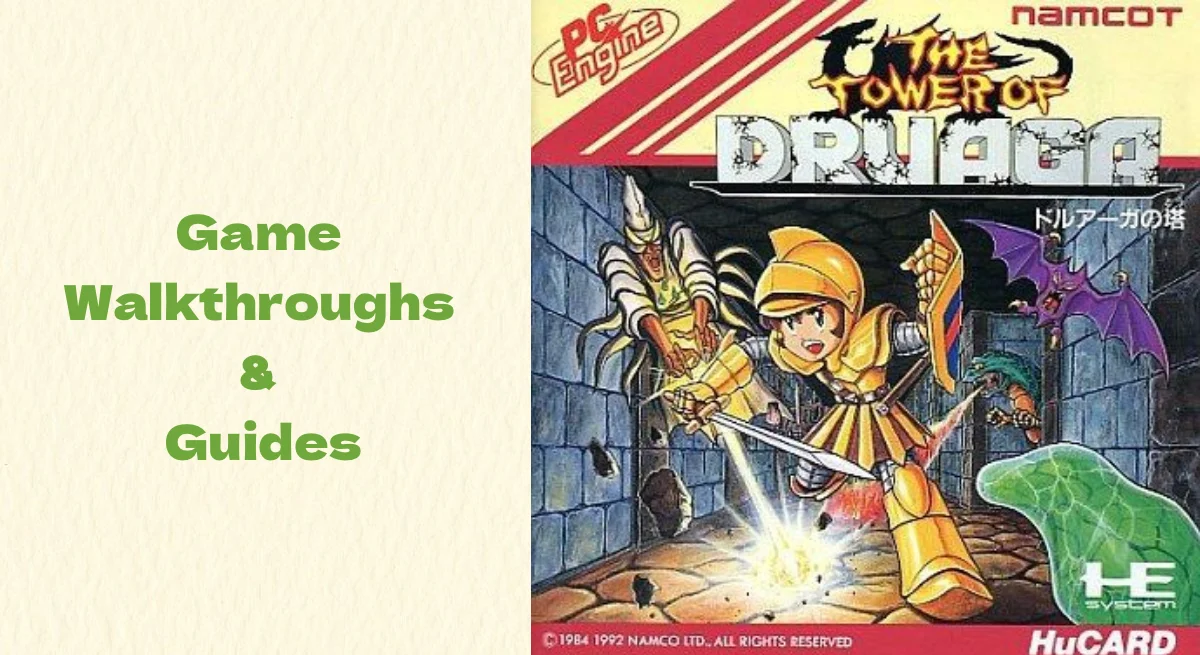
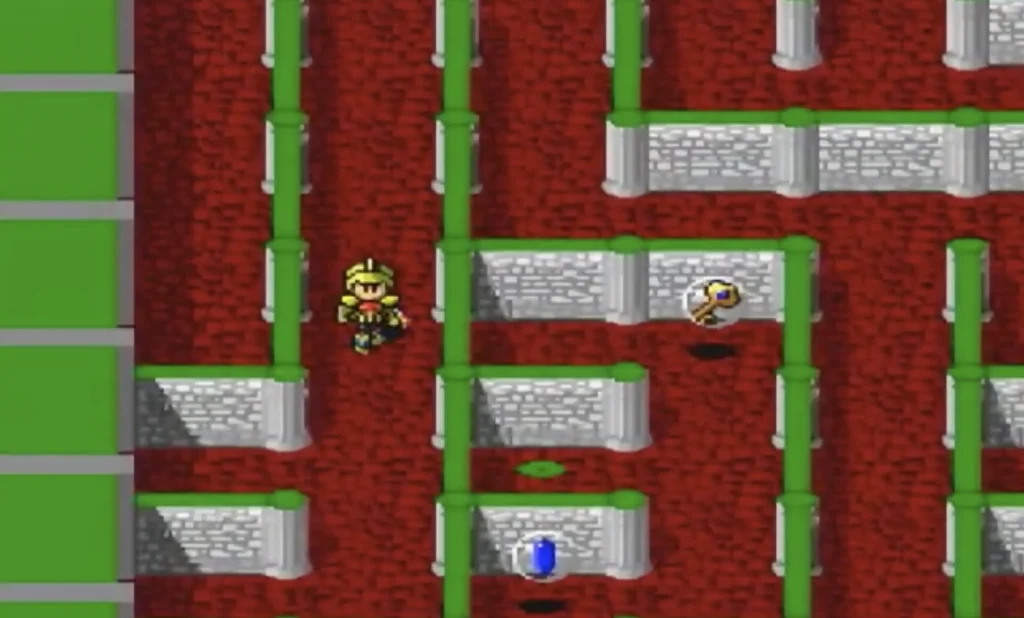
In 1992, The Tower of Druaga was rebuilt from the ground up for the PC Engine. The top-down floors became isometric mazes, and the game added special treasure chests and four difficulty levels. Both the chest conditions and their contents are almost completely different from the arcade and Famicom versions. Your old knowledge is next to useless here.
This guide is based strictly on the PC Engine version and lists the contents and reveal conditions for both regular and special treasure chests across all 60 floors. We cross-checked Japanese play records against English-language strategy resources, and where they disagree, a note shows both versions. We also cover every floor of Pro Gamer mode, which gives you no hints and swaps in entirely different conditions. There are no maze maps here, but in exchange we’ve tabled every item’s effect and exactly “which floor’s condition it’s used for.”
Full disclosure: I’m one of those people who hit a wall around floor 30 on the Famicom version and gave up. On the PC Engine version’s Easy mode, though, Ishtar gives you a hint on every floor. I wish I could go back and tell my younger self.
*Prices in this article are converted from Japanese yen at ¥159 = US$1 (November 2026 rate).

What Is The Tower of Druaga on PC Engine? A Full 1992 Remake
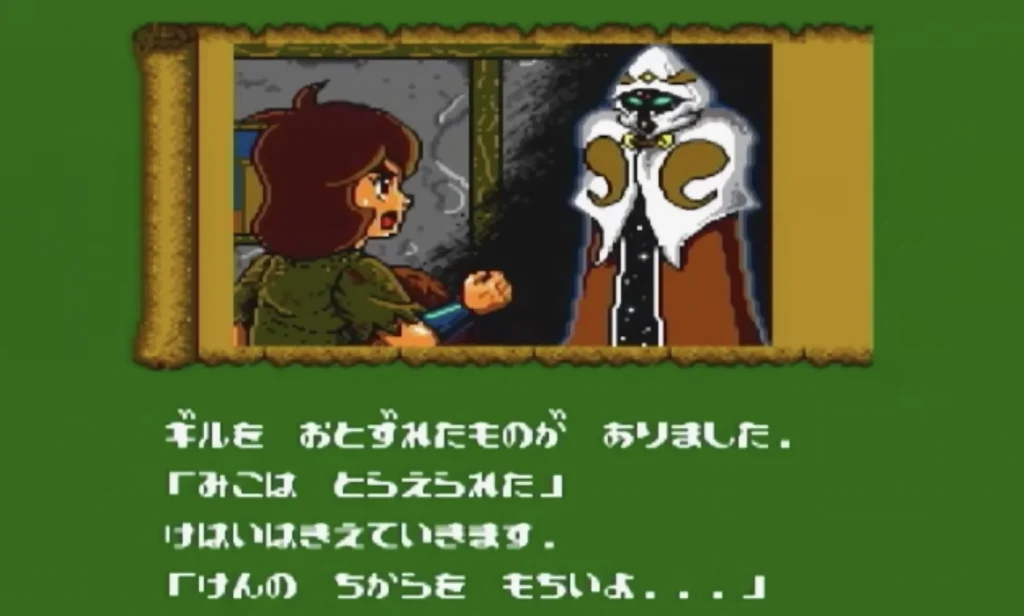
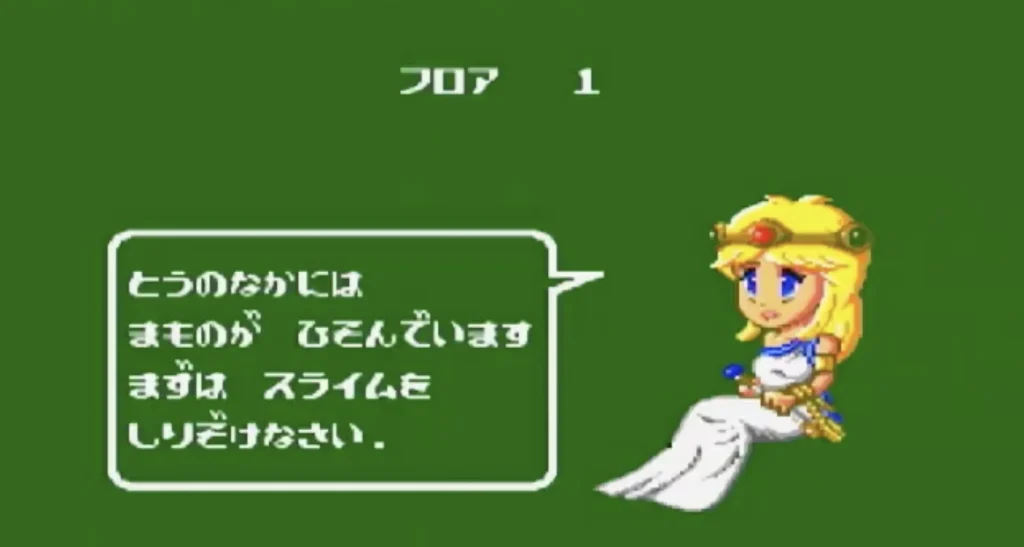
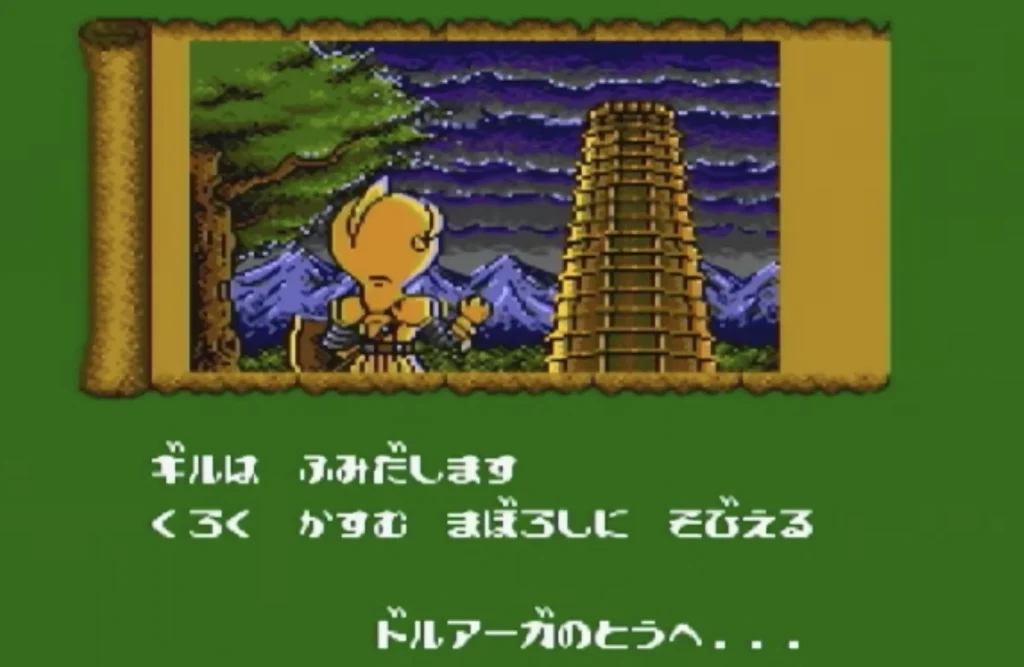
The PC Engine version of The Tower of Druaga is a remake that completely rebuilds the 1984 arcade game. You play as Gil, the golden knight, climbing a 60-floor tower to defeat Druaga and rescue the maiden Ki.
| Item | Details |
| Title | The Tower of Druaga |
| Release Date | June 25, 1992 |
| Publisher / Price | Namco / $43 |
| Developer | Game Studio (Director: Masanobu Endo) |
| Media | HuCARD |
| Based On | The Tower of Druaga (1984, arcade, Namco) |
| Scope | 60 floors / 55 regular treasure chests + special treasure chests (from floor 11) |
| Difficulty | Four levels: Easy, Normal, Hard, Pro Gamer |
| Final Goal | Defeat Druaga on floor 59 and rescue Ki on floor 60 |
This remake was directed by Masanobu Endo, the creator of the original. Reviews were split at launch: Gekkan PC Engine magazine gave it a strong 85/100, while Famitsu’s Cross Review was tougher at 22/40.
How Is It Different From the Arcade and Famicom Versions? Comparing the Four Difficulty Modes
The PC Engine version didn’t just get a visual makeover; the game’s whole structure was overhauled. The chest conditions in Famicom strategy guides or arcade walkthrough pages simply don’t work here.
| # | Change | Arcade / Famicom | PC Engine |
| 1 | Perspective | Top-down | Isometric (angled overhead view) |
| 2 | Treasure Chests | One per floor | “Special treasure chests” added from floor 11 (except in Pro Gamer) |
| 3 | Difficulty | One setting | Four levels. Pro Gamer uses different chest conditions on every floor |
| 4 | Hints | None | Ishtar gives a hint at the start of each floor (except in Pro Gamer) |
| 5 | Using Items | Effects apply automatically on pickup | Adds swapping equipment and using items with the II button |
| 6 | Progression | Equipment only | On Easy and Normal, you earn points to allocate to stats each time you clear a floor (max 20 per stat) |
How the Four Difficulty Levels Differ
| Difficulty | Ishtar’s Hints | Spirit Crystal | Timer | Continues | Password | Chest Conditions |
|---|---|---|---|---|---|---|
| Easy | Yes | Given automatically | No | Unlimited | Yes | Shared |
| Normal | Yes | Picked up by floor 24 | No | Unlimited | Yes | Shared |
| Hard | Yes | None | Yes | 10 | No | Shared |
| Pro Gamer | No | None | Yes | 3 | No | Different on every floor (one per floor, no specials) |
Easy, Normal, and Hard all share the same chest conditions; what changes is how forgiving the game is. Easy gives you unlimited continues and hands you the Spirit Crystal automatically, so if this is your first climb, just pick Easy. Pro Gamer strips out the hints, caps you at three continues, adds a timer, and on top of that reshuffles the chest conditions on every floor. There are no special treasure chests and no floor 57 riddle, either. The full Pro Gamer list lives in its own section later in the guide.
Every Item’s Effect: Equipment, Passive Items, and Usable Items
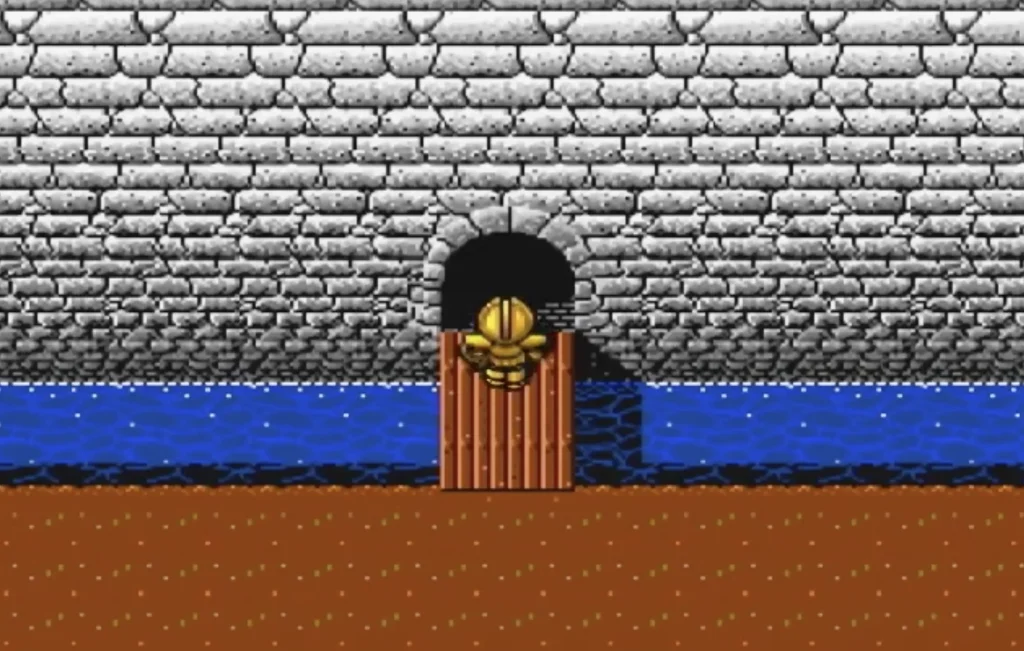
Items in the PC Engine version fall into three groups: gear you equip to boost stats, items that work just by being in your inventory, and items you use with the II button. Effect values come from English-language strategy resources, and the number in parentheses is the floor where the regular treasure chest holds it (SP means special treasure chest).
Equipment (Swords, Shields, Armor, Helmets, Gauntlets, Boots, Mattocks)
| Slot | Item (Floor) | Effect |
|---|---|---|
| Sword | White Sword (Floor 5) | +3 |
| Sword | Spear (Floor 16) | +6 |
| Sword | Dragon Slayer (Floor 22) | +2. Strong against dragons |
| Sword | Spell Canceller (Floor 30) | +2. Reflects spells while your sword is drawn |
| Sword | Excalibur (Floor 50) | +10. The strongest sword |
| Shield | Red Line Shield (Floor 6) | +4 |
| Shield | Fire Shield (Floor 20) | +2. Absorbs fireballs |
| Shield | Reflect Shield (Floor 29) | +2. Reflects spells even from the side |
| Shield | Blue Line Shield (Floor 47) | +10 |
| Armor | Red Line Armor (Floor 7) | HP +24 |
| Armor | Black Knight Armor (Floor 23) | +18. Enemies don’t chase you |
| Armor | Holy Armor (Floor 32) | +18. Absorbs spells three times |
| Armor | Blue Line Armor (Floor 53) | +60 |
| Helmet | Blue Helmet (Floor 18) | +4 |
| Helmet | Horned Helmet (Floor 43) | +8 |
| Gauntlet | White Gauntlet (Floor 9) | Sword draw speed +4 |
| Gauntlet | Blue Gauntlet (Floor 34) | +10 |
| Boots | Jet Boots (Floor 2) | +4 |
| Boots | Levitate Boots (Floor 12) | +2. Lets you pass over pits and small enemies |
| Boots | Moon Walker (Floor 27) | +3. You can’t change facing unless your sword is drawn |
| Boots | Rocket Boots (Floor 39) | +8 |
| Mattock | Copper (Floor 1) / Silver (Floor 10) / Gold (Floor 21) | Breaks walls: Copper 2 times, Silver 5 times, Gold 10 times |
For raw attack power, your main sword path is Spear into Excalibur; the Dragon Slayer and Spell Canceller are picks you make for their special effects, not their numbers. The ultimate loadout is five pieces: Horned Helmet, Blue Line Armor, Blue Gauntlet, Excalibur, and Blue Line Shield. You need the full set for the Druaga fight on floor 59.
Passive Items (Work Just by Holding Them)
| Item (Floor) | Effect |
|---|---|
| Emerald Necklace (Floor 15) | Protects against floor flames |
| Ruby Necklace (Floor 26) | Protects against fireballs |
| Sapphire Necklace (Floor 41) | Protects against dragon fire |
| Red Ring (Floor 31) | Protects against red Wisps |
| Blue Ring (Floor 48) | Protects against blue Wisps |
| Silver Mirror (Floor 24) | Slows down Mirror Knights |
| Gold Mirror (Floor 51) | Lets you defeat the White Knight on floor 59 |
| Bronze Key (Floor 28) / Silver Key (Floor 35) / Gold Key (Floor 44) | Required to open specific treasure chests |
| Balance (Floors 33, 38, 42, 46, 49, 52) | Turns Evil gear into Hyper gear |
| Ankh (Floors 36, 40, 54) | Required to open the Crystal Rod treasure chests |
| Red / Green / Blue Crystal Rod (Floors 45, 37, 57) | Required to rescue Ki and to fight Druaga |
| Ruby Mace (Floor 58) | Required for the dragon fight on floor 59 |
Items You Use With the II Button and Consumables
| Item (Floor) | Effect |
|---|---|
| Silver Chime (Floor 3) | Rings when you face the key. Using it stops the BGM |
| Gold Chime (Floor 8) | Upgraded version of the chime |
| Book of Map (Floor 4) | Shows the floor map |
| Key Detect (Floor 13) | Finds the key’s location |
| Book of Light (Floor 19) | Toggles the lighting |
| Match (Floors 11, 14) / Candle (Floor 17) | Lights up dark areas. Makes Ghosts visible |
| Rope (Floor 18 SP, Floor 48 SP) | Returns you one floor up |
| Silver Shovel (Floor 22 SP, Floor 29 SP) | Takes you one floor down |
| Gold Shovel (Floor 54 SP) | Warps you to any floor you’ve already visited |
| Potions | Light Blue = restores 10, Blue = full heal, Green = cures poison and full heal, Black = poison |
| Trowel (Copper / Silver / Gold) | Builds walls. Copper 1, Silver 2, Gold 5 |
| Rainbow Mattock (Floor 24 SP) | Breaks unlimited walls for one floor |
| Scrolls | Seven types: Acid, Quiet, Sleep, Clear, Shell, Heat, Burn |
| Silver Clock / Gold Clock | Stops time (Silver 5 seconds, Gold 20 seconds) |
| Red / Green / Blue Crystal | Makes you immune to damage from specific enemies on that floor |
Nothing in the special treasure chests is required to beat the game. That said, many of the later special chests require you to use a scroll you picked up earlier, so one missed item can snowball into a chain of missed chests. Check the next table to see “which floor’s condition needs what.”
Items Needed for Later-Floor Conditions
| Floor Used | What You Need | Where to Get It |
|---|---|---|
| Floor 7 | Copper Mattock | Floor 1 |
| Floor 12 | Match or Candle (to see Ghosts) | Floors 11, 14, 17 |
| Floor 23 SP | Silver Clock | Floor 20 SP |
| Floor 24 | Book of Light | Floor 19 |
| Floor 29 | Silver Chime | Floor 3 |
| Floors 32, 41, 53 | Moon Walker | Floor 27 |
| Floor 34 | Necklace | Floor 15 |
| Floor 36 | Any of Match, Candle, or Book of Light | Floors 11, 14, 17, 19 |
| Floor 44 SP | Trowel | Floors 11, 16, 19, 32, 37 SP |
| Floor 49 SP | Sleep Scroll | Floors 17, 26 SP |
| Floor 50 SP | Quiet Scroll | Floor 23 SP |
| Floor 51 SP | Shell Scroll | Floor 27 SP |
| Floor 52 SP | Heat Scroll | Floor 38 SP |
| Floor 53 | Book of Map | Floor 4 |
| Floor 54 SP | Burn Scroll | Floor 46 SP |
| Floor 59 | Gold Mirror, Ruby Mace, Blue Crystal Rod, ultimate gear | Floors 51, 58, 57, and more |
The Balance items decide whether the gear on floors 34, 39, 43, 47, 50, and 53 turns out to be Evil gear. Start collecting them on floor 33, and the golden rule is: don’t miss a single one. The same goes for the Ankhs and the Crystal Rod chests. Miss one link in that chain and you’ll never make it to Ki’s rescue.
All 60 Floors of Treasure: What’s in Every Regular and Special Chest, and How to Make It Appear
From here on, this is the full treasure list for all 60 floors, and it applies to Easy, Normal, and Hard alike. The baseline is wherever Japanese play records (Easy mode) and overseas strategy guides agree; on floors where they conflict, a ※ note lays out both versions. Five floors have no regular chest at all: 25, 55, 56, 59, and 60.
Floors 1-10: Building Your Basic Kit
| Floor | Regular Chest | How to Reveal | Special Chest | How to Reveal |
|---|---|---|---|---|
| 1 | Copper Mattock | Defeat one Green Slime | — | — |
| 2 | Jet Boots | Defeat one Black Slime | — | — |
| 3 | Silver Chime | Use the Copper Mattock on an outer wall ※1 |
— | — |
| 4 | Book of Map | Block a Mage’s spell with your shield | — | — |
| 5 | White Sword | Walk through the magic circle in the center of the floor | — | — |
| 6 | Red Line Shield | Draw your sword after leaving the starting point | — | — |
| 7 | Red Line Armor | Break a wall with the Copper Mattock ※1 |
— | — |
| 8 | Gold Chime | Defeat one Blue Knight | — | — |
| 9 | White Gauntlet | Walk through two flashing magic circles | — | — |
| 10 | Silver Mattock | Lure a Sparky (the fast-moving enemy) onto a magic circle | — | — |
The first 10 floors only have regular chests, and this is where you get the first tier of sword, shield, armor, gauntlet, and boots. The Silver Chime from Floor 3 is a condition for Floor 29, and the Book of Map from Floor 4 is a condition for Floor 53, so hang on to them once you’ve got them.
Floors 11-20: Special Chests Enter the Picture
| Floor | Regular Chest | How to Reveal | Special Chest | How to Reveal |
|---|---|---|---|---|
| 11 | Match | Touch an outer wall | Copper Trowel | Walk past the door without picking up the key |
| 12 | Levitate Boots | Defeat the Ghost (a Match or Candle makes it visible) | — | — |
| 13 | Key Detect | Defeat one Mage ※2 |
Light Blue Potion | Push against a wall for 5 seconds |
| 14 | Match | Step on the flashing magic circle (doesn’t work while wearing the Levitate Boots) | — | — |
| 15 | Emerald Necklace | Stand still for a few seconds | Acid Scroll | Keep standing still after the regular chest appears |
| 16 | Spear | Step on the two green magic circles | Copper Trowel | Walk through the spot in the lower-right corner of the floor |
| 17 | Candle | Step on the upper-left magic circle, then the center magic circle | Sleep Scroll | Wipe out every enemy |
| 18 | Blue Helmet | Swat away a Sorcerer’s flame with your sword | Rope | Wait 5 seconds at a specific spot in the upper left |
| 19 | Book of Light | Grab the key without breaking any walls with your own Mattock | Silver Trowel | Open the door |
| 20 | Fire Shield | Lure a Black Knight onto a flashing magic circle | Silver Clock | Draw your sword for just a split second |
Special chests join the mix starting on Floor 11. They mostly hold consumables like Trowels and scrolls. None of them are required to clear the game, but a lot of them are conditions for special chests later on. Careful on Floor 19: if you break a wall with your own Mattock, the regular chest won’t appear.
Floors 21-30: Dragon Slayer and the Spell Canceler
| Floor | Regular Chest | How to Reveal | Special Chest | How to Reveal |
|---|---|---|---|---|
| 21 | Gold Mattock | Step on every magic circle to change its color | Black Potion | On the D-pad: right 7 times, left once, right 7 times |
| 22 | Dragon Slayer | Defeat Quox | Silver Shovel | Ram into Quox without your sword drawn (do this first) |
| 23 | Black Knight Armor | Pick up the key | Quiet Scroll | Use the Silver Clock |
| 24 | Silver Mirror | Darken the floor with the Book of Light and wait | Rainbow Mattock | Press Button II with no item set |
| 25 | No chest | The chest already sitting there at the start is a Mimic | — | — |
| 26 | Ruby Necklace | Keep standing on the magic circle until it stops flashing | Sleep Scroll | Drop your health to 1/8 of max or lower |
| 27 | Moon Walker | Walk up to the chest and wait 1 second with the Mimic out | Shell Scroll | Pick up the key (some records say without defeating any enemies) |
| 28 | Bronze Key | Step on the three magic circles in the center, lower left, and lower right | Silver Clock | Walk the fourth row from the top from one end to the other |
| 29 | Reflect Shield | Use the Silver Chime ※3 |
Silver Shovel | Rotate the D-pad three full times |
| 30 | Spell Canceler | On the center vertical line, break the walls above and below the magic circle | — | — |
The Floor 22 special chest has to come out before the regular chest. Before you defeat Quox, sheathe your sword and ram into him. The Floor 26 special is a risky one: you need to be at 1/8 health or lower.
Floors 31-40: Collecting the Balance and the Ankh
| Floor | Regular Chest | How to Reveal | Special Chest | How to Reveal |
|---|---|---|---|---|
| 31 | Red Ring | Make every self-destructing enemy blow itself up | Red Crystal | Get caught in a self-destruct blast |
| 32 | Holy Armor | Break one of the walls with a candle on it | Copper Trowel | Wear the Moon Walker and run around with your sword drawn |
| 33 | Balance | Use the magic circle warps to visit every one | Green Crystal | Walk for 5 seconds with your sword drawn |
| 34 | Blue Gauntlet | Wear a necklace and touch a Fire Element ※4 |
— | — |
| 35 | Silver Key | Step on the magic circles in this order: bottom center, upper right, upper left | Black Potion | Grab the key without ever drawing your sword |
| 36 | Ankh | Use a Match, a Candle, or the Book of Light | Acid Scroll | Drop your health to 1/16 of max or lower |
| 37 | Green Crystal Rod | Wipe out every enemy | Gold Trowel | Wipe out every enemy |
| 38 | Balance | Stay put in one spot for a while | Heat Scroll | Use up all your Mattock charges (not on outer walls) |
| 39 | Rocket Boots | Touch a candle on the wall ※4 |
— | — |
| 40 | Ankh | Touch the lion statue without your sword drawn ※5 |
Gold Clock | See the note below |
The Balance is the item that turns Evil equipment into Hyper equipment, and you start collecting them on Floor 33. The Ankh is required to open the Crystal Rod chests. The Floor 36 special demands 1/16 health or lower, even harsher than Floor 26.
※5 Sources disagree on the Floor 40 special. Japanese records say “wipe out every enemy,” while overseas guides say “enter Heat mode (by touching the lion statue or using the Heat Scroll).” Touch the lion statue with your sword drawn and you die.
Floors 41-50: The Road to Excalibur
| Floor | Regular Chest | How to Reveal | Special Chest | How to Reveal |
|---|---|---|---|---|
| 41 | Sapphire Necklace | Wear the Moon Walker and run around with your sword drawn | Green Potion | Step on the same magic circle 5 times in a row |
| 42 | Balance | Defeat the Dark Eye (the spell turret) | Blue Potion | Press the RUN button on the Player 2 controller |
| 43 | Horned Helmet | Take 3 spells while standing on a glowing magic circle ※4 |
— | — |
| 44 | Gold Key | Open the door (won’t appear before you take the chest) | Clear Scroll | Use a Trowel |
| 45 | Red Crystal Rod | Die once (it doesn’t cost you a game over) | — | — |
| 46 | Balance | Summon enemies with the yellow magic circle at bottom center, and get the last Silver Dragon to breathe fire | Burn Scroll | Open the door without defeating a single enemy |
| 47 | Blue Line Shield | Defeat the Mirror Knight without letting it touch the lion ※4 |
— | — |
| 48 | Blue Ring | Grab the key with your sword drawn | Rope | Draw and sheathe your sword 3 times |
| 49 | Balance | Walk through the 4 magic circles near the corners | Sleep Scroll | Use the Sleep Scroll |
| 50 | Excalibur | Lure the red and blue Will-o’-the-Wisps onto glowing magic circles ※4 |
Quiet Scroll | Use the Quiet Scroll |
The condition on Floor 45 is “die once.” It won’t cost you a game over, so go ahead and get taken down without a second thought. Floor 50’s Excalibur turns into the Evil Sword if you don’t have the Balance.
Floors 51-60: Final Gear and the Druaga Fight
| Floor | Regular Chest | How to Reveal | Special Chest | How to Reveal |
|---|---|---|---|---|
| 51 | Gold Mirror | Step on the magic circles in this order: upper right, top center, center, bottom center, lower left | Shell Scroll | Use the Shell Scroll |
| 52 | Balance | Press up while standing on a magic circle | Black Potion | Use the Heat Scroll |
| 53 | Blue Line Armor | Use the Book of Map ※4 |
Blue Crystal | Wear the Moon Walker and charge into an enemy |
| 54 | Ankh | Defeat every Knight | Gold Shovel | Use the Burn Scroll |
| 55 | No chest | — | — | — |
| 56 | No chest | — | — | — |
| 57 | Blue Crystal Rod | Stab the fake Ishtar with your sword to reveal its true form, then answer its questions ※6 |
Empty Chest | See the note below |
| 58 | Ruby Mace | Grab the key wearing only your starting equipment ※6 |
Empty Chest | See the note below |
| 59 | No chest | Final battle with Druaga | — | — |
| 60 | No chest | Rescuing Ki | — | — |
The Gold Mirror from Floor 51 and the Ruby Mace from Floor 58 are essential for the showdown on Floor 59. Floor 58’s condition is grabbing the key in your starting equipment, so once you’ve got it, switch your gear back before heading up to Floor 59.
※6 For the fake Ishtar’s questions on Floor 57, answer yes, no, no, yes, no, in that order (per overseas guides). Japanese records say you only need to answer “no” to the last question. As for the Empty Chest, Japanese records put it on Floor 57 (walk through the entire fifth row from the bottom), while overseas guides put it on Floor 58 (walk the seventh row from the top from one end to the other), so both the floor and the condition conflict.
Floors 59 and 60: Druaga and Ki
- Floor 59: Defeat them in this order: the White Knight, then the real body of the cloning Wizard (the red one is the real one), then the Dragon, then Druaga. Without the Gold Mirror you can’t beat the White Knight, without the Ruby Mace you can’t beat the Dragon, and without a full set of top-tier gear you can’t beat Druaga. Come up short and you get knocked down to a lower floor and lose some of your equipment.
- Floor 60: Free Ki from her stone curse and set the three Crystal Rods in their designated spots. According to Japanese play records, the order is: the center of the third row from the bottom, the center of the third row from the top, and the center of the middle column, facing down.
Pro Gamer Mode Treasure Chest List: No Hints, One Chest per Floor
Pro Gamer mode gives you exactly one chest per floor, and the triggers have nothing in common with Easy through Hard. The lineup of rewards is nearly identical, with one difference: Floor 56 holds a Gold Shovel chest. Fair warning: the conditions listed here come from a single overseas strategy source, and I couldn’t cross-check them against any Japanese material.
Pro Gamer: Floors 1-30
| Floor | Chest | How to Reveal |
|---|---|---|
| 1 | Copper Mattock | Defeat a Green Slime |
| 2 | Jet Boots | Defeat a Black Slime |
| 3 | Silver Chime | Press the RUN button |
| 4 | Book of Map | Defeat every enemy |
| 5 | White Sword | Open the door |
| 6 | Red Line Shield | Walk past the door before grabbing the key |
| 7 | Red Line Armor | Use the mattock on the outer wall |
| 8 | Gold Chime | Use the mattock on the door |
| 9 | White Gauntlet | Step on the same magic circle 5 times |
| 10 | Silver Mattock | Grab the key without drawing your sword |
| 11 | Match | Walk for a few seconds with your sword drawn |
| 12 | Levitate Boots | Defeat a Black Slime, then a Druid, then a Ghost, in that order |
| 13 | Key Detect | Use the Gold Chime, then the Silver Chime |
| 14 | Match | Draw and sheathe your sword 3 times |
| 15 | Emerald Necklace | Destroy every wall with a candle on it |
| 16 | Spear | Grab the key without defeating any enemies |
| 17 | Candle | Take a spell from the left with your sword drawn |
| 18 | Blue Helmet | Mash the I button to swing your sword |
| 19 | Book of Light | Leave the starting point and return after a long while |
| 20 | Fire Shield | Push against a wall for a few seconds |
| 21 | Gold Mattock | D-pad: Right 7 times, Left once, Right 7 times |
| 22 | Dragon Slayer | Use an item in the top-left corner |
| 23 | Black Knight Armor | Stop the music with the Silver Chime, then open the door |
| 24 | Silver Mirror | Darken the floor with the Book of Light, then grab the key |
| 25 | No chest | — |
| 26 | Ruby Necklace | Walk a full lap of the floor along the outer wall |
| 27 | Moon Walker | Break 3 walls with the mattock |
| 28 | Bronze Key | Get Quox to break 3 walls |
| 29 | Reflect Shield | Don’t grab the key until the timer hits 30 |
| 30 | Spell Canceler | Hold the II button for a few seconds |
Pro Gamer: Floors 31-60
| Floor | Chest | How to Reveal |
|---|---|---|
| 31 | Red Ring | Grab the key while wearing the Moon Walker |
| 32 | Holy Armor | Rotate the D-pad counterclockwise 3 times |
| 33 | Balance | Defeat a Druid, Mage, Druid, then Mage, in that order |
| 34 | Blue Gauntlet | Draw your sword when the timer reads 30 |
| 35 | Silver Key | Pass over every magic circle with the Levitate Boots |
| 36 | Ankh | Open the door without defeating any enemies |
| 37 | Green Crystal Rod | Defeat the Black Knight |
| 38 | Balance | Stand still until the chest appears |
| 39 | Rocket Boots | Block 15 spells with your shield |
| 40 | Ankh | Defeat a Hyper Knight with the Spell Canceler |
| 41 | Sapphire Necklace | Pass over the tiles at column 3, row 11 and column 7, row 11, counting from the top left |
| 42 | Balance | Grab the key, then use the mattock on the outer wall |
| 43 | Horned Helmet | Open the door, then use the mattock on the outer wall |
| 44 | Gold Key | Draw and sheathe your sword 3 times while wearing the Levitate Boots |
| 45 | Red Crystal Rod | Press the II button with no item set |
| 46 | Balance | Stand in the top-left corner facing the outer wall for a few seconds |
| 47 | Blue Line Shield | Drop your HP to 1/16 |
| 48 | Blue Ring | Defeat a Druid, Mage, Sorcerer, then Wizard, in that order |
| 49 | Balance | Bump into an enemy while wearing the Moon Walker |
| 50 | Excalibur | Drop your HP to 1/8 |
| 51 | Gold Mirror | Use up all your mattock charges |
| 52 | Balance | Defeat every enemy |
| 53 | Blue Line Armor | Defeat a Lizard Man, Mirror Knight, then Hyper Knight, in that order |
| 54 | Ankh | Take 3 spells on the Holy Armor (not the shield) |
| 55 | No chest | — |
| 56 | Gold Shovel | Open the door after the timer hits 10 |
| 57 | Blue Crystal Rod | Strike the fake Ishtar with your sword |
| 58 | Ruby Mace | Grab the key without breaking any walls |
| 59 | No chest | — |
| 60 | No chest | — |
What defines Pro Gamer is how many conditions make you watch the timer (Floors 29, 34, and 56) or kill enemies in a set order (Floors 12, 33, 48, and 53). Just like the other modes, coming up short on Balance on Floors 34, 39, 43, 47, 50, and 53 turns your gear into its Evil version.
5 Spots Where Players Tend to Trip Up
1. Sources Disagree on the Floor 3 Mattock
The Floor 3 chest appears when you use the Copper Mattock on the outer wall. An overseas strategy source says a mattock used on the outer wall is only disabled for that floor and its uses come back on the next one, but a Japanese playthrough log says doing this makes the Floor 7 chest impossible to get. And since skipping the Silver Chime on Floor 3 also locks you out of the Reflect Shield on Floor 29, picking which one to prioritize is a real headache. On Easy and Normal, where passwords work, the safe play is to jot one down before Floor 3 and then experiment.
2. Get the Special Chest First on Floor 22
The Special Chest on Floor 22 requires you to body-slam Quox without drawing your sword. Kill Quox first and the condition can no longer be met, so get the bump in before you take it down.
3. Dying While Draining Your HP
The Special Chests on Floor 26 and Floor 36 require you to drop your HP to 1/8 or less and 1/16 or less of max, respectively. Both just hold scrolls and aren’t required. If you don’t trust your HP management, feel free to skip them.
4. The Floor 42 Special Needs a Player 2 Controller
The Special Chest on Floor 42 requires pressing RUN on the Player 2 controller. The PC Engine only has one controller port, so on real hardware you’ll need a multitap.
5. Forgetting to Re-Equip After Floor 58
On Floor 58, grabbing the key with your starting gear reveals the Ruby Mace. Head into Floor 59 like that and you’ll face Druaga without your best equipment, so always switch your gear back before leaving Floor 58.
Can You Play The Tower of Druaga on Current Consoles? A Complete Platform Guide
The short answer: as of November 2026, the arcade version is playable on PS4 and Switch, and the Famicom version is on Nintendo Switch Online. The PC Engine version isn’t available on any current console, so you’ll need original hardware.
1. Available via Subscription or Free
| Title | Platform | Notes |
|---|---|---|
| The Tower of Druaga (Famicom version) | Nintendo Switch Online | Added April 9, 2026 |
The Famicom version is playable through Nintendo Classics: Famicom on Nintendo Switch Online. That said, the Famicom and PC Engine versions differ in both how chests are revealed and what’s inside them, so the lists in this article won’t work for the Famicom version.
2. Available as a Standalone Purchase
| Title | Platform | Price (tax included) | Notes |
|---|---|---|---|
| Arcade Archives THE TOWER OF DRUAGA | PS4 / Nintendo Switch | $5 | Released June 2, 2022. Arcade version |
3. Available as a Remaster or Remake
As of November 2026, no remaster or current-console release of the PC Engine version of The Tower of Druaga has been announced.
4. Hard to Get on Current Consoles
To play the PC Engine version of The Tower of Druaga, you need an actual PC Engine and the HuCARD. It isn’t included on the PC Engine mini (TurboGrafx-16 mini) released in 2020. The Arcade Archives release gets you the arcade version for $5, but you won’t get the PC Engine version’s quarter-view perspective, Special Chests, or four difficulty levels.
Enjoying this article? Add us as a preferred source on Google.
Wrap-Up: The PC Engine Tower of Druaga Is a Different Druaga, Rebuilt by Its Original Creator
The PC Engine version of The Tower of Druaga is a HuCARD title released by Namco on June 25, 1992, for $43. It was developed by Game Studio and directed by the original creator, Masanobu Endo. Between the quarter-view perspective, Special Chests, and four difficulty levels, it’s practically a different game from the arcade and Famicom versions.
Chests are shared across Easy, Normal, and Hard, while Pro Gamer is different on every floor. The misses that really hurt: the Silver Chime on Floor 3 (needed for Floor 29), the Book of Map on Floor 4 (needed for Floor 53), the Balances from Floor 33 onward (which keep your gear from turning Evil), and the Gold Mirror on Floor 51 and Ruby Mace on Floor 58, both essential for Floor 59. Lock down those five and the road to Ki is wide open.
As you’d expect from a remake the original creator reworked himself, the thrill of revealing chests is fully intact, with Special Chest side trips and a chain of items that unlock conditions on later floors layered on top. Thanks to Ishtar’s hints and passwords, Easy is still approachable today, while Pro Gamer is even more hardcore than the original. One cartridge covers everything from beginner’s course to full-on ascetic training.
The biggest letdown is that you can’t play it on current hardware. Here’s hoping the PC Engine version gets a re-release.
Read Next
Snicker Kitamura









Leave a Reply