



Enjoying this article? Add us as a preferred source on Google.
- What kind of game is Shin Megami Tensei II? Its setting and how it differs from the first game
- Differences between the SFC, PS and GBA versions, and which one you should play
- Alignment, MAG and the COMP, the systems at the core of the walkthrough
- Raising Aleph, Hiroko and Beth, plus a skill table for the 24 spells Hiroko learns
- Area-by-area walkthrough charts for all six areas, from Valhalla to the Underworld
- Coordinate-marked maps of all 38 areas of the underground city, plus maps for the Expanse, the shrines and the extra dungeons across 32 dungeons and 101 floors
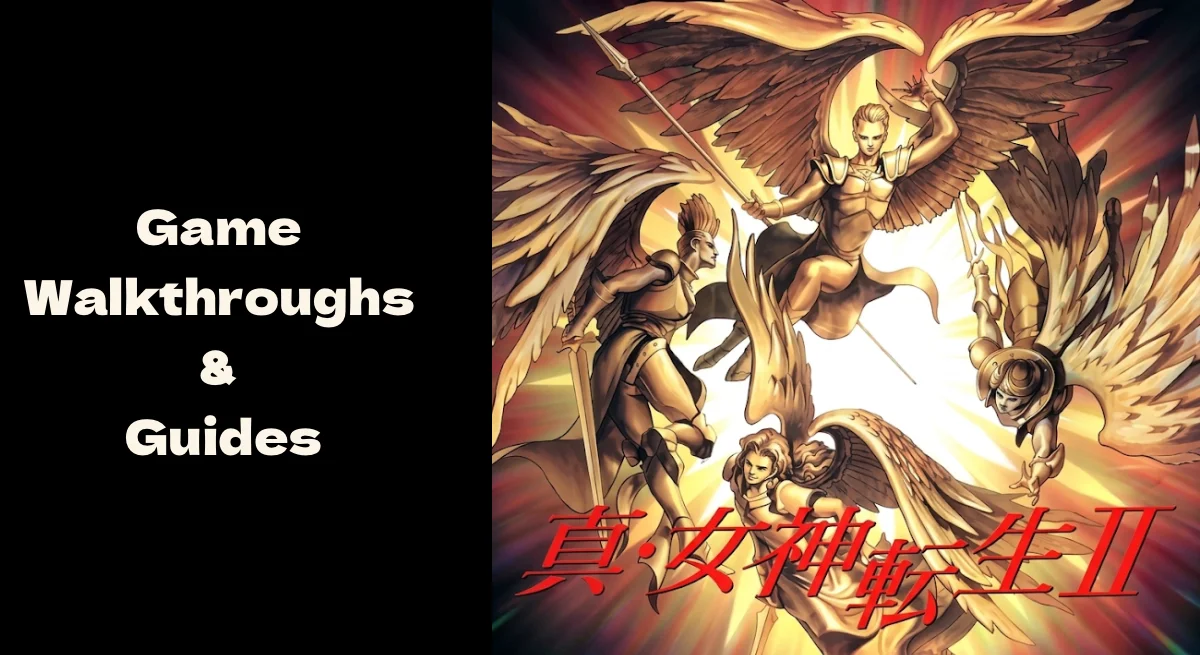
Shin Megami Tensei II is the proper sequel RPG that Atlus released for the Super Famicom in 1994. Several decades after the Great Destruction depicted in the first game, it unfolds in the underground city of Tokyo Millennium, where the three orders of LAW, NEUTRAL and CHAOS collide. The hero Aleph (Hawk) begins the story as the champion of the arena, but before long he is pulled into the conspiracy of the Mesian Church’s Center, and then into the final war between God and demons.
The heart of the game is the way your alignment shifts with the choices you make, and the route branches that follow from it. You travel back and forth between six areas, Valhalla, the Center, Holytown, Factory, Arcadia and the Underworld, and you have to spot the branch points you can never take back. Leaning on the automap’s coordinate readout (east/north) to get through the tangled connecting passages without losing your way is what keeps you alive.
In this article I’ve laid out coordinate-marked maps for all 38 areas of the underground city based on the SFC version, and added maps for 32 dungeons across 101 floors covering the Expanse plus the Underworld shrines and the extra dungeons, complete with treasure chest contents and event locations. There’s also a skill table for all 61 spells, including the learn order and MP costs of the 24 spells Hiroko and Beth pick up along with the spells your demon allies use, and the area-by-area walkthrough charts explain the route the story takes. The PS and GBA versions have exactly the same dungeon structures, so everything here works on any version. The maps are collapsed area by area, so open only the places you need.
Honestly, on my first playthrough I wandered into the Old Suidobashi passage, ran out of MAG and got wiped out. I want to go back and punch the version of me who tried to clear that 250-plus-tile dungeon without a map.
*Prices in this article are converted from Japanese yen at ¥153 = US$1 (November 2026 rate).
What kind of game is Shin Megami Tensei II? An underground-city story utterly unlike the first game
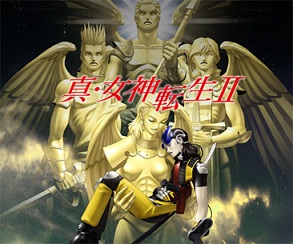
Shin Megami Tensei II is a 3D dungeon RPG set in Tokyo Millennium, the underground city built after the Great Destruction of the first game. Inside the stratified society the Mesian Church governs, the hero Aleph makes a name for himself as champion of the arena, and eventually has to face the truth about the world.
| Item | Details |
| Title | Shin Megami Tensei II |
| Release date | SFC version March 18, 1994 / PS version March 20, 2002 / GBA version September 26, 2003 |
| Publisher and price | Atlus, $65 (before tax, SFC version) |
| Genre | 3D dungeon RPG (demon fusion and conversation negotiation systems) |
| Dungeon scale | 6 areas, 38 maps in total (each map 24 tiles east by 3 to 22 tiles south) |
| Final goal | Reach an ending on the LAW, NEUTRAL or CHAOS route |
Where the first Shin Megami Tensei was a wasteland survival story set in a post-apocalyptic Tokyo, this one is set in the managed society of an underground city. The Mesian Church’s Center controls everything, and citizens are sorted into residential districts such as Valhalla, Holytown, Factory and Arcadia. The first half of the story has you touring each area while you piece together how that stratified society is built, and the second half is a separate stage that runs through the Underworld of old Tokyo and on into the Expanse.
Demon fusion and conversation negotiation, the backbone of the series, are of course alive and well. You recruit the demons you meet along the way as allies and fuse them at the Cathedral of Shadows to build stronger demons. The big change from the first game is that an ally’s alignment now ties directly into the hero’s route choice. Head down the LAW route and CHAOS-aligned allies become hard to use, and the reverse is just as true.
What are the differences between the SFC, PS and GBA versions? Which one should you play?
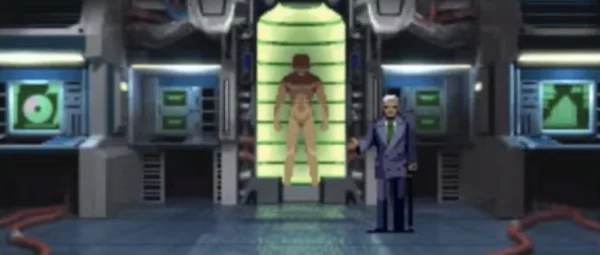
To start with the conclusion, the dungeon structures are completely identical across the SFC, PS and GBA versions. The maps in this article were built from SFC version images, but they work as-is on the PS and GBA versions too. Controls and added features do differ, so I’ve organized those in the table below.
| Item | SFC version (1994) | PS version (2002) | GBA version (2003) |
|---|---|---|---|
| Difficulty select | None | Yes (EASY/NORMAL) | Yes |
| Automap | Basic functions only | Improved coordinate display, expanded minimap | Same as the PS version |
| Artwork | Original | New artwork by Kazuma Kaneko added | Same as the PS version |
| Text | Mostly hiragana | Kanji display supported | Kanji display supported |
| Bugs | Few | Many progression-blocking bugs in the early print run | Largely fixed |
| Dungeon structure | Shared by every version (wall layouts, floor counts and connections are all identical) | ||
The PS version got easier to play thanks to Kazuma Kaneko’s new artwork and kanji text, but freezes and progression-blocking bugs have been reported in the early print run. If you want stability, the SFC or GBA version is the safe choice. I’d point you toward the SFC version, which you can play easily on Nintendo Switch Online.
Note that there is no save data carryover from the first Shin Megami Tensei. This game was designed as a completely standalone work, and you can enjoy it without any problems even if you haven’t played the original. That said, the background to the story, why the underground city came to exist and what the ICBM Great Destruction was, tastes richer if you know the first game.
Raising Aleph, Hiroko and Beth, plus the skill table. The 24 spells Hiroko learns and a list of every spell in the game
In Shin Megami Tensei II, Hiroko (Beth early on) is the only human character who can use magic, and the hero Aleph never learns a single spell all the way to the end. That makes the growth plan simple. Aleph builds around Strength and Speed while keeping enough in reserve for the stat checks at key moments, and Hiroko raises Intelligence and Magic first so she picks up the travel spells early. This chapter puts the numbers behind those decisions into tables.
Aleph | He can’t use magic. Strength, Speed, and the stat checks at key moments
Aleph’s fighting strength comes down to swords, guns, and how you run your demon allies. You can happily put the ability points you hand out on level-up into Strength and Speed, but there are several stat checks baked into the game’s progression, so you can’t abandon Intelligence and Magic entirely. In the post-game extra dungeon, the Diamond Realm, in particular, your alignment and your base stats (excluding bonuses from equipment and gems) are checked when you step into the warp that takes you to each route’s final dungeon.
| Destination | Required alignment | Required stat (no bonuses) |
|---|---|---|
| Old Tokyo Tower | LAW | Magic 25 |
| Old Imperial Palace | NEUTRAL | Intelligence 25 |
| Old Ichigaya | CHAOS | Stamina 25 |
There is a Luck check too when you walk into the rooms where Fiends appear. As a rule, use every incense you find on Aleph; raising him deliberately from the early game is the shortest road to conquering the Diamond Realm.
Hiroko and Beth | The number of spells learned is set by (Level × 2 + Intelligence + Magic) ÷ 8
Hiroko’s and Beth’s spells don’t arrive one per level. They learn however many spells a formula dictates, in a fixed order. According to testing by the walkthrough site Dai-San Hinansho, that formula is (Level × 2 + Intelligence + Magic) ÷ 8, and the quotient is the number of spells already learned. In other words, raise Intelligence and Magic and you reach deeper into the list at the same level. Prioritize Intelligence and Magic from the early game through the midgame, because getting Estoma (15th) and Traport (17th) early translates directly into a smoother run. Later on, feel free to shift back into Strength and Stamina so you can survive bosses’ back-to-back attacks.
| No. | Spell | MP Cost | Effect |
|---|---|---|---|
| 1 | Mapper | 2 | Displays the surrounding map. The effect expires at the new moon |
| 2 | Dia | 2 | Restores a little HP to one ally |
| 3 | Zio | 4 | Elec damage to one enemy; can inflict SHOCK |
| 4 | Patra | 2 | Cures minor status ailments on one ally |
| 5 | Dormina | 3 | Inflicts SLEEP on 1-3 enemies |
| 6 | Media | 6 | Restores a little HP to the whole party |
| 7 | Zionga | 9 | Heavy Elec damage to one enemy, with SHOCK |
| 8 | Posumudi | 4 | Cures POISON on one ally |
| 9 | Makajam | 4 | Inflicts CLOSE (magic seal) on 1-3 enemies |
| 10 | Diarama | 4 | Restores a lot of HP to one ally |
| 11 | Mazio | 7 | Elec damage to all enemies, with SHOCK |
| 12 | Paraladi | 6 | Cures PALYZE on one ally |
| 13 | Marin Karin | 6 | Inflicts CHARM on one enemy |
| 14 | Diarahan | 8 | Fully restores one ally’s HP |
| 15 | Estoma | 6 | Demons below Aleph’s level stop appearing |
| 16 | Mahama | 10 | Banishes all enemies with Expel |
| 17 | Traport | 6 | Returns you to the last point where you saved |
| 18 | Tetraja | 5 | Protects the whole party from Energy Drain |
| 19 | Mazionga | 12 | Heavy Elec damage to all enemies, with SHOCK |
| 20 | Traesto | 6 | Escapes the dungeon and returns you to the entrance |
| 21 | Recarm | 12 | Revives one DYING ally (HP 1/4, MP 0). On failure the ally becomes DEAD |
| 22 | Megido | 15 | Heavy Almighty damage to one enemy group |
| 23 | Recarmdra | 8 | Fully restores the whole party’s HP and MP at the cost of the caster going down |
| 24 | Necroma | 20 | Makes DEAD demon allies fight, for the duration of the battle only |
These MP costs are the values that matched across three walkthrough sites: ore-game, Megamitensei.jp and Dai-San Hinansho. Learning all 24 requires a quotient of 24, which means Level × 2 + Intelligence + Magic has to reach 192 or more.
Full spell list | MP costs and effects for all 61 spells, demon allies’ magic included
Here is the list, including the spells your demon allies use, sorted by category. Use it to decide which spells you want passed down when you create a demon through fusion. A target of “1-3 enemies” means the spell picks enemies at random that many times.
Attack spells (23 total)
| Spell | MP Cost | Target | Effect |
|---|---|---|---|
| Agi | 3 | One enemy | Fire damage |
| Agilao | 7 | One enemy | Heavy Fire damage |
| Maragi | 5 | One enemy group | Fire damage |
| Maragion | 9 | One enemy group | Heavy Fire damage |
| Bufu | 3 | One enemy | Ice + FREEZE damage |
| Bufula | 8 | One enemy | Heavy Ice + FREEZE damage |
| Mabufu | 6 | All enemies | Ice + FREEZE damage |
| Mabufula | 11 | All enemies | Heavy Ice + FREEZE damage |
| Zio | 4 | One enemy | Elec + SHOCK damage |
| Zionga | 9 | One enemy | Heavy Elec + SHOCK damage |
| Mazio | 7 | All enemies | Elec + SHOCK damage |
| Mazionga | 12 | All enemies | Heavy Elec + SHOCK damage |
| Zan | 2 | One enemy | Force damage |
| Zanma | 5 | One enemy | Heavy Force damage |
| Mazan | 4 | All enemies | Force damage |
| Mazanma | 7 | All enemies | Heavy Force damage |
| Tentarafoo | 14 | All enemies | Nerve damage + PANIC damage |
| Megido | 15 | One enemy group | Heavy Almighty damage |
| Megidolaon | 30 | All enemies | Massive Almighty damage |
| Hama | 5 | Two enemies | Banishes with Expel |
| Mahama | 10 | All enemies | Banishes with Expel |
| Mudo | 3 | Two enemies | Instant kill with Death |
| Mudoon | 9 | 3-5 enemies | Instant kill with Death |
Debuffs and status ailments (12 total)
| Spell | MP Cost | Target | Effect |
|---|---|---|---|
| Dormina | 3 | 1-3 enemies | SLEEP (asleep) |
| Shibaboo | 3 | 1-3 enemies | BIND (bound) |
| Pulinpa | 2 | 1-3 enemies | PANIC (confusion) |
| Hapiruma | 2 | 1-3 enemies | HAPPY (happiness) |
| Marin Karin | 6 | One enemy | CHARM (charmed) |
| Makajam | 4 | 1-3 enemies | CLOSE (magic sealed) |
| Tarunda | 4 | All enemies | Lowers enemies’ attack power |
| Rakunda | 4 | All enemies | Lowers enemies’ physical defense |
| Sukunda | 2 | All enemies | Lowers enemies’ accuracy |
| Dekaja | 10 | All enemies | Nullifies -kaja effects |
| Rikaja | 5 | All enemies | Nullifies -nda effects |
| Tetra | 8 | All enemies | Nullifies magic and special attacks for one turn |
Buffs and defense (7 total)
| Spell | MP Cost | Target | Effect |
|---|---|---|---|
| Tarukaja | 4 | All allies | Raises allies’ physical attack power |
| Rakukaja | 4 | All allies | Raises allies’ defense |
| Sukukaja | 2 | All allies | Raises allies’ accuracy |
| Makakaja | 4 | All allies | Raises allies’ magic power |
| Tetraja | 5 | All allies | Guards against Energy Drain |
| Tetrakarn | 6 | All allies | Reflects normal attacks for one turn |
| Makarakarn | 6 | All allies | Reflects magic attacks for one turn |
Healing (14 total)
| Spell | MP Cost | Target | Effect |
|---|---|---|---|
| Dia | 2 | One ally | Restores a little of an ally’s HP |
| Diarama | 4 | One ally | Restores a lot of an ally’s HP |
| Diarahan | 8 | One ally | Fully restores an ally’s HP |
| Media | 6 | All allies | Restores a little HP to all allies |
| Mediarama | 10 | All allies | Restores a moderate amount of HP to all allies |
| Mediarahan | 14 | All allies | Restores a lot of HP to all allies |
| Patra | 2 | One ally | Cures minor status ailments |
| Me Patra | 4 | All allies | Cures minor status ailments |
| Posumudi | 4 | One ally | Cures the POIZON (poison) state |
| Paraladi | 6 | One ally | Cures the PALYZE (paralysis) state |
| Petradi | 10 | One ally | Cures the STONE (petrification) state |
| Recarm | 12 | One ally | Cures the DYING (death) state. HP becomes 1/4 and MP 0 after revival. On failure, the target becomes DEAD |
| Samarecarm | 24 | One ally | Cures DYING and DEAD (death). HP is MAX and MP 0 after revival |
| Recarmdra | 8 | All allies | Fully restores all allies’ HP and MP. The caster dies |
Travel and special (5 total)
| Spell | MP Cost | Target | Effect |
|---|---|---|---|
| Mapper | 2 | All allies | Displays the surrounding map. The effect expires at the new moon |
| Estoma | 6 | All allies | Demons below Aleph’s level stop appearing |
| Traport | 6 | All allies | Returns you to the last point where you saved |
| Traesto | 6 | All allies | Escapes the dungeon and returns you to the entrance |
| Necroma | 20 | One ally | Makes DEAD demon allies fight, for the duration of the battle only |
What are the systems at the core of the walkthrough? Understanding alignment, MAG and the COMP
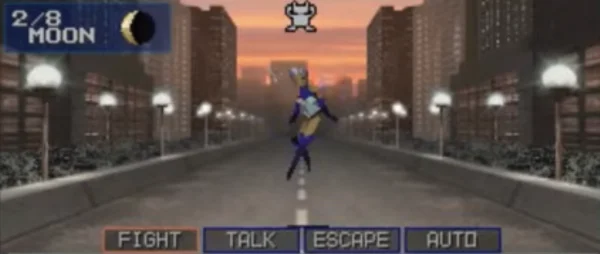
The three most important things when clearing Shin Megami Tensei II are alignment, MAG (Magnetite) and the COMP (the Demon Summoning Program). Whether or not you understand these three changes the game’s difficulty dramatically.
Alignment (LAW / NEUTRAL / CHAOS)
The hero has an invisible alignment value that shifts with the choices you make during the game. Which way that value leans, LAW, NEUTRAL or CHAOS, decides the route you take in the story’s endgame. Once a route is locked in, there’s no going back.
| Route | Tendency | Characteristics |
|---|---|---|
| LAW (Order) | Pick the choices that side with the Mesian Church and the angels | Aims for God’s Millennial Kingdom. LAW-aligned allies shine |
| NEUTRAL (Moderation) | Keep making choices that lean neither way | Holds to human free will. A balanced party works well |
| CHAOS (Chaos) | Pick the choices that side with the Gaian Church and the demons | Aims for order through strength. CHAOS-aligned allies shine |
NEUTRAL is the easiest to aim for on a first playthrough, but it’s actually the hardest to hold onto. Swing too far toward LAW or CHAOS in your choices and the route locks in without you meaning it to. When in doubt, make a point of answering in a balanced way.
Managing MAG (Magnetite)
MAG is a resource that drains with every step you take while demon allies are summoned. Higher-level allies consume more of it, so dragging strong allies around burns through MAG like water. Once MAG hits 0 your allies’ HP starts getting shaved away, so you need to secure enough MAG before you explore a long dungeon.
You earn MAG by winning battles and through conversation negotiation with demons (taking MAG instead of a tribute item). Before you take on an enormous dungeon of over 250 tiles like Old Suidobashi, you want at least a few thousand MAG banked.
The COMP and demon fusion
The COMP is the terminal for summoning and managing demons, and it stocks up to 12. At the Cathedral of Shadows you perform two-demon and three-demon fusions to build more powerful allies. This game introduces a LEVEL restriction the first game didn’t have (fusion can’t create a demon above the hero’s level), so balancing level grinding against fusion matters.
Area-by-area walkthrough chart: a progress guide from Valhalla to the Underworld
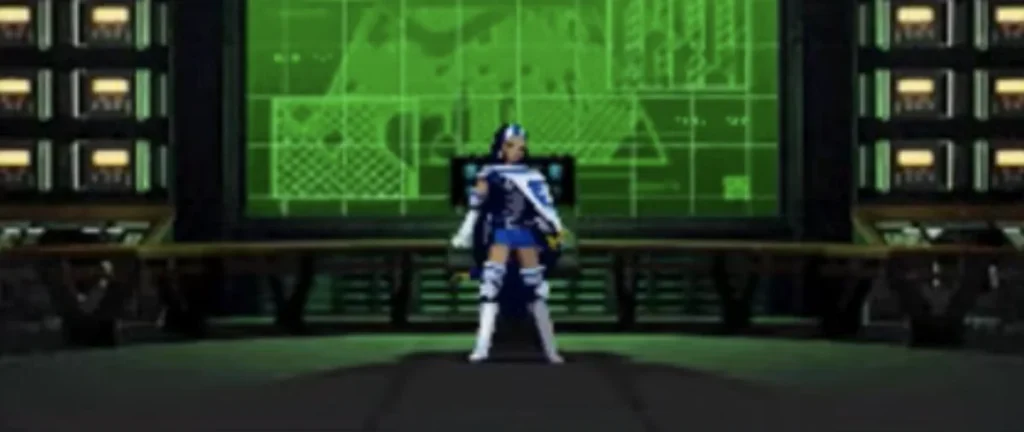
The story of Shin Megami Tensei II advances by touring the six areas of Tokyo Millennium in order. The Center forms a hub that connects every area, and you reach each area through the Center’s connecting passages. The chart below organizes each area’s objective and the points that need care.
| Order | Area | Main objective | Maps |
|---|---|---|---|
| 1 | Valhalla | Aim for the championship in the arena. Work through Okamoto Gym, then Ote Gym, then the Colosseum | 10 |
| 2 | The Center | The Mesian Church’s home base. Explore floors 20 to 22. The hub for the connecting passages to every area | 8 |
| 3 | Holytown | Clear the Grand Cathedral 1F to 3F. Dealings with the Temple Knight Zayin | 6 |
| 4 | Factory | Expose the truth of the industrial district. Pass through the underground excavation site and the internment camp into the Underworld | 6 |
| 5 | Arcadia | The truth behind the utopia. The event at Gimmel’s residence | 3 |
| 6 | The Underworld | The ruins of old Tokyo. Traverse Old Shinjuku, Old Higashi-Shinjuku, Old Akasaka and Old Roppongi | 5 |
| 7 | The Expanse | The final stretch. Tiphereth through Keter Castle. The route-specific final battle | — |
* The flow from the Expanse onward is collected at the end of this chapter under “From the Expanse to the Ark.” Maps for the Expanse, the shrines and the extra dungeons are in the second half of the MAP walkthrough chapter.
Valhalla: conquer the arena and move on to the Center
The area you start the game in. The hero Hawk (later revealed to be Aleph) takes basic training at Okamoto Gym and sharpens his skills in Downtown’s Virtual Battle. He switches his affiliation to Ote Gym, takes on the Colosseum tournament, and becoming champion earns him an invitation to the Center.
Downtown is a roomy 24 tiles east-west by 12 north-south and serves as your early-game base. Virtual Battle is a mock combat area that exists in every district, and they all share the same 24 by 11 tile structure. There’s an important encounter in the Slums (24 by 16 tiles), so don’t miss it. Madam’s Mansion is worth a visit as well.
The Center: the Mesian Church’s core and the connecting passages to every area
The Center, the Mesian Church’s home base, is a hub area you end up visiting over and over across the whole game. Floors 20 and 21 are large 24 by 12 tile floors, each with 129 to 132 tiles of floor space. Floor 22 is a small floor (24 by 4 tiles) that holds the bishop’s office.
The important part is the four connecting passages. Center to Holytown, Center to Factory, Center to Arcadia and Center to Valhalla each exist as an independent map. Their structures are so alike that it’s easy to get lost, but compare the maps and you should be able to tell each passage apart.
Holytown: clearing the Grand Cathedral
The Mesian Church’s holy ground. The Grand Cathedral is built across three levels, 1F to 3F, and every floor is a near-square 24 by 8 tiles. It’s an area closely bound up with the Temple Knight Zayin, with plenty of events that touch the heart of the story. Grand Cathedral B60 is a special floor (24 by 4 tiles) that factors into story progress.
Factory: the underground excavation site and Old Suidobashi
In the industrial district of Factory you explore the workers’ dormitory and the underground excavation site. This area has two trouble spots. One is the underground excavation site (24 by 18 tiles, 88 floor tiles), a huge floor laced with tangled passages. The other is Old Suidobashi, the passage to the Underworld (24 by 16 tiles, 250 floor tiles), the largest-class dungeon in the game. Running out of MAG here leads straight to a wipe. Secure plenty of reserves before you take it on.
The internment camp (24 by 18 tiles, 110 floor tiles) is pretty big too. Across the Factory area as a whole, this is where checking the map matters most.
Arcadia: the other side of the utopia
Arcadia is the smallest area at only three maps, but its importance to the story is high. An event involving Gimmel fires in the Arcadia residences (24 by 9 tiles), and Gimmel’s residence (24 by 4 tiles) takes you to the core of it. The Mesian Building has the same structure as the ones in other areas.
The Underworld: traversing the ruins of old Tokyo
Beyond Factory’s Old Suidobashi lie the underground remains of what was once Tokyo. Old Shinjuku (24 by 18 tiles, 220 floor tiles), Old Akasaka (24 by 18 tiles, 212 floor tiles) and Old Roppongi (24 by 22 tiles, 237 floor tiles) come one after another, every one of them an enormous floor topping 200 tiles. This is the easiest area in the game to get lost in, and getting through it without a map is extremely hard.
Old Higashi-Shinjuku holds Puck’s hideout, which becomes your base in the Underworld. Get through Old Roppongi and the road to the Expanse opens up, but note that maps for the Expanse area are not included in this article.
From the Expanse to the Ark: touring the Sephirah from your base in Tiphereth
Step through the door to the Expanse that opens in the Grand Cathedral and the story enters its second half. The Expanse is a cluster of towns linked by corridors with Tiphereth at the center. You beat the corridor bosses, collect the keys, and finally reach Keter Castle. Maps for each dungeon are in the MAP walkthrough chapter, so compare them against the table below as you go.
| Dungeon | Objective and boss |
|---|---|
| Tiphereth | The town that serves as your base in the Expanse. Recruit Petersen, who stands just south of the spot you warp in from the Grand Cathedral (refusing tilts you toward CHAOS). Reach Reverse Arcadia through the spatial distortion to the east |
| Reverse Arcadia | Simply a climb from 1F to 5F. Every treasure chest holds Luck Incense. Fight Gimmel on the top floor and decide whether Arcadia survives |
| Yesod | STEVEN makes it possible for you to use the Terminal Stone. Stock up on weapons, then head east to the Yetzirah Corridor |
| Yetzirah Corridor | The Tyrant Hecate waits at the center. Beat her and you can move on to Hod and Netzach. The entrance to Tiphereth needs two keys |
| Hod | No residents and no shops, just the lair of the Drake Tiamat. There is at least a healing facility |
| Netzach | Crowley only appears on the night of a full moon. Enter at moon phase 7/8 and let the full moon arrive in the boss’s room |
| Inside Abaddon | Traport and Traesto don’t work. You meet Madam in event A, receive the MAG Presser from Megata in the Slums you warp to, and only then can you fight Abaddon |
| Beriah Corridor | Almost all of the stairs on B2F are dummies. Stairs 15 lead to Chesed Temple, stairs 4 to Geburah Fortress. Handle the dark zones with Mapper |
| Chesed Temple | Not required to progress, but Beth’s soul in event A raises every ability by 1. On LAW or NEUTRAL you fight the Deity Vairocana |
| Geburah Fortress | Beat all of the Twelve Divine Generals to reach Daigensui Myo-o. Chatsura reflects guns and Santira reflects swords, so use magic |
| Atziluth Corridor | You come out at the stairs on the Binah side, so go to Binah first. Then come back and exit toward Chokmah. There’s no boss |
| Binah | Recruit the Tyrant Astaroth as an ally and go to the temple, and he splits into Ishtar and Ashtar. Ishtar is excellent as a healer |
| Tower of Chokmah | Four levels. The terminal is save-only and can’t teleport you. Beat the Tyrant Mara and a warp opens to Keter |
| Keter Castle | The biggest dungeon. There are no treasure chests at all and the encounter rate is high. On 1F, stairs 1 north of the entrance is the right answer. For Beelzebub’s room take stairs 12, then 17, then 21 on 3F |
| The Ark, 52F to 55F | On CHAOS and NEUTRAL you advance by beating each floor’s boss. On LAW there are no bosses and you go straight to the final battle. You can’t return to the surface once you enter, so keep a separate save |
| Higher-Dimensional Space | The site of the final battle |
Five points where players most often get stuck
① Alignment branches can’t be taken back
This game’s alignment branches lock in at specific events. The game never spells out which choices lean LAW or CHAOS, so you can end up on a route you never intended. If you’re aiming for a particular route on your first playthrough, I strongly recommend looking up the effects of the major choices in advance. Spread your saves across multiple slots and keep them.
② Getting lost in the Center’s connecting passages
The four connecting passages that run from the Center to each area have very similar structures. Check which passage leads to which area at the entrance before you push on. Walking the wrong passage on and on while MAG drains away is something you want to avoid. This article lists each of them as an independent floor, so compare them.
③ The vast maps of Old Suidobashi and the Underworld
Old Suidobashi (250 floor tiles) and the Underworld’s maps (over 200 floor tiles each) are the most expansive group of dungeons in the game. They’re full of dead ends and complicated branches, and MAG drains fast. Always save when you find a terminal (save point), and make use of Estoma (the enemy-avoidance spell) to hold down MAG consumption.
④ Overlooking the point of Virtual Battle
The Virtual Battle zones that exist in every district are mock combat areas, all with the same 24 by 11 tile structure. Some have no direct bearing on story progress, but they’re excellent places to grind levels and gather allies. The Center’s Virtual Battle in particular is well suited to farming MAG. Put them to use whenever you spot one.
⑤ Going into the Expanse underprepared
Once you leave the Underworld and push into the Expanse, enemy strength jumps a whole tier. Maps for the Expanse are collected in the MAP walkthrough chapter, and the basics of clearing it are the same, but get your levels up (Lv50 or higher at minimum is recommended), stockpile a mountain of MAG, and build a party of allies whose alignment matches the route you’re aiming for before you take on the Expanse.
MAP Guide: Floor Maps for the 38 Underground City Areas and the 32 Netherworld and Extra Dungeons (shared by the SFC and PS versions)
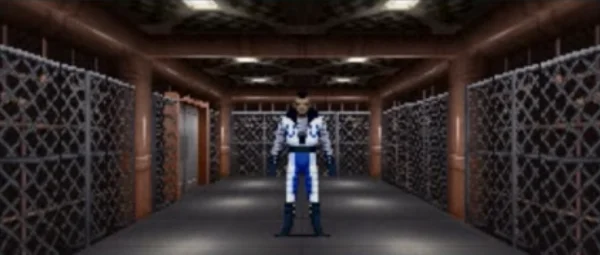
From here we lay out floor maps covering all 6 areas and 38 maps. The maps were built by reading coordinates straight out of the SFC version’s image data, which means one thing—they work as-is on the PS and GBA versions, because the dungeon layout is identical in every version. The gray bands are walls and the white areas are passages. Each map’s horizontal axis runs east and its vertical axis runs north, matching the coordinate readout on the in-game automap.
Every area is collapsed, so open only the ones you need. For the Netherworld (Tiphereth through Keter Castle), the Underworld shrines and the Sealed Iwato Caves, the Ark, and post-game extra dungeons such as the Diamond Realm, we have added 32 Dungeons and 101 Floors drawn up from a separate source in the second half of this chapter. Those maps use marks to show chest contents and event locations.
Every Map for the Netherworld, the Shrines and the Extra Dungeons, with Chest Contents and Event Locations
The 32 Dungeons from here on were redrawn tile by tile from map images on walkthrough sites. On top of walls and doors, one-way passages and dark zones, the marks carry chests and gem boxes, the matching numbers for stairs and warps, and the spots where boss fights and events happen. Put the cursor on a mark and you get the chest contents or the opponent in that event. Unlike the underground city maps these have no coordinate labels, so line your position up by the shape of the room.
How to read the additional maps
WallDoorDoor that opens once conditions are metDark zoneNo COMP or magic useVirtual space
UUp stairs
DDown stairs
EElevator
WWarp entrance
wWarp exit
WWarp (entrance = exit)
PtPitfall
LdLanding point
TrChest
GbGem box
BsBoss battle
!Event (A through L match the explanations in the text)
?Person who hands you information
FdFiend spawn point
ExEXIT
SStart
HPDamage floor
TtTurntable
↑Moving floor
TTerminal
SpHealing spring (the color shows the alignment)
McMessian Church
CdCathedral of Shadows
WpWeapon shop
ArArmor shop
JkJunk shop
BrBAR
FtFortune teller’s house
CnCasino
DsDisco
RRussian Roulette
* Put the cursor on a mark and its contents show up (chest contents, event names and so on). The numbers on stairs, warps and pitfalls match up between a spot and its destination. There are no coordinate labels, so read the maps by room shape and by where the symbols sit relative to one another
If you want the highlights: the Shrine of Onamuchi, buried wall to wall in moving floors; Geburah Fortress, where the Twelve Divine Generals line up across 12 event spots; and Keter Castle, which is nothing but stairs. Keter Castle holds zero chests, so the right play is to skip the detours and follow the stair numbers straight through.
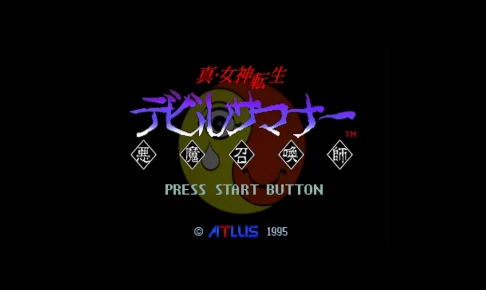
Can you play Shin Megami Tensei II on current hardware? A complete platform-by-platform guide
✅ Conclusion
As of September 2026, Shin Megami Tensei II can be played through a Nintendo Switch Online subscription (the SFC version). Smartphone versions (iOS/Android) were released as well, but their current availability needs checking. There is no current-hardware port of the PS or GBA versions.
① Titles you can play on a subscription or for free
| Platform | Contents | Notes |
|---|---|---|
| Nintendo Switch Online | SFC version of Shin Megami Tensei II | Added February 17, 2021. No extra charge for subscribers |
Right now the easiest way in is the Nintendo Switch Online version. It’s the SFC version itself, so the maps in this article work as-is. Rewind and save-anywhere features are available, which makes it far more playable than the original.
② Titles you can play by buying them individually
| Platform | Contents | Notes |
|---|---|---|
| iOS | Shin Megami Tensei II | Released June 2012. Continued availability needs checking (as of September 2026) |
| Android | Shin Megami Tensei II | Released December 2012. Continued availability needs checking (as of September 2026) |
The iOS and Android versions launched back in 2012, but how well they keep pace with OS updates is fluid. I’d recommend checking compatibility on the store before you buy.
③ Titles you can play as a remaster or remake
As of September 2026, no remaster or remake of Shin Megami Tensei II exists. Within the series, Shin Megami Tensei III Nocturne HD Remaster (2020, Switch/PS4/Steam) and Shin Megami Tensei V: Vengeance (2024, Switch/PS4/PS5/Xbox/Steam) are playable on current hardware, but no modern remaster of II itself has been announced.
④ Titles that are hard to obtain on current hardware
| Version | Status | Alternative |
|---|---|---|
| SFC cartridge | Secondhand market only | Nintendo Switch Online (SFC version) recommended |
| PS disc | Secondhand market only. Watch out for bugs in the early print run | Nothing in particular. Substitute with Nintendo Switch Online (SFC version) |
| GBA cartridge | Secondhand market only | Nothing in particular |
To play the PS version you need the actual hardware (PS1/PS2/PS3) and the disc. The GBA version also means securing both the console and the cartridge secondhand. Neither is easy to obtain on current hardware, so simply playing the SFC version on Nintendo Switch Online is the most realistic choice. If you’re curious about the newest entry in the Shin Megami Tensei series, Shin Megami Tensei V: Vengeance is playable on Switch, PS4, PS5, Xbox and Steam.
Enjoying this article? Add us as a preferred source on Google.
Summary: Shin Megami Tensei II is an RPG about rebellion against a managed society
Shin Megami Tensei II is a 3D dungeon RPG whose SFC version Atlus released on March 18, 1994. The PS version (2002) and GBA version (2003) have completely identical dungeon structures, so this article’s maps for all 38 areas work as-is on any version. As of September 2026, playing the SFC version on Nintendo Switch Online is the easiest way in.
Look at the MAP walkthrough chapter before you step into a dungeon, and come back to the skill table chapter whenever you’re unsure about fusing or raising allies. The route from the Expanse onward is collected at the end of the walkthrough chart.
The core of the game is managing alignment (LAW/NEUTRAL/CHAOS) and stockpiling MAG. It’s built around shuttling between six areas with the Center as your starting point, and Factory’s Old Suidobashi (250 floor tiles) plus the Underworld’s Old Shinjuku, Old Akasaka and Old Roppongi (over 200 tiles each) are the biggest trouble spots. When you’re staring down maps that vast, this article’s floor maps should earn their keep.
In the end the ending branches across three routes, LAW, NEUTRAL and CHAOS. On a first playthrough, keep the route-deciding moments in mind but take it easy and plan on three playthroughs. Note that maps for the Expanse area (Tiphereth through Keter Castle) aren’t part of this article’s sources, so they aren’t covered here. Please fill in the Expanse walkthrough from other information.
If the first Shin Megami Tensei was wasteland survival, II is a whistleblower report from inside a managed society. The story’s range, from Valhalla’s arena to the Center’s conspiracy and on to the underground remains of old Tokyo, has a sense of scale that stands among the best of 90s RPGs. The maps are as complicated as the first game’s, but just having the automap’s coordinate readout makes it vastly more bearable. On the other hand, the PS version’s early print run bugs and the sudden difficulty spike once you enter the Expanse are still rough to deal with today. Use Nintendo Switch Online’s rewind feature to the fullest and taste all three endings: LAW, NEUTRAL and CHAOS.
Order, chaos, or the human will? Thirty years on, the question still has no answer.
Read Next
Snicker Kitamura





Leave a Reply