






Enjoying this article? Add us as a preferred source on Google.
- The full story of Dimguil, the finale of PS1’s only Gaiden-line Wizardry
- How to tell the buggy release from the fixed one, plus the Gaiden IV character transfer
- 11 races, 14 classes, the Area X passwords and how card battles work
- A walkthrough chart for all 12 areas with coordinates (dial safe solution included)
- Floor maps for all 42 floors with coordinates (full 24×24 grid)
The Wizardry Gaiden line is a monument to the way Japan took the dungeon RPG and evolved it on its own terms. Its final entry is also the odd one out, the only game in the line that never wore the word “Gaiden” on its cover: Wizardry Dimguil, released for PS1 in 2000. A world built on Mesoamerican mythology, the largest race and class roster in the series at 11 races and 14 classes, and a monstrous labyrinth spanning 12 areas and 42 floors. Clearing it without a guide is, frankly, brutal.
The heart of this game is a chain of key items. Beat the four pillar bosses out in the field to get the Sun Tablet, grab the Jade Mask in the temple, then unlock each area with its Area X password. Miss a single link and you simply cannot advance, and plenty of puzzles, like the dial safe in Area B and the cipher in Area D, are handed to you with no hint at all.
This guide follows the PS1 version exactly, with a coordinate-marked walkthrough chart and 24×24 floor maps for all 42 floors. Coordinates are written in the “E#, N#” format throughout, so you can track your destination in the text and on the map at the same time.
For what it’s worth, I played this one right when it launched. I was stuck on the Area B dial safe for three days and ended up running to Akihabara to buy a strategy book. Back then, the solution to that safe barely existed anywhere online.
*Prices in this article are converted from Japanese yen at ¥153 = US$1 (September 2026 rate).

What kind of game is Wizardry Dimguil? The full picture of the Gaiden line’s finale
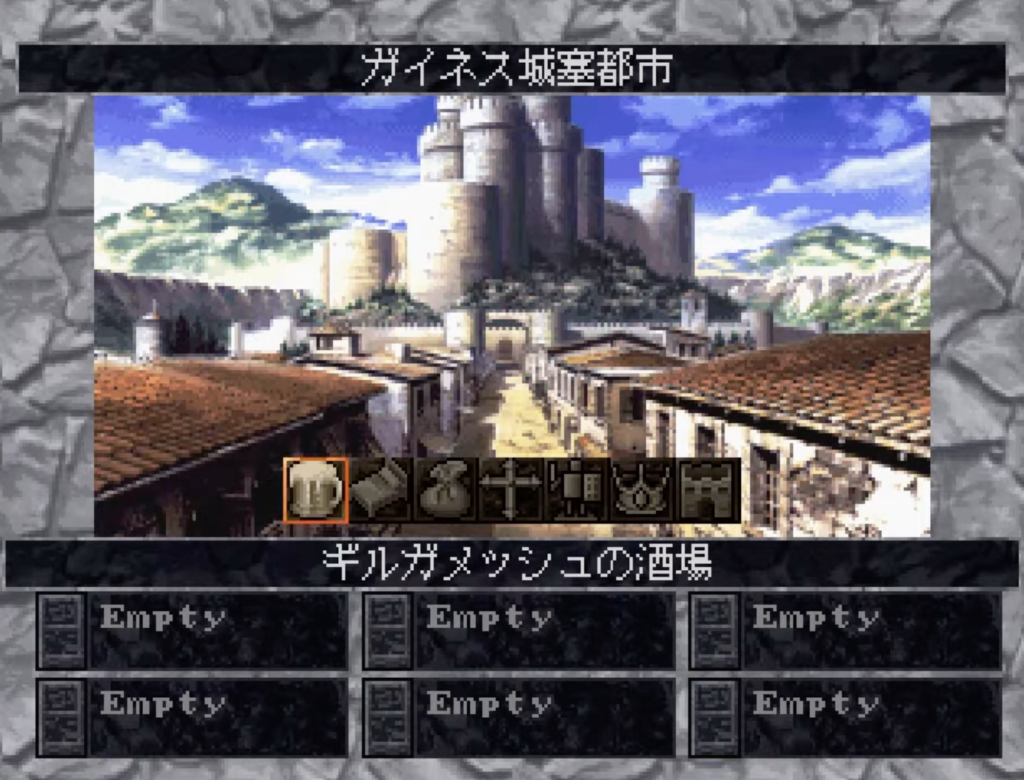
Wizardry Dimguil is a PS1-exclusive first-person 3D dungeon RPG, and the fifth and final entry in the Japan-only Gaiden line.
| Item | Details |
| Title | Wizardry ~DIMGUIL~ |
| Release date | April 20, 2000 |
| Platform | PlayStation (PS1 exclusive) |
| Publisher / developer | ASCII / developed by Access |
| Price | US$44 (before tax) |
| Product code | SLPS-02691 |
| Place in the series | Fifth and final Gaiden entry; the only one without “Gaiden” in its title |
| Races / classes | 11 races, 14 classes (most in the series) |
| Size of the labyrinth | 12 areas, roughly 42 floors (each floor 24 east-west by 24 north-south) |
| Final objective | Defeat Quetzalcoatl in Area Z and claim the Priestess’s Bracelet |
| Character design | Hiroyuki Suwahara |
| Theme song | Akina Nakamori, “Tsuki no Hohoemi” |
The setting is Gaines, a fortified city built on the shore of Lake Cara. A world modeled on the ancient civilizations of Mesoamerica sets it clearly apart from the medieval-European flavor of the earlier Gaiden games. Using Gaines as your base, you explore the field, the temple and the underground temple, then pass through Area X to conquer six areas (A through E and Z) plus the Training Grounds and the Dragon’s Cave.
As the culmination of the Gaiden line, its 11 races and 14 classes are the largest roster the series ever offered. Alongside Gaiden originals like the Dragonewt, Devil and Angel, the class list is deep too, with Ranger, Valkyrie, Samurai and Ninja all on the table. Hiroyuki Suwahara handled character design, and Akina Nakamori’s “Tsuki no Hohoemi” serves as the theme song, the kind of lavish presentation only the PS1 era could bankroll.
What’s the difference between the buggy and fixed versions of Dimguil? Plus the Gaiden IV carryover
Dimguil exists in a buggy release (the initial shipment) and a fixed release. This guide follows the PS1 version and is written against the fixed release.
How to tell the buggy release from the fixed one
You can’t really tell them apart by looking at the box or the disc, but the game’s behavior gives it away. On the buggy release, certain event flags fail to set properly, and there are reported cases of the game becoming unbeatable. Be careful if you’re buying used. The fixed release still carries the SLPS-02691 product code, but the disc’s mastering date is said to differ.
Password transfer from Gaiden IV
Enter the password issued by the previous game, Wizardry Gaiden IV: Throb of the Demon’s Heart, and you can carry your characters over into Dimguil. Transferred characters start with their levels and gear intact, which dramatically softens the early game. That said, you can absolutely finish the game without transferring anything. Building a fresh party from scratch is its own kind of Wizardry pleasure.
The only Gaiden finale on PS1
The Gaiden line began with Gaiden I through III on Game Boy, continued with Gaiden IV on PlayStation, and wrapped up here with Dimguil. Gaiden I through III on Game Boy, Gaiden IV on PS1, Dimguil on PS1 too, a series that hopped platforms as it went. And again, Dimguil is the only Gaiden entry that doesn’t carry the word “Gaiden” in its name. The official title is Wizardry ~DIMGUIL~, so there must be plenty of players who finished it without ever realizing it was a Gaiden game.
Which systems do you need to understand to beat Dimguil? 11 races and 14 classes, card battles and the key item chain
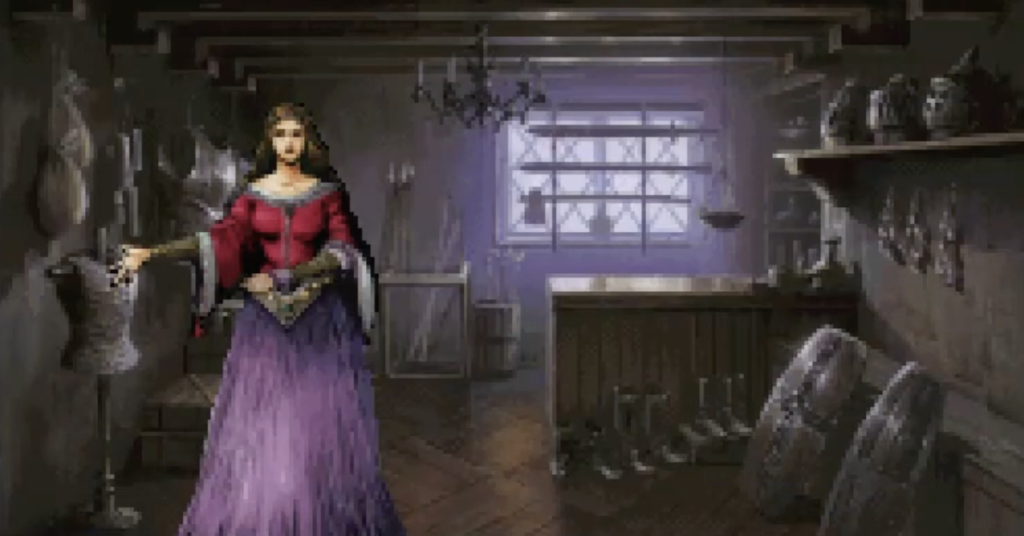
There are three systems you really need to grasp before pushing through Dimguil: how to pick races and classes, the key item chain, and card battles.
Mixing 11 races with 14 classes
You build characters from a pool of 11 races and 14 classes. Each race carries different stat modifiers, and the requirements for entering a class shift by race too. For the walkthrough, these are the points that matter most.
| Category | Details |
| Races (11) | Human, Elf, Dwarf, Gnome, Hobbit, Felpurr, Lycant, Dragonewt, Devil, Angel, Faerie |
| Base classes (8) | Fighter, Mage, Priest, Thief, Bishop, Samurai, Lord, Ninja |
| Advanced classes (6) | Ranger, Valkyrie, Monk, Cleric, Bard, Dragon Slayer |
| Recommended party | Three in front (a Fighter-type plus Lord and Samurai) and three in back (Priest, Mage, Bishop) |
The Dragonewt hits hard and suits the Fighter and Samurai roles, while the Angel has strong Priest aptitude. The Faerie is fragile but has standout Mage potential. On a first playthrough, a Dragonewt Fighter up front and an Angel Priest in the back will keep things stable.
The key item chain: what to get, and in what order
In Dimguil, the order in which you collect key items is everything. Understand the chain below and your odds of getting lost in the labyrinth drop sharply.
| Order | Key item | Where to get it | What it does |
| 1 | Sun Tablet | Field (after beating the four pillar bosses) | Opens the temple interior |
| 2 | Jade Mask | Temple interior 4F, E14, N7 | Reveals the hidden passage in Area C |
| 3 | Colored stones (red, blue, yellow, silver and more) | Underground temple through the various areas | Requirement for activating the Area X password panel |
| 4 | Red Stone | Area B, B5F, E4, N12 | One of the conditions for entering Area Z |
| 5 | Priestess’s Bracelet | Area Z (after defeating Quetzalcoatl) | Triggers the ending |
| 6 | Demon Statue | Collected across the areas | Required for the Diamond Drake fight in the Dragon’s Cave |
Card battles
Separate from dungeon crawling, Dimguil includes a card battle minigame. Played at a facility in town, it has you collecting monster cards and dueling with them, and it has no direct bearing on the main quest. Still, there are rare items you can only obtain through card battles, so it’s hard to write off as an extra. Playing a few rounds as a breather isn’t a bad way to spend your time.
All 12 areas: walkthrough chart with coordinates
From here on, the key points of each area are tracked by coordinate. The notation is “E#, N#”, and every floor of the labyrinth is 24 tiles east-west by 24 tiles north-south.
Field: beat the four pillar bosses and take the Sun Tablet
The field map is the first thing you explore once the game begins. Defeat all four bosses posted around its edges, Cuauhtli, Ocelotl, Coatl and Itzcuintli, and the Sun Tablet is yours. The bosses appear near the four corners of the field, and at starting levels they’re rough going. The safe play is to shuttle between town and the labyrinth until you’re around level 10, then take them on.
- Four corners of the field: the pillar bosses (Cuauhtli / Ocelotl / Coatl / Itzcuintli)
- After all four fall: get the Sun Tablet, which opens the temple interior
Temple interior (1F to 4F): secure the Jade Mask

This is the first real dungeon, opened with the Sun Tablet. It runs four floors deep, and the single most important item is the Jade Mask on 4F.
- 1F to 3F: standard exploration. Monsters take a step up in strength, so get your gear in order
- 4F, E14, N7: the Jade Mask (essential later for spotting the hidden passage in Area C)
- 4F boss: Chany Mask (waiting in the depths of 4F; beating it opens the road to the underground temple)
Underground temple (B1F to B4F): collect the colored stones
This area sprawls beneath the temple, and it’s where you pick up the colored stones. Those stones are the keys that activate the password panel in Area X.
- B1F to B2F: midbosses like the Ice Lock and the Guardian show up
- B3F: Two-Headed Snake (fixed battle)
- B4F: Gas Cloud. Grab the stone at the deepest point of the underground temple
Area X: unlock each area with five passwords
Push past the underground temple and you reach Area X. It houses a password panel, and entering the correct password opens the door to each area (A through E). You’re meant to deduce the passwords from in-game hints, but they’re all listed below.
| Password | Area unlocked |
| STAFF | Area A |
| LABORATORY | Area B |
| WAREHOUSE | Area C |
| ENERGY | Area D |
| COCKPIT | Area E |
The default clear order is A, B, C, D, E, though you’re free to shuffle it depending on your gear and levels. One caveat: Area C requires the Jade Mask from temple 4F, so if you skipped it, go back and get it.
Area A (B1F to B4F): recover the four-piece golden equipment set
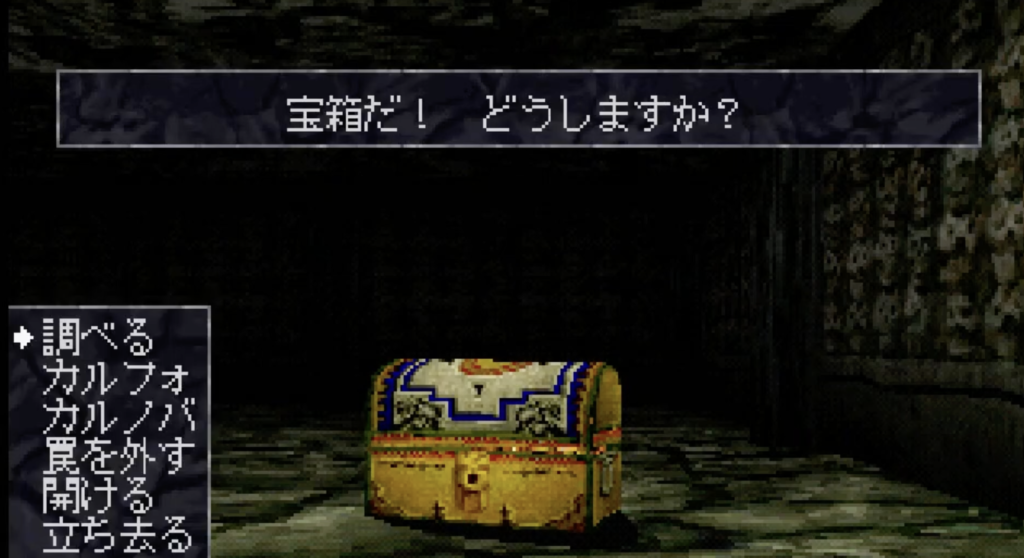
Area A has a relatively simple layout, and your main goal here is recovering the four-piece golden equipment set. Golden gear is excellent on both offense and defense, and it makes the midgame onward far more manageable.
- B1F to B3F: standard exploration. Watch for chest traps (teleporter traps in particular are everywhere)
- B4F: pick up the four-piece golden equipment set (Golden Sword, Golden Armor, Golden Shield, Golden Helm)
Area B (B1F to B5F): the dial safe solution and the Red Stone
Waiting at the bottom of Area B, on B5F, is the dial safe, arguably the single hardest obstacle in the game. There is no way to solve it without a hint, so here’s the answer for the record.
- B1F to B4F: standard exploration. Monsters spike hard from B3F onward
- B5F, E7, N11: the dial safe
Dial safe solution (B5F, E7, N11)
Small dial: turn it 135 degrees right, then the middle dial 45 degrees left, then the outer dial 90 degrees right
- B5F, E5, N12: Ruby Hand (fixed battle; beat it to push deeper)
- B5F, E4, N12: the Red Stone (one of the conditions for entering Area Z)
Area C (B1F to B4F): conveyor floors and where the Jade Mask comes in
Area C is defined by its conveyor floors, which shove you along the moment you step on them. Because of that, there are sections you simply can’t reach through normal exploration. Equip the Jade Mask and passages and switches that were invisible become visible.
- B1F, E10, N6: control panel
- B1F, E10, N7: C Door, leading into the conveyor floor section
- B4F, E5, N2: equip the Jade Mask to see the blue floor (entrance to the hidden passage)
- B4F, E5, N11: Guardian (fixed battle)
- B4F, E5, N12: switch (makes the red floor vanish so you can continue)
- B4F, E4, N13: secret door
- B4F, E2, N20: conveyor floor shutoff switch (step on it and every conveyor floor in the area stops)
- B4F, E5, N21: warp (sends you back near the B1F entrance)
Area D (B1F to B3F): the cipher answer is “DIMGUIL”
Area D is fairly compact, but at its lowest point it demands a cipher. Without the answer, you’ll never get past it.
- B1F to B2F: standard exploration
- B3F: cipher input panel. The answer is “DIMGUIL” (the game’s own title)
- Deep in B3F: camouflage mode is dispelled, triggering the Mother fight (fixed boss)
Mother is Area D’s boss, and beating her fully opens the road to Area E. The Mother fight tends to drag, so go in with plenty of MP in reserve.
Area E (B2F to B4F): killing Cleo and the elevator to Area Z
Area E is the climax of the main story. Defeat Cleo on B4F and the elevator to the final area, Area Z, unlocks.
- B2F, E13, N12: elevator entrance
- B2F, E12, N15: north door
- B2F, E12, N6: stairs down
- B3F, E12, N6: stairs down
- B3F, E11, N7: teleporter
- B3F, E10, N5: elevator
- B3F, E2, N11: hidden door
- B3F, E4, N12: full MP recovery point (precious; always use it before the boss fight)
- B4F, E11, N21: hidden door
- B4F, E12, N6: BRIDGE door
- B4F, E12, N12: Cleo fight (fixed boss, the guardian of Area E)
- B4F, E12, N13: elevator to Area Z
Having a full MP recovery point (B3F, E4, N12) right before the Cleo fight is a mercy. Backtracking to it costs time, but going in at full strength changes the difficulty enormously.
Area Z: final boss Quetzalcoatl
Area Z is a small, single-floor area, and it’s where the final boss Quetzalcoatl waits. Named for the feathered serpent of Mesoamerican myth, this boss commands magic of every element and hits like a truck physically too.
- Area Z: Quetzalcoatl (final boss)
- After the kill: get the Priestess’s Bracelet, clearing the main scenario
In the Quetzalcoatl fight, countermeasures against group magic attacks are non-negotiable. Give every party member an item that guards against MAKANITO and lean hard on your Priest’s MADI (full-party healing). Aim for an average party level of 30 or higher. A full set of golden equipment keeps you safe on the physical side, but thin magic defense can wipe you in a single hit.
Training Grounds (B1F to B8F): the Priestess’s Door and the Card of Change
One of the postgame pursuits after clearing the main scenario is the Training Grounds. It runs eight floors deep, and the Priestess’s Door sits on B8F.
- B5F chest: the Card of Change (a rare item used to change a character’s class)
- B8F, E10, N11: the Priestess’s Door (opens once specific conditions are met)
Dragon’s Cave (B1F to B3F): superboss Diamond Drake
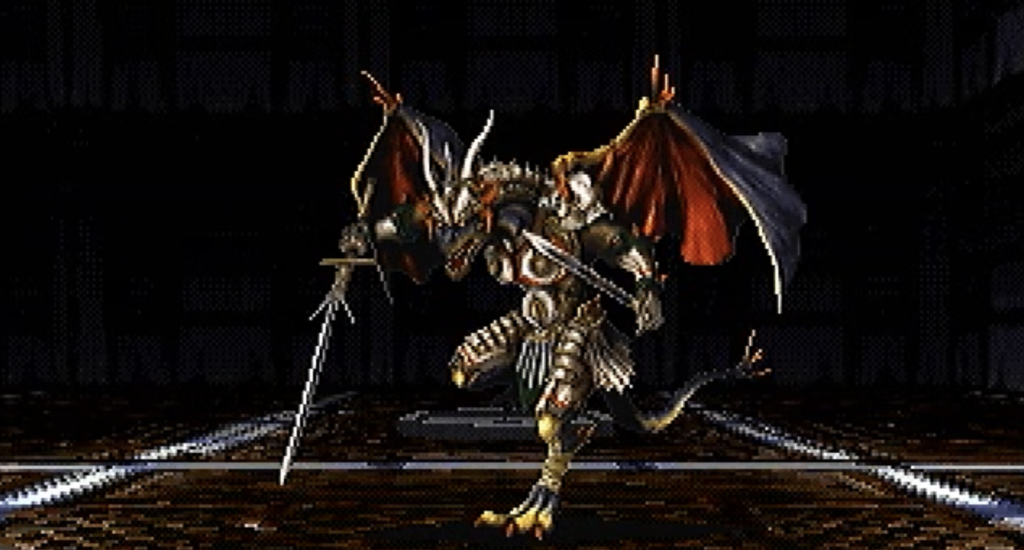
This is the hidden dungeon where the Diamond Drake, a traditional Wizardry superboss, holds court. You need the Demon Statue to enter, and the Diamond Drake is enthroned at the deepest point of B3F.
- B1F: you can’t enter without the Demon Statue in hand
- B3F: the Diamond Drake (superboss with stats among the highest in the series)
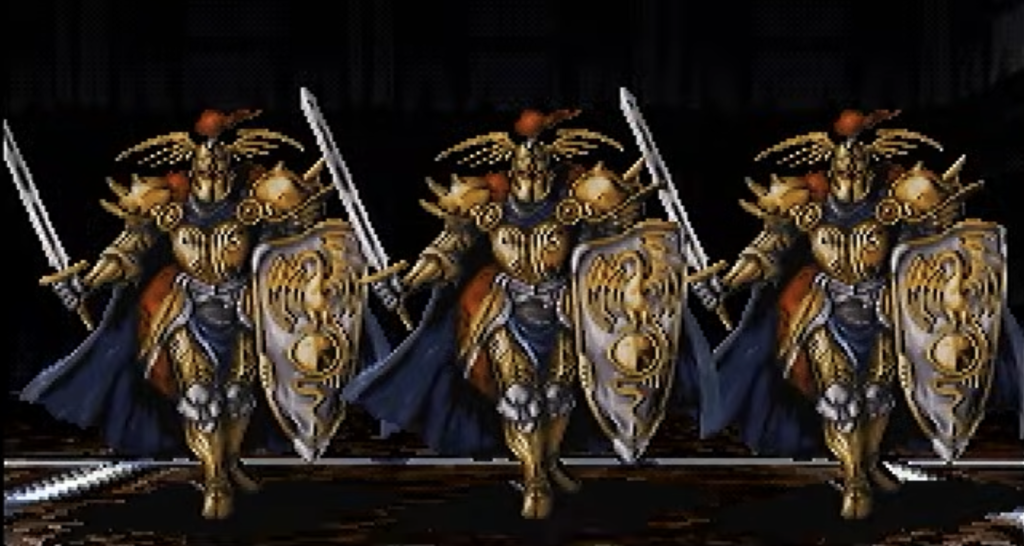
The Diamond Drake is the series’ familiar wall of hit points. Come at it in the high 40s, or ideally past level 50. Betting on a Ninja decapitation or a Samurai critical with Muramasa works, but a lot of it comes down to luck.
Five places players get stuck
1. The Area B dial safe (B5F, E7, N11) won’t open
The game gives you almost no hint toward the dial safe’s solution. The answer is “small dial 135 degrees right, middle dial 45 degrees left, outer dial 90 degrees right.” Get a step wrong and you start over from the beginning, so work through it one careful turn at a time.
2. You can’t progress in Area C (you forgot the Jade Mask)
B4F of Area C has a hidden passage that stays invisible unless the Jade Mask is equipped. You should already have the mask from temple interior 4F at E14, N7. Don’t “use” it from the item menu, “equip” it. It does nothing while it’s sitting unequipped.
3. You can’t crack the Area D cipher
The answer is “DIMGUIL,” the game’s own title. It’s a meta puzzle, and the information inside the game barely gets you there.
4. You miss the full MP recovery point in Area E
There’s a full MP recovery point at B3F, E4, N12. Charge into the Cleo fight without knowing about it and you’ll likely run dry on MP and stall out completely. Always stop by before facing Cleo.
5. Event flags don’t set on the buggy release
On the initial shipment (the buggy release), some flags don’t behave correctly. If you pick up a used copy, the first thing to check is whether it’s the fixed release. Since there’s no clear external difference, the only real recourse right now is cross-referencing serial number lists posted online.
MAP guide: floor maps for all 42 floors
From here on you’ll find floor maps for all 42 floors. Each map is 24 tiles east-west by 24 tiles north-south, with gray bands for walls and red dashed lines for doors. Hover your cursor over a marker to see what happens on that tile.
The map images are based on the in-game automap of the PS1 version (a 24×24 grid). Hidden doors look exactly like walls until you find them, so some spots are drawn as walls here. If you’re exploring and get the feeling that “there’s a room behind this wall,” try your Thief’s search-for-secret-doors command.
Map symbol legend
Field: the four pillar bosses and the Sun Tablet
FIELD MAP (horizontal = East 0–19 / vertical = North 0–19)
Temple Interior 1F
TEMPLE 1F MAP (horizontal = East 0–19 / vertical = North 0–19)
Temple Interior 2F
TEMPLE 2F MAP (horizontal = East 0–19 / vertical = North 0–19)
Temple Interior 3F
TEMPLE 3F MAP (horizontal = East 0–19 / vertical = North 0–19)
Temple Interior 4F: Jade Mask (E14, N7)
TEMPLE 4F MAP (horizontal = East 0–19 / vertical = North 0–19)
Underground Temple B1F
UNDERGROUND TEMPLE B1F MAP (horizontal = East 0–19 / vertical = North 0–19)
Underground Temple B2F
UNDERGROUND TEMPLE B2F MAP (horizontal = East 0–19 / vertical = North 0–19)
Underground Temple B3F
UNDERGROUND TEMPLE B3F MAP (horizontal = East 0–19 / vertical = North 0–19)
Underground Temple B4F
UNDERGROUND TEMPLE B4F MAP (horizontal = East 0–19 / vertical = North 0–19)
Area X: the password panel
AREA X MAP (horizontal = East 0–19 / vertical = North 0–19)
Area A B1F
AREA A B1F MAP (horizontal = East 0–19 / vertical = North 0–19)
Area A B2F
AREA A B2F MAP (horizontal = East 0–19 / vertical = North 0–19)
Area A B3F
AREA A B3F MAP (horizontal = East 0–19 / vertical = North 0–19)
Area A B4F: the four golden equipment pieces
AREA A B4F MAP (horizontal = East 0–19 / vertical = North 0–19)
Area B B1F
AREA B B1F MAP (horizontal = East 0–19 / vertical = North 0–19)
Area B B2F
AREA B B2F MAP (horizontal = East 0–19 / vertical = North 0–19)
Area B B3F
AREA B B3F MAP (horizontal = East 0–19 / vertical = North 0–19)
Area B B4F
AREA B B4F MAP (horizontal = East 0–19 / vertical = North 0–19)
Area B B5F: dial safe and Red Stone
AREA B B5F MAP (horizontal = East 0–19 / vertical = North 0–19)
Area C B1F
AREA C B1F MAP (horizontal = East 0–19 / vertical = North 0–19)
Area C B2F
AREA C B2F MAP (horizontal = East 0–19 / vertical = North 0–19)
Area C B3F
AREA C B3F MAP (horizontal = East 0–19 / vertical = North 0–19)
Area C B4F: the conveyor floor shutoff switch
AREA C B4F MAP (horizontal = East 0–19 / vertical = North 0–19)
Area D B1F
AREA D B1F MAP (horizontal = East 0–19 / vertical = North 0–19)
Area D B2F
AREA D B2F MAP (horizontal = East 0–19 / vertical = North 0–19)
Area D B3F: the cipher panel (DIMGUIL)
AREA D B3F MAP (horizontal = East 0–19 / vertical = North 0–19)
Area E B1F
AREA E B1F MAP (horizontal = East 0–19 / vertical = North 0–19)
Area E B2F
AREA E B2F MAP (horizontal = East 0–19 / vertical = North 0–19)
Area E B3F: full MP recovery point
AREA E B3F MAP (horizontal = East 0–19 / vertical = North 0–19)
Area E B4F: the Cleo fight and the way to Area Z
AREA E B4F MAP (horizontal = East 0–19 / vertical = North 0–19)
Area Z: Quetzalcoatl
AREA Z MAP (horizontal = East 0–19 / vertical = North 0–19)
Training Grounds B1F to B6F (shared map)
TRAINING GROUNDS B1F-B6F MAP (horizontal = East 0–19 / vertical = North 0–19)
Training Grounds B7F
TRAINING GROUNDS B7F MAP (horizontal = East 0–19 / vertical = North 0–19)
Training Grounds B8F: the Priestess’s Door (E10, N11)
TRAINING GROUNDS B8F MAP (horizontal = East 0–19 / vertical = North 0–19)
Dragon’s Cave B1F
DRAGON B1F MAP (horizontal = East 0–19 / vertical = North 0–19)
Dragon’s Cave B2F
DRAGON B2F MAP (horizontal = East 0–19 / vertical = North 0–19)
Dragon’s Cave B3F: Diamond Drake
DRAGON B3F MAP (horizontal = East 0–19 / vertical = North 0–19)
Can you play Wizardry Dimguil on current hardware? A platform-by-platform guide
The verdict: as of September 2026, there is no legitimate way to play Wizardry Dimguil on current hardware. Tracking down an actual PS1 and a used copy of the game is the only option.
1. Titles available via subscription or for free
Dimguil is not part of the Classics Catalog on PS Plus Premium (as of September 2026). It’s obviously absent from Nintendo Switch Online and Xbox Game Pass as well.
2. Titles available as standalone purchases
Dimguil has never been distributed on the PlayStation Store either (via PS one Classics for PS3 and PS Vita). None of the PlayStation-era Gaiden titles made it onto the digital archive.
3. Titles available as remasters or remakes
No remaster or remake of Dimguil has been announced. Digital Eclipse released a 3D remaster of the original #1 on Switch, PS4, PS5, Xbox and Steam in 2024, but that has nothing to do with the Gaiden line. In May 2026, Atari acquired the rights to the original #1 through #5 and stated plans for ports and remasters, but again, that concerns the mainline numbered entries (#1 through #5) and most likely won’t extend to the Japan-exclusive Gaiden games.
4. Titles that are hard to obtain on current hardware
| How to get it | Notes |
| Real PS1 hardware plus a used copy | Used copies run roughly US$13 to US$33 (as of September 2026). Watch out for the buggy release versus the fixed one |
| PS2/PS3 (PS1 backward compatibility) | The PS2 reads PS1 discs directly. Launch-model PS3 units (CECHA/CECHB) also have PS1 compatibility |
The rights situation around the Gaiden line is tangled, and there’s no port on the horizon. Atari picked up the rights to the mainline numbered games, but the Gaiden series was developed independently by a Japanese publisher (ASCII, now part of the KADOKAWA group), so the ownership is separate. Rather than waiting for an official port, securing PS1 hardware is the realistic move. If the original #1 through #5 interest you, keep an eye on Digital Eclipse’s 3D remaster (#1, released in 2024) and whatever Atari does next.
Enjoying this article? Add us as a preferred source on Google.
Wrap-up: Wizardry Dimguil is the Gaiden line’s grand finale, standing proudly alone
Wizardry Dimguil (PS1, April 20, 2000, ASCII, US$44) is the fifth and final entry in the Gaiden line and the only one that never put the word “Gaiden” on the box. Character creation across 11 races and 14 classes, a colossal labyrinth of 12 areas and 42 floors, a world built on Mesoamerican mythology; the fact that a dungeon RPG this large shipped in 2000, at the tail end of the PS1’s life, is remarkable on its own.
The core of the game is the key item chain. Sun Tablet, then Jade Mask (temple 4F, E14, N7), then the Area X passwords (STAFF / LABORATORY / WAREHOUSE / ENERGY / COCKPIT), then the stones in each area, then the Priestess’s Bracelet in Area Z. Keep that flow in your head and you won’t get lost. Get past the two biggest walls, the Area B dial safe (B5F, E7, N11: small dial 135 degrees right, middle 45 degrees left, outer 90 degrees right) and the Area D cipher (answer: DIMGUIL), and the rest is leveling up and hitting things.
As of September 2026 there’s no port to current hardware, so real PS1 hardware is the only way in. Even so, it’s worth the trouble, and I’ll say that flatly.
As the culmination of the Gaiden line, it’s the biggest the series ever got in races, classes and sheer dungeon size. The flip side is the pile of unhinted puzzles (the dial safe, the Area D cipher), which means clearing it without a guide demands serious patience. The Mesoamerican world is a genuine outlier even within the Gaiden line, and Hiroyuki Suwahara’s character designs plus Akina Nakamori’s theme song lift the whole presentation. This is a hidden gem from the twilight of the PS1, and anyone who loves dungeon RPGs owes it a run.
The finale that refused to call itself “Gaiden.” That’s exactly why you should walk it yourself.
Read Next
Snicker Kitamura






Leave a Reply