





Enjoying this article? Add us as a preferred source on Google.
- What kind of game is FF4? The birth of ATB and the dramatic RPG
- PlayStation version (Final Fantasy Collection) vs. Pixel Remaster
- ATB, fixed parties and elements: the systems at the core of any playthrough
- All 12 characters: the magic and skills they learn, and how to use them
- Dungeon-by-dungeon walkthrough charts plus every treasure chest
- 3 world maps plus floor maps for all 17 dungeons and 151 areas
Final Fantasy IV (FF4 from here on) was the first game in the series to bill itself as a “dramatic RPG.” Party members come and go, betray you, sacrifice themselves, and then walk back into your life. On the Super Famicom in 1991, this was the title that drove a brand-new stake into the ground for RPGs: the idea that you were there to experience a story. On the mechanical side, it also introduced the series’ first ATB (Active Time Battle) system, and plenty of players were caught flat-footed by a turn-based combat system that suddenly refused to wait for them.
The key to playing FF4 well is understanding the quirks of the 12 companions who rotate in and out of your party automatically as the story dictates, then picking a battle plan that fits whatever lineup you happen to have. It’s the exact opposite of the design philosophy behind FF3 and FF5, where you chose jobs freely. Knowing in advance what level each character learns which spell, and what abilities they bring, makes an enormous difference to how smoothly the game goes.
This guide covers both the PlayStation version (the one included in Final Fantasy Collection, released in 1999) and the Pixel Remaster. On top of 3 world maps and floor maps for all 17 dungeons across 151 areas, we’ve cataloged every treasure chest in each dungeon.
Full disclosure: the first time I played the Super Famicom version, I got wiped out by Golbez and let the cartridge gather dust. Back then it never crossed my mind that Kain would turn on us again. Coming from a guy with two divorces behind him, I probably shouldn’t be the one saying this, but trusting people is hard.

What kind of game is Final Fantasy IV? The series’ first ATB system fused with real drama
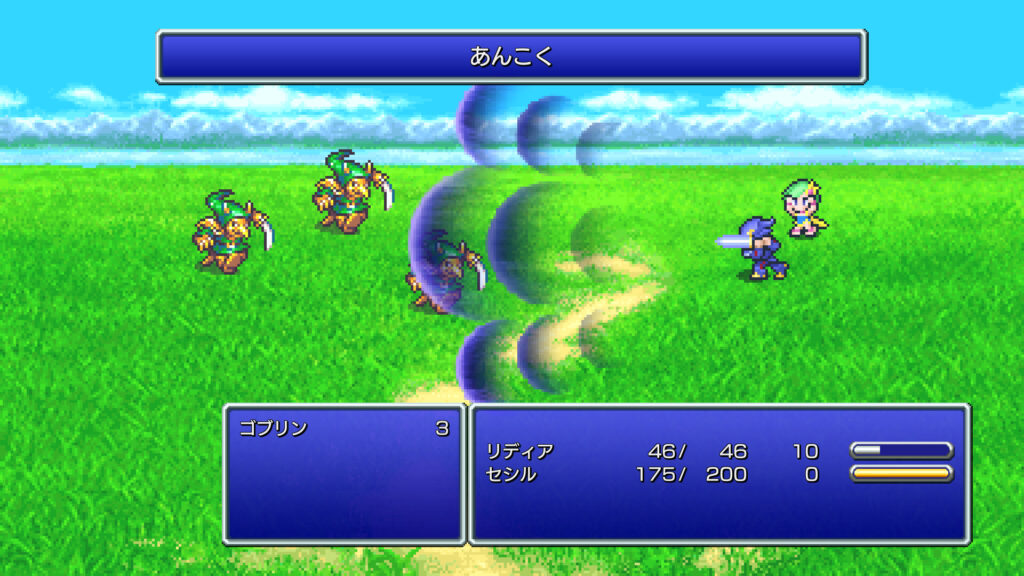
FF4 is the fourth entry in the Final Fantasy series, and the first to fuse a real-time ATB combat system with a character-driven story. You play as Cecil Harvey, a dark knight of the Kingdom of Baron, racing across three separate worlds from a conspiracy over the Crystals all the way to a final showdown deep beneath the moon.
| Item | Details |
| Title | Final Fantasy IV |
| Release date | July 19, 1991 (Super Famicom) |
| Publisher / price | Square, 8,800 yen, about $56 (excluding tax; converted at roughly 157 yen to the dollar, late September 2026) |
| Dungeon scale | 17 dungeons, 151 areas, plus 3 world maps (Overworld, Underworld, Moon) |
| Playable companions | 12 total (swapped automatically by the story; final party of 5 is fixed) |
| Final objective | Defeat Zeromus in the deepest reaches of the Lunar Subterrane |
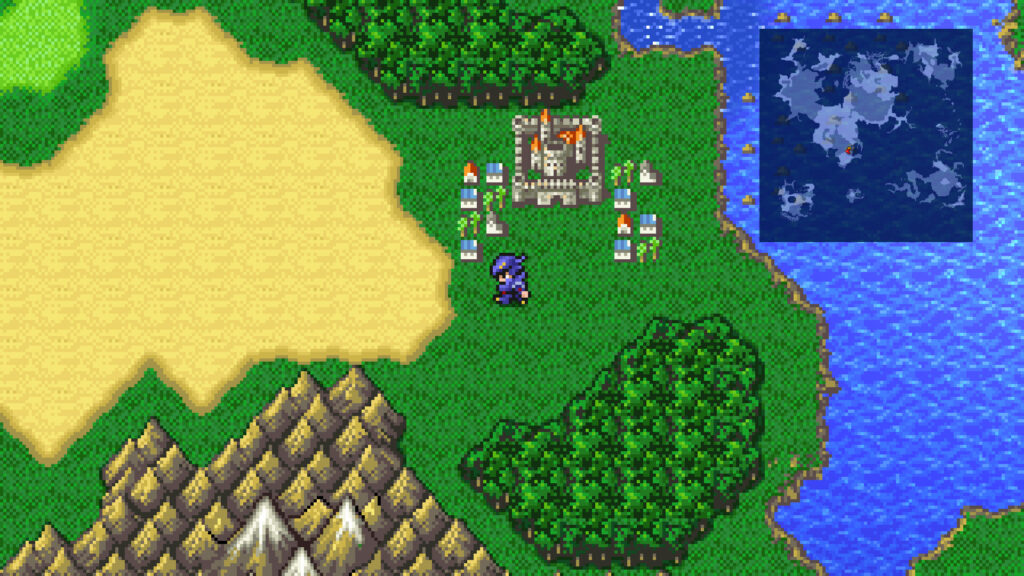
The story spans three worlds. In the early overworld chapters you deal with the King of Baron going off the rails and the theft of the Crystals; in the midgame Underworld you join forces with the dwarves and tackle the Tower of Babil; and in the endgame on the moon, the secret of Cecil’s birth and the final battle with Zeromus are waiting. Where earlier games in the series boiled down to “Warriors of Light vs. evil,” this one makes Cecil’s own atonement and growth the spine of the narrative. That, more than anything, is what defines FF4.
PlayStation version (Final Fantasy Collection) vs. Pixel Remaster: which one should you play?
To cut straight to it: if you’re starting FF4 fresh in 2026, I’d strongly recommend the Pixel Remaster. The PlayStation version has a charm all its own thanks to the added CG movies, a real novelty at the time, but the load times are a serious drag. The Pixel Remaster faithfully remasters the Super Famicom version’s 2D pixel art while packing in a huge pile of modern quality-of-life features.
| Item | PlayStation version (Final Fantasy Collection) | Pixel Remaster |
|---|---|---|
| Release date | Standalone: March 21, 1997 (DigiCube) Final Fantasy Collection: March 11, 1999 |
Steam/iOS/Android: September 9, 2021 Switch/PS4: April 20, 2023 |
| Price | Final Fantasy Collection: 6,800 yen, about $43 (FF4 + FF5 + FF6 bundled) |
Standalone: 2,200 yen, about $14 Six-game bundle: 9,172 yen, about $58 |
| CG movies | Added to the opening and ending | None |
| Dash | Yes (absent from the Super Famicom version) | Yes, plus diagonal movement |
| Boost features | None | 0x–4x EXP/gil, plus encounters on/off |
| Auto-battle | None | Yes (repeats your previous actions automatically, plus double speed) |
| Saving | Memory card | 20 slots, plus autosave and quick save |
| Gear on departing characters | Must be unequipped manually (forget and it’s gone) | Unequipped automatically |
| Arrow supply | Consumed on use | Unlimited |
| BGM/font toggle | None | Yes (Switch/PS4 versions) |
| Extra dungeons | None | None (the GBA version’s Cave of Trials and Lunar Ruins aren’t included) |
Everything in this guide (dungeon layouts, boss weaknesses, chest placements, character performance) applies equally to the Super Famicom version, the PlayStation version and the Pixel Remaster. Version-specific differences are collected in the table above, so from here on, read it as a walkthrough that works for all of them. One caveat: in the PlayStation version, you need to manually strip the gear off characters before they leave the party, or that equipment vanishes for good. The Pixel Remaster fixes that problem.
For the record, the DS version (2007) is a 3D remake with substantially different systems, so it falls outside the scope of this article. If you’re playing that one, look for a guide written specifically for it.
ATB, fixed parties and elemental weaknesses: the 3 systems you have to master in FF4
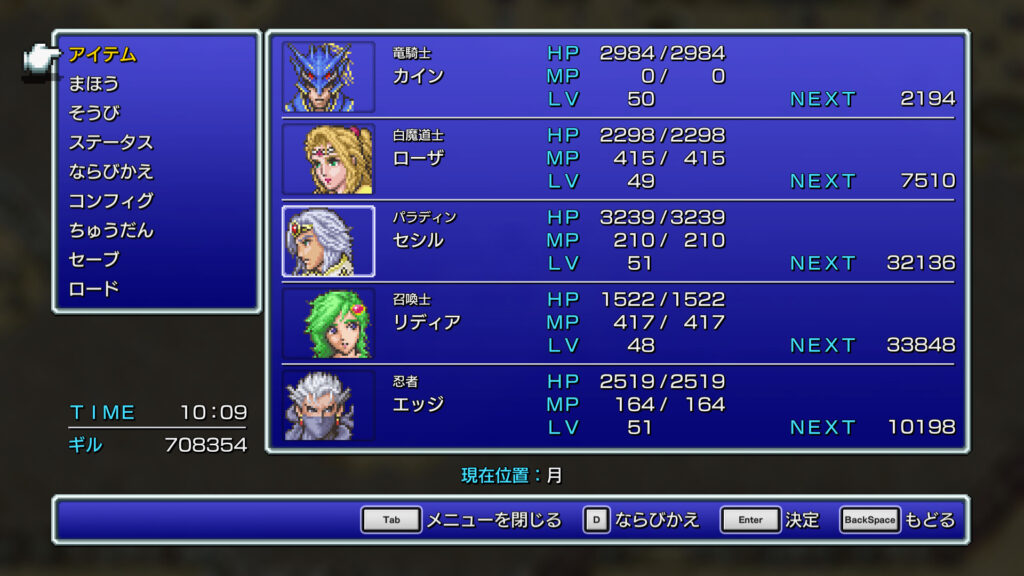
Three systems make or break your run through FF4: ATB (Active Time Battle), the story-locked fixed party system, and elemental matchups. Get your head around those three and you can take down most bosses without brute-forcing anything.
ATB (Active Time Battle): turn-based combat that won’t wait for you
FF4 was the first game in the series to use ATB. Each character’s gauge fills according to their Speed, and you input commands in the order those gauges top off. Enemy gauges keep filling while you’re picking a command, so dithering gets you hit. In boss fights, the timing of your heals is critically important. On the Pixel Remaster you can switch to the “Wait” setting so the clock stops while a menu window is open, and I’d recommend Wait until you’ve got a feel for the rhythm.
The fixed party system: be ready for your allies to rotate out
In FF4 your party members are swapped out by force as the story progresses. Of the 12 total characters, the final party is locked to five: Cecil, Kain, Rosa, Rydia and Edge. Plenty of characters also leave temporarily along the way, so on the PlayStation version, get into the habit of pulling their gear off before they go. On the Pixel Remaster, equipment comes back to you automatically, so there’s nothing to worry about.
| Stage of the game | Party lineup | Notes |
|---|---|---|
| Baron to Mist | Cecil (Dark Knight) + Kain | Kain leaves after the Mist Dragon fight |
| Kaipo to the Lower Waterway | Cecil (Dark Knight) + Rydia (child) | Rydia can use both white and black magic |
| Damcyan to the Antlion’s Den | Cecil (Dark Knight) + Rydia + Edward | Tellah leaves, Edward joins |
| Mount Hobs to Fabul | Cecil (Dark Knight) + Rydia + Edward + Yang | Five once Rosa joins up, then Rosa is abducted |
| Mount Ordeals | Cecil (Dark Knight) + Palom + Porom | Cecil becomes a Paladin at the summit of Mount Ordeals |
| Baron to the Magnetic Cave | Cecil (Paladin) + Palom + Porom + Tellah + Yang/Cid | Tellah and Yang join, then Palom and Porom turn to stone |
| Tower of Zot | Cecil (Paladin) + Tellah + Yang + Cid | Tellah kills himself casting Meteor, then Kain and Rosa join |
| Underworld to the Tower of Babil | Cecil (Paladin) + Kain + Rosa + Rydia (adult) | Cid leaves, Rydia returns grown up |
| Eblan to the Sealed Cave | Cecil + Kain + Rosa + Rydia + Edge | Kain leaves again after the Sealed Cave |
| Moon to the Giant of Babil | Cecil + Rosa + Rydia + Edge + FuSoYa | FuSoYa joins, then leaves after the Giant fight |
| Final party | Cecil + Kain + Rosa + Rydia + Edge | Lunar Subterrane through the Zeromus fight |
Elemental matchups: hit a weakness and the whole fight changes
FF4’s bosses have clearly defined elemental weaknesses. These are the combinations that matter most.
- Weak to Lightning: Octomammoth, Dr. Lugae (Thunder spells work)
- Weak to Ice: Flamehound, Barbariccia (Blizzard spells work)
- Weak to Holy: undead enemies in general (Cecil’s Cure and Cura deal damage)
- Resistant to everything: Zeromus resists every element, and you can’t bring him down without using the Crystal
All 12 Characters: Spell and Ability Lists Plus How to Use Them | Party Building Guide
All 12 party members in FF4 have their own fixed job, and the spells and abilities each one learns are completely locked in. Below I’ll cover the five characters in your endgame party first, then run through the temporary members.
Cecil Harvey (Dark Knight to Paladin) — The Hero, a Frontliner Who Also Heals
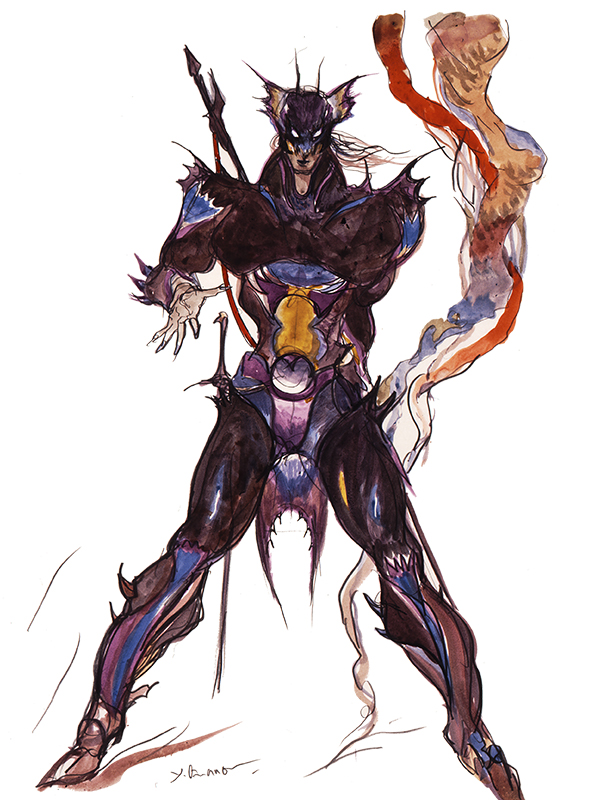
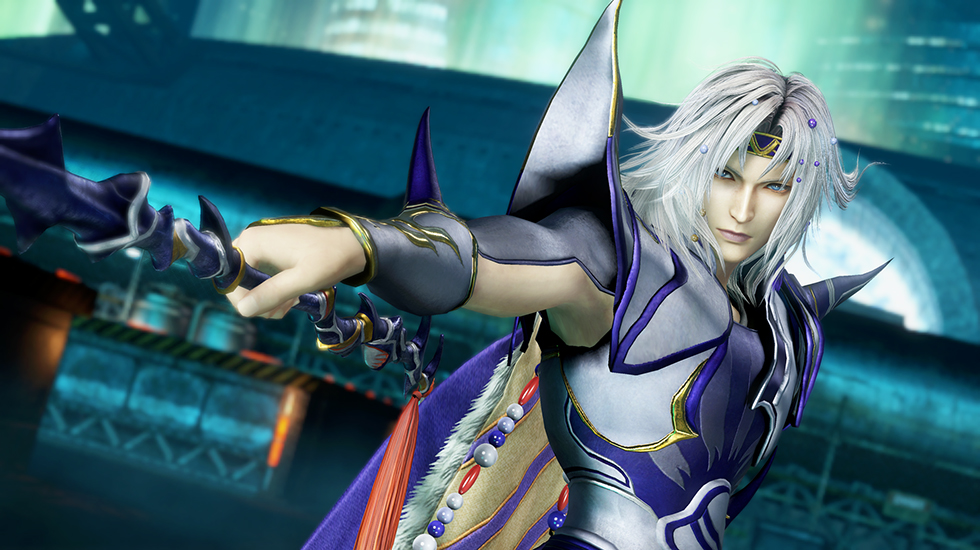
The protagonist of the story. On Mount Ordeals he changes from a Dark Knight into a Paladin. The class change drops him back to Level 1, but it also unlocks white magic for him. Late in the game he’s your secondary healer and tank rolled into one. His physical damage is plenty once he’s holding Excalibur (holy element), his best weapon. Dark Wave, his Dark Knight command, hits every enemy at the cost of his own HP — powerful, but you have to pick your moments.
| Lv | White Magic | Effect |
|---|---|---|
| On class change | Cure | Restores HP to one ally or the whole party; damages undead |
| 3 | Sight | Reveals the surrounding terrain on the field |
| 8 | Libra | Displays an enemy’s HP and weaknesses |
| 15 | Cura | Restores a moderate amount of HP to one ally or the party |
| 19 | Teleport | Escapes a dungeon or a battle |
| 24 | Esuna | Cures poison, blind, silence, petrification, confusion and curse |
Kain Highwind (Dragoon) — Dodge Damage and Deal It With Jump
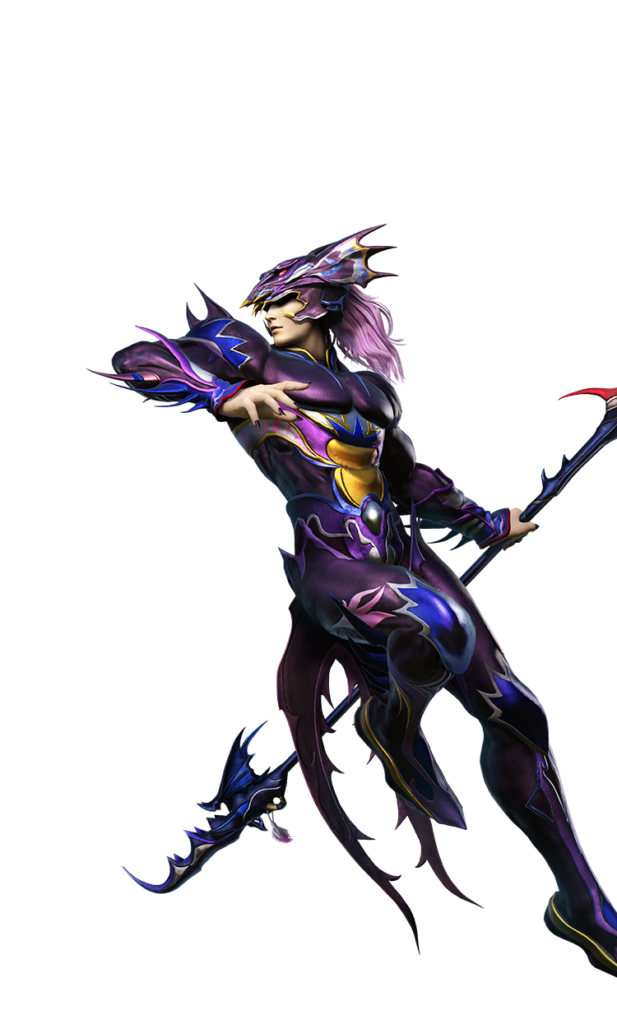
Kain’s greatest weapon is Jump. He leaves the screen entirely, dodging enemy attacks, then lands for double his normal damage. Time a Jump for the moment a boss unloads a party-wide attack and you take zero damage. Lining it up with Barbariccia’s Tornado or Zeromus’s Big Bang is the bread-and-butter tactic. Just keep in mind that the story yanks him out of the party and hands him back three separate times, so leaning on Kain too hard will hurt when he’s gone.
Spells and abilities learned: none (physical attacks and Jump only). His best gear is the Holy Lance plus the Genji Shield.
Rosa Farrell (White Mage) — The Best Healer in the Game, With a Bow
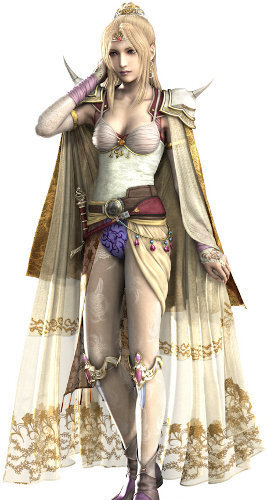
FF4’s lifeline. Cura, Curaga, Raise and Arise all live on her spell list. Berserk (which turns an ally into a berserker and sends their physical damage through the roof) and Slow (which drags a boss’s turns out) are the keys to boss fights. Because she can equip bows she attacks from the back row, and once she picks up Holy at Lv55 she works as a straight-up damage dealer too.
| Lv | White Magic | Effect |
|---|---|---|
| Starting | Cure | Restores HP |
| 11 | Raise | Revives a KO’d ally |
| 13 | Slow | Lowers an enemy’s action speed |
| 20 | Berserk | Turns an ally into a berserker (physical damage up) |
| 23 | Blink | Creates images that dodge physical attacks |
| 29 | Shell | Reduces magic damage |
| 31 | Dispel | Removes an enemy’s buffs |
| 35 | Esuna | Cures status ailments across the board |
| 36 | Haste | Raises action speed |
| 45 | Arise | Revives a KO’d ally with HP fully restored |
| 55 | Holy | Massive holy-element damage |
Rydia (Summoner) — The Best Attacker, With Black Magic and Summons
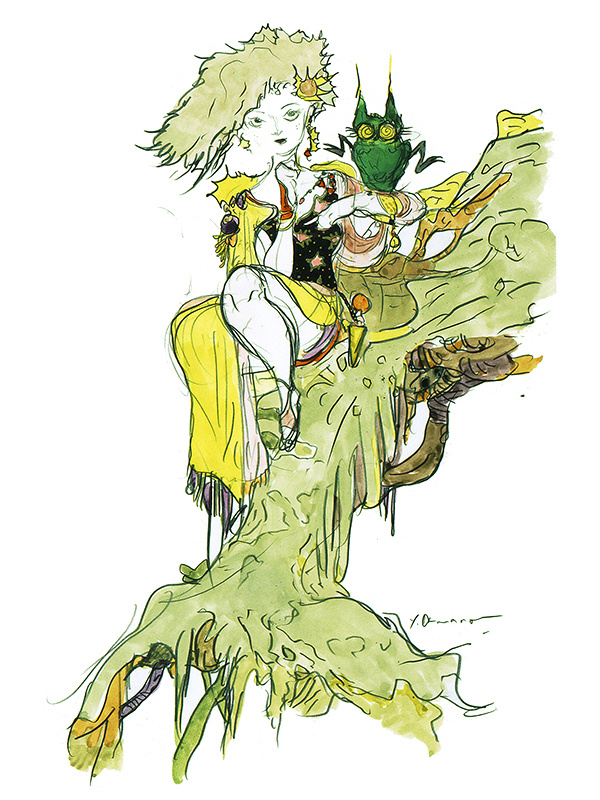
As a child she can barely manage Cure and Fire, but when she returns in the underworld as an adult she transforms into a specialist in both black and summon magic. Bahamut is about the strongest non-elemental, party-wide attack spell in the game. She also learns Flare (Lv55) and Meteor (Lv60), but once you factor in MP efficiency, alternating between Bahamut and Firaga/Blizzaga/Thundaga is the practical way to play her.
| Lv | Black Magic | Effect |
|---|---|---|
| On rejoining | Fire/Blizzard/Thunder | Basic elemental attacks |
| On rejoining | Fira/Blizzara/Thundara | Mid-tier elemental attacks |
| 39 | Blizzaga | Massive ice-element damage |
| 42 | Firaga | Massive fire-element damage |
| 45 | Thundaga | Massive lightning-element damage |
| 55 | Flare | Massive non-elemental damage |
| 60 | Meteor | Massive non-elemental damage to all enemies |
Rydia’s summon magic (all 15) — summons don’t come from leveling up. Shiva, Ramuh, Ifrit, Titan and Mist Dragon are already hers the moment adult Rydia joins, and you pick up the rest by beating bosses, hitting story events and farming monster drops.
| Summon | Effect | How to get it |
|---|---|---|
| Chocobo | Chocobo Kick deals non-elemental damage to one enemy | Already known when Rydia is a child |
| Shiva | Diamond Dust deals ice damage to all enemies | Already known when adult Rydia joins |
| Ramuh | Judgment Bolt deals lightning damage to all enemies | Already known when adult Rydia joins |
| Ifrit | Hellfire deals fire damage to all enemies | Already known when adult Rydia joins |
| Titan | Earthen rage deals non-elemental damage (no effect on floating enemies) | Already known when adult Rydia joins |
| Mist Dragon | A breath of mist. Non-elemental damage scaled to the caster’s HP | Already known when adult Rydia joins |
| Goblin | Goblin Punch deals minor non-elemental damage to one enemy | Drop from Goblin and Li’l Murderer |
| Bomb | Self-destruct. Deals damage equal to the caster’s HP | Drop from Remedy Bomb and Dark Grenade |
| Cockatrice | A petrifying beak turns enemies to stone | Drop from Dive Eagle, Cockatrice and Ludran Baby |
| Mindflayer | Mind Blast deals non-elemental damage plus paralysis and sap | Drop from Mindflayer |
| Sylph | Whispering Wind drains enemy HP and heals the whole party | Sylph Cave B3F, via the Frying Pan of Love event |
| Odin | Zantetsuken instantly kills enemies | Beat Odin in the right tower of Baron Castle, B2F |
| Asura | Triggers a random healing or support effect | Beat Asura in the throne room of the Feymarch |
| Leviathan | Tsunami deals non-elemental damage to all enemies | Beat Leviathan in the throne room of the Feymarch |
| Bahamut | Mega Flare deals enormous non-elemental damage to all enemies | Beat Bahamut in the Cave of Bahamut B3F |
Goblin, Bomb, Cockatrice and Mindflayer are the four summons you can only learn from items that the matching monsters rarely drop. Since it all comes down to post-battle drop luck, collecting the full set means grinding on the floors where those monsters appear.
Edge (Ninja) — Dual Wield, Ninjutsu and Steal
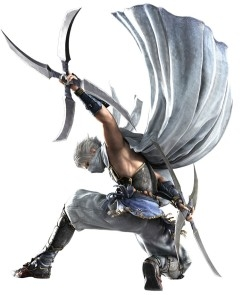
A versatile attacker who pulls his weight physically and magically. Steal nabs rare items off enemies, and Throw hurls shuriken and the like for big damage. His Ninjutsu hits every enemy, which makes it great for clearing out trash mobs. His endgame weapon, the Masamune (found in the Lunar Subterrane), has high speed and pushes his turn rate even higher.
| Lv | Ninjutsu | Effect |
|---|---|---|
| Starting | Flame | Fire damage to all enemies (MP15) |
| Event | Flood | Ice damage to all enemies (MP20) |
| Event | Blitz | Lightning damage to all enemies (MP25) |
| 27 | Pin | Paralyzes one enemy (MP5) |
| 33 | Smoke | Guarantees an escape from battle (MP10) |
| 38 | Image | Creates images that dodge physical attacks (MP6) |
Tellah (Sage) — The Do-Everything Old Mage Who Can’t Afford the MP
He’s a Sage who wields both white and black magic, but his maximum MP is brutally low (it barely climbs as he levels). He learns Meteor in the Tower of Zot, yet the spell costs 99 MP while his max MP tops out at 90, so you can never actually cast it outside of a cutscene. He’s only with you for the short stretch that ends with him hurling Meteor at Golbez in the Tower of Zot and killing himself in the process.
How to play him: while he’s around, leave the healing to Rosa and let Tellah focus purely on offensive magic. His MP situation is dire, so stock up on plenty of Ethers.
Tellah’s spell list — Tellah is the one character who doesn’t learn magic by leveling up. He shows up with part of his list already intact, and during the Mount Ordeals event the Recall command disappears while the rest of his spells arrive all at once. He’s the only character who covers nearly the entire white and black magic lists.
| Type | Spells Tellah can cast | How he learns them |
|---|---|---|
| White Magic | Cure / Cura / Curaga / Curaja / Raise / Arise / Esuna / Dispel / Protect / Shell / Blink / Berserk / Haste / Float / Reflect / Slow / Silence / Confuse / Mini / Hold / Libra / Sight / Teleport | Learned in bulk when he joins and during the Mount Ordeals event. Leveling up adds nothing |
| Black Magic | Fire / Fira / Firaga / Blizzard / Blizzara / Blizzaga / Thunder / Thundara / Thundaga / Sleep / Toad / Pig / Poison / Bio / Drain / Osmose / Break / Stop / Warp / Quake / Tornado / Death / Meteor | Also learned through events. Flare is the one black spell he never picks up |
Tellah’s max MP stalls out around 90. Meteor costs 99 MP — meaning the numbers make it flat-out impossible to cast. The Meteor he unleashes on Golbez in the Tower of Zot is a scripted set piece, and there’s no point where you get to pick it as a command. The fact that this “spell he learns but can never use” is literally how Tellah’s story ends is one of the cruelest, most beautiful touches in FF4.
Edward Chris von Muir (Bard) — A Delicate Support Character
The prince of Damcyan. His combat ability is dead last among the cast. Sing is a command he can only use while equipped with a harp, and it randomly triggers effects like a lullaby (sleep), a song of seduction (confusion) or a song of silence — you can’t aim for the one you want. Salve spends a single Potion to heal the entire party. He’s around for such a short time that it’s hard to count on him as firepower, but stick to support duty in the Antlion’s Den and you’ll be fine.
Spells and abilities learned: none (just Sing, Salve and items). The Lamia Harp is his signature weapon.
Yang Fang Leiden (Monk) — The Best Bare-Handed Physical Attacker
A Monk who puts out serious physical damage with claws equipped. Kick is a full-party attack that deals physical damage to every enemy on screen, which makes it outstanding for mopping up trash mobs. He joins the party twice, and both times a story event yanks him back out. Don’t forget to strip his claws off before he leaves (in the PS version).
Magic and special abilities learned: none (just Fight, Kick, and Focus).
Palom & Porom (Black Mage & White Mage) — The Twins and Their Twincast
The twin mages of Mysidia. As long as both of them are in the party, Twincast lets them unleash a powerful combined spell (Petit Flare / Petit Meteor) on every enemy at once. Palom brings the black magic firepower, while Porom handles healing with Cura and Raise. They’re only with you up until the pair turn themselves to stone and leave in the Magnetic Cave, but while they’re around they’re an incredibly strong pair of hands.
Palom’s black magic (24 spells total) — his commands are Fight / Black / Twincast / Bluff / Item. Bluff is a self-buff that raises his own intellect by +16, and the black magic he fires off right afterward hits dramatically harder. Since his stint in the party is short, the mid-tier spells he learns at Lv. 11 to 14 are realistically as far as you’ll get in actual battle.
| Lv | Black Magic | Effect |
|---|---|---|
| Start | Fire | Minor fire damage to one enemy or all enemies |
| Start | Blizzard | Minor ice damage to one enemy or all enemies |
| Start | Thunder | Minor lightning damage to one enemy or all enemies |
| Start | Poison | Inflicts poison and deals non-elemental damage |
| Start | Sleep | Puts one enemy or all enemies to sleep |
| 11 | Blizzara | Moderate ice damage to one enemy or all enemies |
| 11 | Pig | Turns one enemy or all enemies into pigs |
| 12 | Fira | Moderate fire damage to one enemy or all enemies |
| 13 | Thundara | Moderate lightning damage to one enemy or all enemies |
| 14 | Stop | Leaves one enemy unable to act for a set time |
| 19 | Bio | Inflicts sap and deals non-elemental damage |
| 22 | Toad | Turns one enemy or all enemies into frogs |
| 23 | Quake | Non-elemental damage to all enemies |
| 26 | Drain | Absorbs HP from one enemy and adds it to the caster’s HP |
| 29 | Warp | Returns you to the previous floor of a dungeon |
| 32 | Blizzaga | Major ice damage to one enemy or all enemies |
| 33 | Firaga | Major fire damage to one enemy or all enemies |
| 34 | Thundaga | Major lightning damage to one enemy or all enemies |
| 36 | Break | Turns one enemy or all enemies to stone |
| 40 | Osmose | Absorbs MP from one enemy (costs 0 MP) |
| 46 | Death | Massive non-elemental damage to all enemies |
| 48 | Tornado | Reduces one enemy to near death |
| 50 | Meteor | Massive non-elemental damage to all enemies |
| 52 (Lv. 55 in the Pixel Remaster) |
Flare | Massive non-elemental damage to one enemy |
Flare is the one spell whose learning level changes between versions. It’s Lv. 52 in the SNES/PS versions and Lv. 55 in the Pixel Remaster. Either way, Palom is long gone (he leaves at the Magnetic Cave) before you ever get there, so the only Flare you’ll actually fire off is the Petit Flare from Twincast.
Porom’s white magic (24 spells total) — her commands are Fight / White / Twincast / Cry / Item. Porom’s white magic lineup is almost identical to Rosa’s, but she learns everything a few levels later than Rosa does. While she’s in the party, whether or not you have Cura (Lv. 13) and Raise (Lv. 11) available is the difference between life and death.
| Lv | White Magic | Effect |
|---|---|---|
| Start | Cure | Restores a small amount of HP to one ally or the whole party |
| Start | Hold | Inflicts paralysis, leaving the target unable to act |
| Start | Libra | Reveals an enemy’s HP and elemental weakness |
| Start | Slow | Slows an enemy’s action speed |
| Start | Sight | Shows the surrounding terrain out on the field |
| 11 | Raise | Revives one KO’d ally |
| 12 | Protect | Boosts physical defense |
| 13 | Cura | Restores a moderate amount of HP to one ally or the whole party |
| 15 | Silence | Inflicts silence, sealing off magic |
| 18 | Berserk | Inflicts berserk, raising attack power |
| 19 | Teleport | Escapes a dungeon or flees a battle |
| 20 | Esuna | Cures multiple status ailments |
| 23 | Blink | Creates images that dodge physical attacks |
| 25 | Confuse | Inflicts confusion on an enemy |
| 29 | Shell | Boosts magic defense |
| 31 | Mini | Shrinks the target, weakening its abilities |
| 31 | Dispel | Removes buff effects |
| 33 | Curaga | Restores a large amount of HP to one ally or the whole party |
| 38 | Haste | Raises action speed |
| 40 | Float | Levitates the target, nullifying earthquake-type damage |
| 44 | Reflect | Raises a barrier that bounces magic back |
| 48 | Curaja | Restores a huge amount of HP to one ally or the whole party |
| 52 | Holy | Massive holy-element damage to one enemy |
| 56 | Arise | Revives a KO’d ally with HP fully restored |
Cid Pollendina (Engineer) — The Hammer-Swinging Bruiser
Baron’s airship engineer. His Analyze command lets you check an enemy’s HP. He’s a step below Yang as a combatant, but he joins temporarily after you clear the Tower of Zot and he’s the guy who handles the airship modifications, which makes him a crucial character. His stint is short, so there’s basically no reason to invest in leveling him.
Magic and special abilities learned: none (just Fight and Analyze).
FuSoYa (Lunarian) — The All-Magic Mage
The elder of the Lunarians. He’s the single most powerful mage in the game, able to cast every white and black spell there is, but his level is locked the moment he joins (Lv. 50) and he’s a short-timer who leaves after you clear the Giant of Babil. Bless is his unique command, automatically restoring HP to the entire party. In the Pixel Remaster it’s been buffed to restore 5% of max HP. While he’s around, don’t hold back on top-tier spells like Holy and Flare.
FuSoYa’s spell list (24 white spells + 24 black spells) — FuSoYa is the only character in FF4 who can use all 48 white and black spells. His commands are Fight / White / Black / Bless / Item, and his level is locked at 50 the moment he joins.
| Type | Spells | How they’re learned |
|---|---|---|
| White magic (all 24) | Cure / Cura / Curaga / Curaja / Raise / Arise / Esuna / Holy / Dispel / Protect / Shell / Blink / Berserk / Haste / Float / Reflect / Slow / Silence / Confuse / Mini / Hold / Libra / Sight / Teleport | All already learned when he joins (locked at Lv. 50) |
| Black magic (all 24) | Fire / Fira / Firaga / Blizzard / Blizzara / Blizzaga / Thunder / Thundara / Thundaga / Sleep / Toad / Pig / Poison / Bio / Drain / Osmose / Break / Stop / Warp / Quake / Tornado / Death / Flare / Meteor | All already learned when he joins (locked at Lv. 50) |
His unique Bless command restores HP to the whole party. In the SNES/PS versions the healing is locked at 10 HP, which makes it all but pointless late in the game, but in the Pixel Remaster it was buffed to restore 5% of max HP, turning it into a genuinely practical party-wide heal that costs no MP.
Dungeon-by-Dungeon Walkthrough and Treasure Chest Lists: The Complete Guide to All 17 FF4 Dungeons
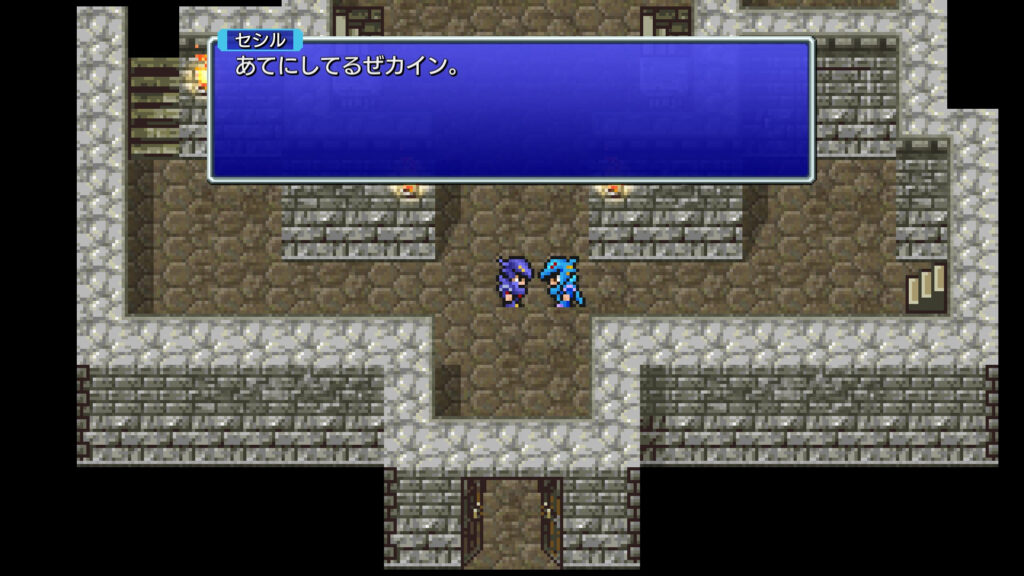
From here on, I’ll run through the key tactics and the treasure chests for every dungeon. Chest contents follow the SNES/PS versions, with notes where the Pixel Remaster changes things. The recommended levels are rough targets based on the boss fights.
Mist Cave (Recommended Lv. 10)
The very first dungeon. Your party is just Cecil and Kain. The boss, Mist Dragon (HP 465), counters with a party-wide attack if you hit it while it’s in mist form. The correct play is to stop entering commands and wait it out whenever it turns to mist.
Treasure chests: Potion x2, Eye Drops, Tent
Underground Waterway (Recommended Lv. 13)
A long haul spread across six areas. With just Cecil and Rydia, damage output is painfully thin early on. On B2F behind the waterfall you’ll find the Hades Helm and Hades Gauntlets, and in the underground lake you’ll pick up the Hades Armor and Hermes Sandals. The boss, Octomammoth (HP 2350), is weak to lightning and darkness. Rydia’s Thunder magic is the fastest way through it.
Key treasures: Potion, Maiden’s Kiss, Tent, Iron Armlet, Ether, Phoenix Down, Ice Rod, 580 gil, Bomb Fragment, Feathered Cap, Hades Helm, Hades Gloves, Hades Armor, Hermes Sandals, Shadowblade
Antlion’s Den (Recommended Lv. 17)
A desert dungeon. The boss, Antlion (HP 1100), counters physical attacks, so leaning on magic is the safe play. The Lamia Harp (Edward’s exclusive weapon) is sitting in a small room on B2F.
Treasure chests: Potion x3, Spider Silk, Tent, Gold Needle, Antarctic Wind, Bronze Hourglass, Lamia Harp, Phoenix Down, Ether, Emergency Exit
Mount Hobs (Recommended Lv. 18)
The mountain dungeon where Yang joins up. The boss, Mom Bomb (HP 11000), explodes and splits into three Bombs and three Bomb Fragments. Hit it with everything you have before it splits, then clean up the pieces with party-wide attacks.
Treasure chests: Tent, Potion, Gold Needle, 960 gil, Holy Arrows
Mount Ordeals (Recommended Lv. 20)
The dungeon where Cecil becomes a Paladin, with Palom and Porom in tow. The boss at the summit is a phantom of Cecil as a Dark Knight, and you win by simply defending without ever attacking. The class change drops him back to Level 1, but he levels up so fast that it’s nothing to worry about.
Treasure chests: Potion, Ether, Tent, Hermes Sandals
Old Waterway (Recommended Lv. 22)
The back route into Baron Castle. It’s a long one, spanning four areas. Tellah has joined by now, so hand healing duty to him and let Palom and Porom do the damage. The boss, Dark Elf, uses magnetism to seal your metal equipment, but Edward’s harp undoes it.
Key treasures: Potion, Ether x2, Tent, Phoenix Down, Gold Needle, Shock Whip, Silver Armlet, Hi-Potion
Magnetic Cave (Recommended Lv. 24)
A dungeon where metal equipment simply doesn’t work. Cecil has to strip off his Dark Knight-era gear and punch things with his fists, or you need to prepare non-metal weapons. The Dark Elf waiting at the back (HP 23890) only gets serious after the event with Edward’s harp. The moment you take it down, Palom and Porom turn to stone and leave the party.
Key treasures: Hi-Potion, Ether, Emergency Exit, Unicorn Horn, Gold Needle, Phoenix Down
Tower of Zot (Recommended Lv. 26)
A final-dungeon-grade gauntlet where you fight the Magus Sisters and then Golbez back to back. This is where Tellah learns Meteor and unleashes it on Golbez at the cost of his own life. Kain and Rosa join after the Golbez fight, and the party finally settles down from here on.
Key treasures: Flame Mail, Flame Sword, Gaia Gear, Light Robe, Flame Shield
Tower of Babil, Lower Section (Recommended Lv. 30)
An enormous tower you break into from the Underworld. Eight areas and 12 floors. Dr. Lugae (HP 4936) is weak to lightning. Yang joins you here, but self-destructs on B5F and leaves. Don’t forget to strip his equipment before he goes.
Treasure chests: Ice Arrows/Emergency Exit, Green Beret, Ice Lance, Icebrand, Cat Claws, Hi-Potion, Phoenix Down, Killer Bow, Southern Wind, Ice Armor, Ice Shield, North Wind, Dry Ether
Cave of Eblan (Recommended Lv. 32)
The dungeon where Edge joins the party. It’s only three areas, but the hidden passages are packed with rare items. The Blood Sword is yours after the fight against two Stone Golems.
Treasure chests: Shuriken, Remedy, Vampire Fang, Potion x2, Ether, Tent, Hi-Potion x3, Bomb Soul, Elixir x2, Cottage, Spider Silk, Silver Hourglass, Phoenix Down x2, Gold Needle, Dry Ether, Blood Sword
Tower of Babil, Upper Section (Recommended Lv. 35)
The surface-side Tower of Babil, connected from Eblan. This is where you square off against Rubicante (HP 34000), the strongest of the Four Fiends. Ice only works on Rubicante while his cloak is open; land ice magic while it’s closed and you’ll heal him instead. He’s that rare breed of boss who fully restores your party before the fight even starts.
Treasure chests: Unicorn Horn, Silver Hourglass, Ogrekiller, Lilith’s Kiss, Ashura, 82000 gil, Hi-Potion, Hell Claws
Sealed Cave (Recommended Lv. 38)
A dungeon where every door you open means another fight with a Demon Wall (HP 28000). The Demon Wall creeps toward you as time passes, and the moment it makes contact it uses Crush Down, which is an instant KO. Going all-in for a quick kill is the standard theory here. Kain leaves the party again after this dungeon.
Treasure chests: Samurai Gear, Ether x3, Tiger Mask x2, Hi-Potion x2, Phoenix Down x2, Light Curtain, Light Sword, Wind Shuriken, Elixir, Black Hood, Dry Ether, X-Potion, Dark Sword
Sylph Cave (Recommended Lv. 36)
An optional dungeon you tackle to get Sylph, the summon. Three areas and 12 floors, with a genuinely complicated layout. After the event in the room where Yang is sleeping, pick up the Frying Pan from Yang’s wife at Fabul Castle and use it to wake him, and the Sylph summon is yours. The place is loaded with rare items, including the Fairy Rod and the Elven Bow.
Key treasures: Samurai Gear, Angel Arrows, Cottage, 1000 gil, Elven Bow, Bomb Soul, Remedy, 2000 gil, 3000 gil, Emergency Exit, Maiden’s Kiss x2, Ether, Magic Master, Fairy Rod, Elixir, Cat Claws, Hell Claws
Cave of Summons (Recommended Lv. 38)
The passage to the Land of Summons. Three areas and five floors. The Defender (a sword) drops after the battle against five Satanites. In the Feymarch itself, beating Asura (HP 31005) and Leviathan (HP 50001) in boss fights unlocks them both as summon magic. Reflect is the key against Asura.
Treasure chests: Phoenix Down x2, Ether, Hi-Potion x3, Cottage, Poison Axe, Katana, Samurai Gear, Defender
Cave of Bahamut (Recommended Lv. 45)
The dungeon where Bahamut (HP 45001) is waiting. Two areas and seven floors. The full Genji set (Genji Gloves, Genji Shield, Genji Armor, Genji Helm) comes together here. Bahamut fires off Megaflare after a countdown, so either bounce it back with Reflect or burn him down while the count runs. Win, and Rydia can summon Bahamut.
Treasure chests: Genji Gloves, Genji Shield, Genji Armor, Genji Helm
Giant of Babil (Recommended Lv. 47)
Three areas and seven floors. After a run of back-to-back fights with the Four Fiends comes the battle against the control system (the CPU, HP 30000, plus an Attack Node and a Defense Node). Kill the Defense Node first and the CPU starts spamming Globe, so the textbook line is to take out the Attack Node first and then focus everything on the CPU. FuSoYa leaves after this fight, and Kain rejoins for the last time.
Treasure chests: Shuriken, Hi-Potion, Ether, Arrowheads, Alarm, Silver Apple, Soma Drop, Elixir
Lunar Subterrane (Recommended Lv. 50) – The Final Dungeon
The final dungeon, at eight areas and 29 floors. FF4’s most powerful equipment is all concentrated in here. The complete Crystal set (shield, mail, gloves, helm) comes from a monster-in-a-box on B5F. The Minerva Bustier (Rydia’s best armor), Ribbon x2, the Holy Lance (Kain’s best weapon) and the Masamune (Edge’s best weapon) are all found in this dungeon too. Ragnarok, Cecil’s best weapon, drops when you beat the Dark Bahamut in the lower right of B5F.
Zeromus, at the very bottom, only reveals its true form after you use the Crystal. It resists every element, so chip away with physical attacks and spend Rosa’s Curaja and Arise freely to answer Big Bang. Riding out Big Bang by dodging it with Kain’s Jump is the steady, reliable play.
Key treasures (B1F-B10F):
| Floor | Key treasures |
|---|---|
| B1F-B2F | Black Garb, Sage’s Staff, Flame Whip, Dragon Shield |
| B3F | Dragon Helm, Dragon Mail, Dragon Gloves |
| B4F | Artemis Arrows, Elixir, Stardust Rod |
| B5F | Crystal Shield/Mail/Gloves/Helm, Protect Ring, White Robe, Minerva Bustier, Ragnarok |
| B6F | Wind Shuriken, Artemis Arrows, Golden Apple |
| B7F | Holy Lance, Ribbon x2 |
| B8F | Wind Shuriken, Masamune |
| B9F-B10F | Elixir, Gysahl Whistle, Wind Shuriken x2 |
The 5 Things Players Get Stuck On Most in FF4
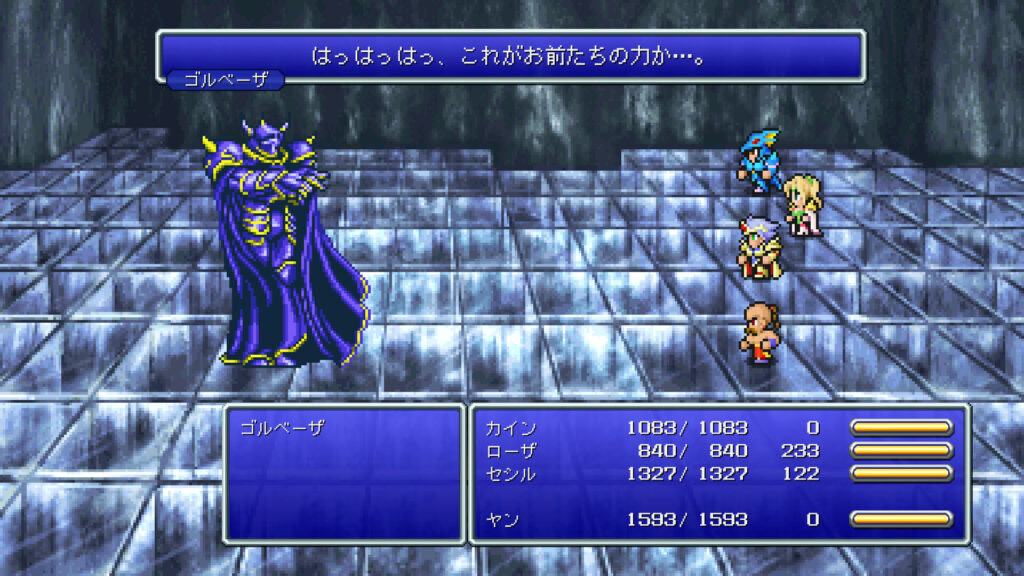
1. Forgetting to unequip departing characters in the PS version
In the PS version, a character’s equipment disappears along with them when they leave the party. The three to watch are Tellah (who self-destructs in the Tower of Zot), Yang (who self-destructs in the Tower of Babil) and Kain (who leaves after the Sealed Cave). Always strip their gear before they go. The Pixel Remaster does away with this problem entirely.
2. Attacking the Mist Dragon while it’s in mist form
When the Mist Dragon, the game’s first boss, shifts into mist form, any attack you land gets answered with Cold Mist, a party-wide counter. It’s a classic first-timer killer. The correct move is to do absolutely nothing and wait out the mist. Set the ATB gauge to “Wait” and you’ll have all the time you need to react.
3. Walking into the Magnetic Cave still wearing metal gear
In the Magnetic Cave, equipping metal weapons or armor leaves you unable to act in battle. You need to stock up on non-metal equipment at Mysidia or Troia ahead of time. Cecil can’t use swords at all here, so there will be moments where you have no choice but to swing with your bare fists.
4. Spamming ice magic without watching Rubicante’s cloak
Hit Rubicante, one of the Four Fiends, with ice magic while his cloak is closed and you’ll heal him instead. Save your focused attacks for the moment the cloak opens. You can see it open and shut with your own eyes, so watch him closely before you commit.
5. Killing the Defense Node first in the CPU fight
In the Giant of Babil’s CPU fight, taking out the Defense Node first among the three targets makes the CPU spam Globe (9999 damage to the whole party), which means a guaranteed wipe. The correct answer is to kill the Attack Node first and then pour everything into the CPU. The Defense Node can be left alone entirely.
Map Guide: 3 World Maps Plus Floor Maps for All 17 Dungeons and 151 Areas
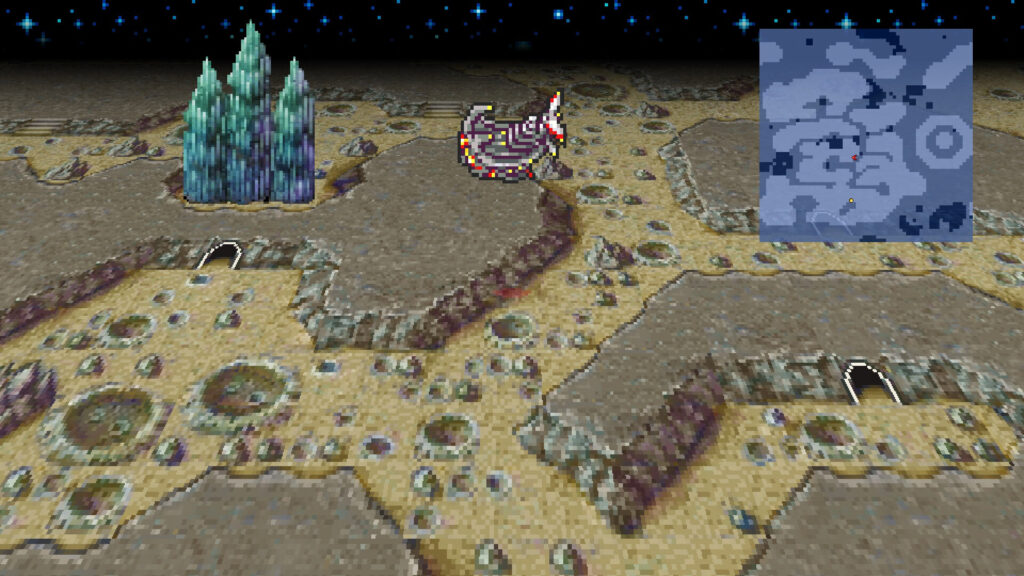
From here on, we’re laying out every map in FF4: three world maps (the Overworld, the Underworld and the moon) plus floor maps for all 17 dungeons across 151 areas. Each map was auto-converted from a walkthrough diagram, so small details may differ from the actual game screen. For what the colors on the maps mean, check the legend.
The dungeon layouts are identical across the SFC version, the PS version and the Pixel Remaster. Chest placement is virtually the same as well, with only a handful of item contents changed in the Pixel Remaster.
How to read the world maps
Land
Sea and sky
Note: auto-converted from in-game screens. Check place names against the walkthrough chart.
How to read these maps
Paths and rooms
Walls and structures
Treasure chests and bosses
Stairs and connections
Note: because these are auto-converted from walkthrough diagrams, small details may differ from the actual game screens.
Can You Play Final Fantasy IV on Modern Hardware? The Complete Platform Guide
✅ The bottom line
As of September 2026, you can play FF4 on Switch, PS4, Steam, iOS, and Android.Two versions are available on modern hardware: the 2D Pixel Remaster and the Nintendo DS 3D remake (Steam/iOS/Android). I would point you to the Pixel Remaster, which runs about $14 on its own.
1. Versions you can play on a subscription or for free
FF4 is not in the Nintendo Switch Online library as of September 2026. Square Enix generally does not hand its Super Famicom catalog over to NSO, so I would not hold my breath waiting for it to show up.
2. Versions you can buy outright
| Version | Platform | Price / notes |
|---|---|---|
| FF4 Pixel Remaster | Switch / PS4 | About $14 each (digital) |
| FF4 Pixel Remaster | Steam | About $14 (has hit 50% off in sales) |
| FF4 Pixel Remaster | iOS / Android | About $14 |
| FF Pixel Remaster six-game bundle | Switch / PS4 / Steam | About $58 (FF1–FF6 set) |
3. Versions playable as remasters or remakes
| Version | Platform | Price / notes |
|---|---|---|
| FF4 (3D remake) | Steam | A port of the Nintendo DS 3D version. Adds its own systems, such as Augments. |
| FF4 (3D remake) | iOS / Android | The 3D remake based on the Nintendo DS version |
The 3D remake (based on the Nintendo DS version) plays very differently from the Pixel Remaster. Augment abilities, a higher difficulty, and full voice acting are its headline features, but none of the strategies in this guide carry over, so keep that in mind.
4. Versions that are hard to get on modern hardware
| Version | Notes |
|---|---|
| Super Famicom version (1991) | Used cartridges only. Not on Nintendo Switch Online. |
| PlayStation version / Final Fantasy Collection (1997/1999) | Downloadable through PSone Classics (PS3/PSP/Vita), though the storefront could close at any time |
| Game Boy Advance version: Final Fantasy IV Advance (2005) | The only version with the bonus dungeons, the Cave of Trials and the Lunar Ruins. Used cartridges only. |
| PSP version: Final Fantasy IV Complete Collection (2011) | Bundles Final Fantasy IV: The After Years. Used UMDs only. |
If you want the Game Boy Advance version’s bonus dungeons (the Cave of Trials and the Lunar Ruins), tracking down a GBA cartridge is the only way. The Pixel Remaster does not include any of that extra content. The realistic route: start with the Pixel Remaster, then go hunting for the GBA cart if the bonus material grabs you.

Enjoying this article? Add us as a preferred source on Google.
Wrap-Up: Final Fantasy IV Is Where the Story-Driven RPG Began
The Super Famicom version of FF4 launched on July 19, 1991. The PlayStation version was folded into Final Fantasy Collection (March 11, 1999, about $43). And the Pixel Remaster has been a digital purchase on Switch and PS4 since April 20, 2023, for about $14. An adventure that tears through 17 dungeons and 151 areas with 12 party members, it is the turning point where the series fused the ATB system with genuinely dramatic storytelling.
The key to clearing it is knowing what all 12 characters can do before the story swaps them in and out on you. Rosa’s Berserk and Slow, Kain’s Jump, and knowing which of Rydia’s elemental spells to reach for are what make or break boss fights. The crystal gear in the Lunar Subterrane and the final fight against Zeromus are the two biggest walls.
On the PlayStation version you have to manually strip the gear off characters before they leave the party. On the Pixel Remaster you get the boost options (0–4x EXP and gil, encounters on or off). Keep those two things in mind and either version should go down smoothly.
FF4 is the historic game that invented the idea of experiencing a story through an RPG. Next to the freedom of FF5’s job system or FF6’s ensemble cast, the player has far fewer choices here — and that is exactly why you get so attached to the characters. Kain’s betrayal, Palom and Porom turning to stone, Tellah’s self-destruct: not many 2D RPGs from over 30 years ago line up this many gut-punch moments. Flip boost on in the Pixel Remaster and you can finish it in around 20 hours, which is reason enough to go back now.
That first jolt of ATB — wait, it is not going to wait for me? — still lands in 2026. Me, I like that kind of tension more than most modern games.
Read Next

Snicker Kitamura










Leave a Reply