




Enjoying this article? Add us as a preferred source on Google.
- The basics of Final Fantasy VI on PS and GBA, and what each version adds
- How the Super Famicom, PS, GBA and Pixel Remaster versions differ, and how to read this guide for both PS and GBA
- How the Magicite system works, with every spell for all 31 Magicite
- All 14 party members’ special commands, learnable abilities and starting stats, in per-character tables
- A walkthrough chart from the World of Balance to the Dragons’ Den
- Floor maps for all 58 locations and 483 maps, with chest contents
Final Fantasy VI is an RPG where each of the 14 party members has their own special command, and anyone can learn any spell as long as you hand them a piece of Magicite. All that freedom is exactly why it is easy to get stuck on questions like who to level up and when to open which treasure chest. The GBA version pushes the finish line for completionists even further out, adding the Dragons’ Den, the Soul Shrine and four new Magicite.
There are three pillars to clearing this game: designing your stats around Magicite level-up bonuses, learning all 14 special commands so you can put the right character in the right slot, and recognizing which treasure chests you should not open until the World of Ruin.
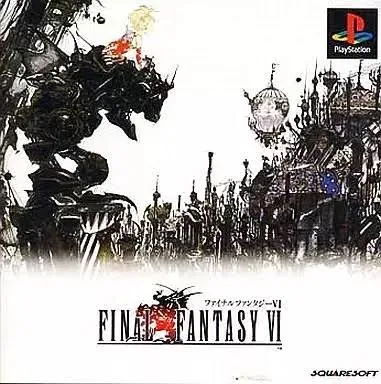
This guide covers both the PS version, released March 11, 1999, and the GBA version, Final Fantasy VI Advance, released November 30, 2006. Dungeon layouts, chest placement and the abilities each character learns are identical in both, so I have gathered all 14 characters’ special commands and learnable abilities into per-character tables, and laid out floor maps for all 58 locations and 483 maps with every chest numbered. Anything exclusive to the GBA version is tagged [GBA], and wherever a chest holds something different in the PS version, both contents are listed right there.
My FF6 was the Super Famicom version, and the memory is not even of my own house but of a friend’s. I did not own the cartridge, so I practically moved into his place and camped there until we had seen the whole thing through to the ending where Kefka goes down. Somewhere in the middle, on a break, I pulled a thin Sailor Moon doujinshi off his bookshelf and got more worked up over that than over what happened next in the game. That room and FF6 are welded together in my head, embarrassing parts included.
On that same playthrough, when we escaped the Floating Continent, the countdown spooked me so badly that I instantly picked “Depart” and left Shadow behind. I still think about it. This guide exists partly so you do not repeat that mistake.
What Kind of Game Is Final Fantasy VI? The Basics of the PS and GBA Versions, and What They Add
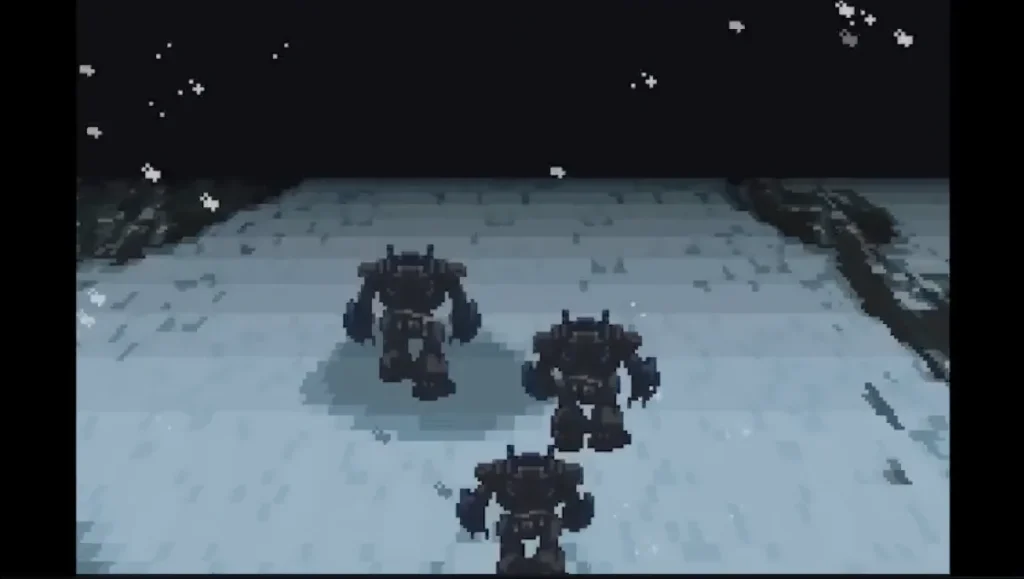
Final Fantasy VI was born on the Super Famicom in 1994. The 1999 PS version is a straight port, and the 2006 GBA version is the definitive edition, adding two new dungeons and four new Magicite.
| Item | Details |
|---|---|
| Title | Final Fantasy VI (PS version) / Final Fantasy VI Advance (GBA version) |
| PS version | March 11, 1999, Square. Also included in Final Fantasy Collection, a same-day bundle of FF4, FF5 and FF6 that sold for 6,800 yen (about US$44). Dollar figures are converted at 153 yen to US$1 and are for reference only. |
| GBA version | November 30, 2006, Square Enix, 4,800 yen (about US$31) before tax. Developed by TOSE |
| Original | Final Fantasy VI on Super Famicom, April 2, 1994, Square, 11,400 yen (about US$75) |
| Party members | 14 (Terra, Locke, Edgar, Sabin, Celes, Cyan, Shadow, Gau, Setzer, Strago, Relm, Mog, Umaro, Gogo) |
| GBA-only additions | Four new Magicite (Leviathan, Cactuar, Gilgamesh, Diabolos), three new spells (Flood, Gravija, Valor), the extra dungeons Dragons’ Den and Soul Shrine, a bestiary, a music player, quick save, and the ability to save after the ending |
| Final goal | Take down Kefka in Kefka’s Tower. In the GBA version, the Kaiser Dragon in the Dragons’ Den and the Soul Shrine’s run of 128 straight battles wait beyond that |
The story opens with Terra, a Magitek soldier under the Empire’s control, and the entire structure of the game flips at the collapse of the world. In the World of Ruin, the moment you get the airship Falcon your destination is wide open, and you decide the order in which you recruit characters and clear side events. The SpotGeeks editorial team rates this as the series entry with the most freedom in party building, and the reason sits in the design: there are no fixed jobs, and Magicite lets anybody learn magic.
The GBA version reportedly sold about 280,000 copies in Japan. That is a solid number for a port arriving 12 years after the original, and the added Dragons’ Den dungeon is what answered the demand from the completionist crowd.
How Do the Super Famicom, PS, GBA and Pixel Remaster Versions Differ? This Guide Covers Both PS and GBA
Here is the short answer: dungeon layouts, chest placement and the abilities characters learn are the same across every version, and the differences are concentrated in added content and quality-of-life features. This guide serves the PS version and the GBA version at once, tagging GBA-only material with [GBA] and listing the PS contents alongside any chest whose contents changed in the GBA version. If you are playing the PS version, skip anything tagged [GBA] and the rest applies as written. One more thing to know up front: the Pixel Remaster does not include the GBA version’s extra dungeons or new Magicite.
| Version | Release date | How it relates to this guide |
|---|---|---|
| Super Famicom version | April 2, 1994 | Maps, chests and learnable abilities are the same as in this guide. Vanish + Doom (and Banish) works on bosses |
| PS version (covered here) | March 11, 1999 | A port of the Super Famicom version with FMV cutscenes added. Load times are long. Maps, chests and learnable abilities match the Super Famicom version, and Vanish + Doom still works |
| GBA version (covered here) | November 30, 2006 | Adds four Magicite, three spells, the Dragons’ Den, the Soul Shrine and a bestiary. Vanish plus instant death is patched out |
| Old mobile version | 2014 (delisted) | A port based on the GBA version. Delisted on July 28, 2021 |
| Pixel Remaster | February 24, 2022 (Steam and mobile), April 20, 2023 (Switch and PS4) | Based on the Super Famicom version. The Dragons’ Den, the Soul Shrine and the new Magicite are not included. Has a boost feature |
What the GBA Version Changed (the Differences from the PS Version)
- Instant-death magic no longer works on an enemy under Vanish. Bosses with status immunity cannot be killed by slapping Vanish on them
- Sabin’s Blitz inputs can now be entered with nothing but the D-pad and the L and R buttons (Suplex is R, L, Down, Up; Mantra is R, L, R, L, Up, Down; Spiraler is R, L, Up, Down, Right, Left)
- In the Cave to the Sealed Gate, a chest’s Remedy became a Gold Needle and its 2,000 gil became 293 gil. Chests in Owzer’s Mansion got the same treatment: Hi-Potion to Potion, Turbo Ether to Ether, Remedy to Gold Needle, 2,000 gil to 293 gil. The map walkthrough tables list the contents for both versions side by side
- Mog can learn Water Rondo from the Leviathan fight, so you no longer have to go fight at the Lete River or the Serpent Trench during the World of Balance
- Movement speed in towns is doubled. Put on Sprint Shoes and it doubles again for 4x speed
- You can save after the ending, which lets you carry items stolen from the final boss over and head for the Dragons’ Den
- The old versions’ bug where magic evasion was used to dodge physical attacks has been fixed
The more time you sank into the Super Famicom or PS versions, the more the GBA version will throw you with Vanish-Doom gone and Sabin’s commands reworked. Get those two things straight, though, and the GBA version is a safe “the original plus extras” experience, while on the PS version everything in this guide outside the [GBA] tags applies exactly as written.
What Is the Magicite System? Every Spell and Level-Up Bonus for All 31 Magicite
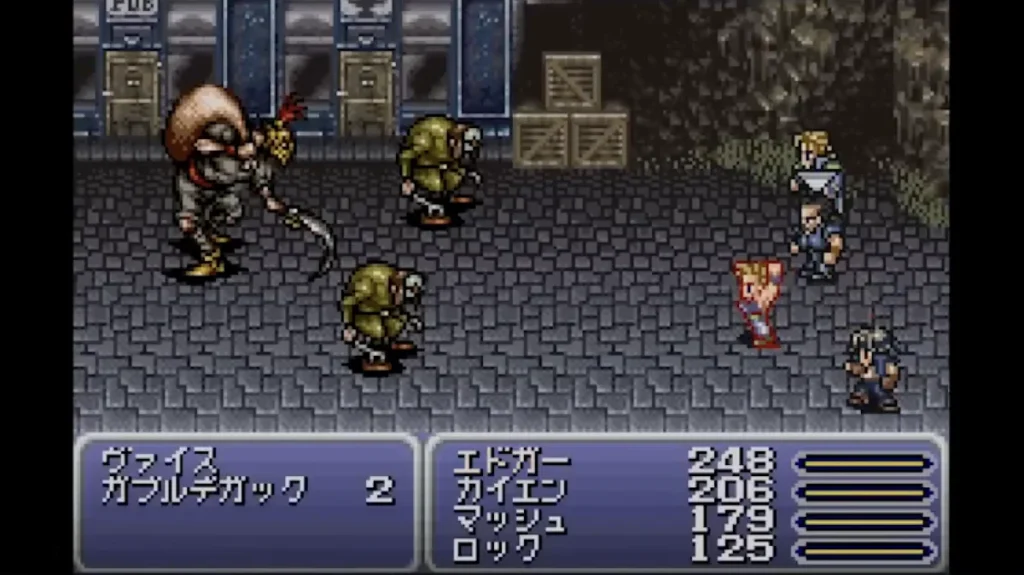
Magicite are stones with an Esper’s power sealed inside: the character who equips one banks the magic AP earned in battle to learn that Magicite’s spells, and gains bonus stats on level-up.
The mechanics are simple. One Magicite is equipped by one character, and the learn percentage advances by the magic AP earned on a battle victory multiplied by each spell’s rate. A spell with a ×20 rate hits 100% after a single battle worth 5 magic AP. A ×1 spell, on the other hand (Ultima, Meteor, Curaga and the like), needs a full 100 magic AP, and that is what decides how long character building takes.
The other pillar is the level-up bonus. Level up with a Magicite still equipped and you add that Magicite’s specific bonus (Magic +2, HP +30% and so on). Magicite that carry a bonus are already in the mix among the first four you get in Zozo, so whenever you are leveling a character you want to invest in, make sure a bonus Magicite is attached. This is the core of character design in this game, and if you level up without thinking, there is no taking it back.
All 31 Magicite: Where to Find Them, Spells Learned and Bonuses
| Magicite | Where to find it | Spells learned (rate) | Bonus |
|---|---|---|---|
| Ramuh | Zozo (first visit) | Thunder ×10, Thundara ×2, Poison ×5 | Stamina +1 |
| Kirin | Zozo (first visit) | Cure ×5, Cura ×1, Regen ×3, Poisona ×4, Libra ×5 | None |
| Siren | Zozo (first visit) | Sleep ×10, Silence ×8, Slow ×7, Fire ×6 | HP +10% |
| Cait Sith | Zozo (first visit) | Confuse ×7, Imp ×5, Float ×2 | Magic +1 |
| Ifrit | Magitek Research Facility | Fire ×10, Fira ×5, Drain ×1 | Vigor +1 |
| Shiva | Magitek Research Facility | Blizzard ×10, Blizzara ×5, Rasp ×4, Osmose ×4, Cure ×3 | None |
| Unicorn | Magitek Research Facility | Cura ×4, Esuna ×3, Dispel ×2, Protect ×1, Shell ×1 | None |
| Maduin | Magitek Research Facility | Fira ×3, Blizzara ×3, Thundara ×3 | Magic +1 |
| Catoblepas | Magitek Research Facility | Bio ×8, Break ×5, Doom ×2 | HP +10% |
| Phantom | Magitek Research Facility | Berserk ×3, Vanish ×3, Gravity ×5 | MP +10% |
| Carbuncle | Magitek Research Facility | Reflect ×5, Haste ×3, Shell ×2, Protect ×2, Teleport ×2 | None |
| Bismarck | Magitek Research Facility | Fire ×20, Blizzard ×20, Thunder ×20, Raise ×2 | Vigor +2 |
| Golem | Jidoor auction house (20,000 gil) | Protect ×5, Stop ×5, Cura ×5 | Stamina +2 |
| Zona Seeker | Jidoor auction house (10,000 gil) | Rasp ×20, Osmose ×15, Shell ×5 | Magic +2 |
| Seraph | Tzen (bought for 3,000 gil) | Raise ×5, Cura ×8, Cure ×20, Regen ×10, Esuna ×4 | None |
| Palidor | Beach on the Solitary Island (World of Ruin, after getting the Falcon) | Haste ×20, Slow ×20, Hastega ×2, Slowga ×2, Float ×5 | None |
| Fenrir | Village of Mobliz (beat Humbaba) | Teleport ×10, Banish ×5, Stop ×3 | MP +30% |
| Valigarmanda | Narshe, Esper Valley (beat it in the World of Ruin) | Firaga ×1, Blizzaga ×1, Thundaga ×1 | Magic +2 |
| Midgardsormr | Yeti’s Cave | Quake ×3, Graviga ×1, Tornado ×1 | HP +30% |
| Lakshmi | Deepest room of Owzer’s Mansion | Cure ×25, Cura ×16, Curaga ×1, Regen ×20, Esuna ×20 | Stamina +2 |
| Alexander | The throne in Doma Castle (after clearing the dream dungeon) | Holy ×2, Shell ×10, Protect ×10, Dispel ×10, Esuna ×15 | None |
| Phoenix | Deepest part of the Phoenix Cave | Raise ×10, Arise ×2, Reraise ×1, Curaga ×2, Firaga ×3 | None |
| Odin | The statue in the Ancient Castle throne room | Meteor ×1 | Speed +1 |
| Raiden | Hidden room in the Ancient Castle (after getting Odin) | Quick ×1 | Vigor +2 |
| Bahamut | Beat Doom Gaze, which appears while you fly the airship | Flare ×2 | HP +50% |
| Ragnarok | Narshe weapon shop (with Locke in the party; choose it instead of the Ragnarok sword) | Ultima ×1 | None |
| Crusader | Beat all eight legendary dragons | Meltdown ×1, Meteor ×10 | MP +50% |
| Leviathan [GBA] | Appears when you board the ship from the port town of Nikeah; beat it to claim the Magicite | Flood ×2 | Stamina +2 |
| Cactuar [GBA] | Beat the Gigantuar that shows up after you defeat a Cactuar in the desert south of Maranda | Teleport ×20, Vanish ×10, Hastega ×5 | Speed +2 |
| Gilgamesh [GBA] | Win Excalipoor at the Jidoor auction, then wager it at the Colosseum and he appears | Quick ×1, Valor ×5 | Vigor +2 |
| Diabolos [GBA] | Beat the Kaiser Dragon in the Dragons’ Den | Graviga ×5, Gravija ×3 | HP +100% |
[GBA] marks Magicite added in this version. The three new spells are Flood (60 MP, water damage to all enemies), Gravija (70 MP, cuts every enemy’s HP to one-eighth) and Valor (20 MP, triples physical attack power for one attack). The PS version and the Pixel Remaster have neither these four Magicite nor these three spells.
The standard approach to character building is to hang Bismarck (Vigor +2) and Zona Seeker (Magic +2) on your main party early, then rotate in Valigarmanda (Magic +2), Bahamut (HP +50%) and, in the GBA version, Diabolos (HP +100%) from the midgame on. Raising Magic pushes the power of both Curaga and Ultima, so anyone who is not a physical attacker should get a Magic +2 Magicite first.
Special Commands, Learned Abilities and Starting Stats for All 14 Party Members: A Character-by-Character Party-Building Guide
There are 14 party members, and every one of them gets Fight, Magic and Item plus a single special command on top. Anyone can learn magic from Magicite, so what actually defines a character is the pairing of that special command with their starting stats. Below, in the order they join, I break each one down: starting stats (Vigor, Speed, Stamina and Magic at Lv1, with where they rank among the 14), special command, abilities learned, and the character-grade weapons you can only get from the GBA version Dragons’ Den. If you are playing the PS version, just skip the [GBA] line at the end of each entry.
The starting stats show each character’s raw tendency if you never apply a single Esper bonus and simply grind levels. Part of what makes this game great is that a low ranking can be flipped completely with Magicite, so treat these tables as nothing more than a baseline: this is how they turn out if you do nothing at all.
A Desperation Attack (the game’s hidden super move) is a Defense-ignoring technique that fires on a 1-in-16 chance when you pick Fight at one-eighth of max HP or less. Gau and Umaro do not have one. Each character’s move name is listed in the entries below.
Terra (Magitek warrior and protagonist, in the party from the start)
Terra is one of only two natural-born mages in the game who learn spells just by leveling up, no Magicite required. Her Magic ranks 2nd out of the 14, and she can equip both swords and knight swords, so she covers the front row and the back row equally well. Her special command, Morph, is the trump card: she transforms into an Esper, dealing double damage and taking half. It unlocks after she rejoins in Zozo. The Morph gauge fills as you bank magic AP, and once it empties you cannot use it again until you have earned another 8 AP. In the World of Ruin, the duration gets longer.
| Vigor | Speed | Stamina | Magic |
|---|---|---|---|
| 31 (10th) | 33 (8th) | 28 (10th) | 39 (2nd) |
| Lv | Spell Learned | MP | Effect |
|---|---|---|---|
| Start | Cure | 5 | Restores a small amount of HP to one ally |
| Start | Fire | 4 | Weak fire-element spell |
| 6 | Poisona | 3 | Cures poison and sap |
| 12 | Drain | 15 | Drains HP |
| 18 | Raise | 30 | Revives a KO’d ally at near-death HP |
| 22 | Fira | 20 | Mid-tier fire-element spell |
| 26 | Teleport | 20 | Escapes a dungeon or a battle |
| 33 | Cura | 25 | Restores a moderate amount of HP |
| 37 | Dispel | 25 | Strips away support effects |
| 43 | Firaga | 51 | High-tier fire-element spell |
| 49 | Arise | 60 | Revives a KO’d ally at full HP |
| 57 | Holy | 40 | Single-target holy-element attack |
| 68 | Break | 25 | Turns the target to stone |
| 75 | Graviga | 48 | Cuts every enemy’s HP to one quarter |
| 86 | Merton | 85 | Fire and wind damage to all combatants, ignores Magic Defense |
| 99 | Ultima | 80 | The strongest spell: non-elemental damage to all enemies, ignores Magic Defense |
Terra learns 16 spells by level. Magicite is the faster route, so this trait only really matters in the early hours before you have any.
Desperation Attack: Riot Blade. [GBA] Apocalypse (Attack 250, spends MP to land criticals), dropped by the upgraded Red Dragon in the Dragons’ Den, is Terra’s ultimate weapon.
Locke (treasure hunter, joins in Narshe)
Locke is a thief with the best Speed of all 14, and his special command, Steal, lifts items straight off enemies. Equip the Thief’s Bracer and it turns into Capture, which steals while it attacks; the Genji Glove’s dual-wield gives you two steal rolls, and the Master’s Scroll gives you four. The success rate is decided by the level gap between Locke and the target, and even on a success, rare drops only come up one time in eight. Equipping the Brigand’s Glove doubles the success rate.
| Vigor | Speed | Stamina | Magic |
|---|---|---|---|
| 37 (7th) | 40 (1st) | 31 (7th) | 28 (11th) |
Abilities learned: none (Steal and Capture are both available from the start). The Valiant Knife, which you pick up later in the Phoenix Cave, is a character weapon that grows stronger the lower his HP falls, and it turns him into a genuinely scary physical attacker in the endgame.
Desperation Attack: Mirager. [GBA] The Zwill Crossblade (Attack 220, 25% chance of triggering Sleep), dropped by the upgraded Yellow Dragon in the Dragons’ Den, is Locke’s ultimate weapon.
Edgar (King of Figaro and machinist, joins at Figaro Castle)
Edgar’s special command, Tools, uses dedicated gadgets to hit every enemy at once or stick them with status ailments. The big selling point is that their power does not drop off from the back row, and in the early game the AutoCrossbow is a damage source on par with Terra casting Fire on all enemies. Tools are sold at the item shop in Figaro Castle, and if you put Edgar at the head of the party before you talk to the clerk, the price is cut in half.
| Vigor | Speed | Stamina | Magic |
|---|---|---|---|
| 39 (5th) | 30 (11th) | 34 (4th) | 29 (9th) |
| Tool | Price | Effect | Where to Get |
|---|---|---|---|
| AutoCrossbow | 250 | Physical attack on all enemies | Owned from the start; also sold at Figaro Castle |
| NoiseBlaster | 500 | Confuses all enemies | Figaro Castle |
| Bio Blaster | 750 | Poison-element damage to all enemies, plus Poison | Figaro Castle |
| Flash | 1,000 | Damage to all enemies, plus Blind | Figaro Castle (after the fight to defend the Esper at Narshe) |
| Drill | 3,000 | Defense-ignoring damage to one enemy | Figaro Castle (after the fight to defend the Esper at Narshe) |
| Chain Saw | Treasure chest | Heavy Defense-ignoring damage to one enemy; rarely an instant kill | Zozo (set the clock to 6:10:50) |
| Debilitator | 5,000 | Saddles one enemy with an elemental weakness | Figaro Castle (World of Ruin) |
| Air Anchor | Treasure chest | Damage, and the enemy destroys itself the next time it acts | Cultists’ Tower (past the hidden switch) |
Desperation Attack: Royal Shock. [GBA] Longinus (Attack 235), dropped by the upgraded Storm Dragon in the Dragons’ Den, is Edgar’s ultimate spear.
Sabin (monk and Edgar’s twin brother, joins at Mt. Kolts)
Sabin’s special command, Blitz, fires only after you punch in a button input like you are playing a fighting game. He ranks 2nd of 14 in both Vigor and Stamina, and his Blitzes never miss and lose no power from the back row. The PS version uses the same inputs as the Super Famicom version, while the GBA version trims them down to the D-pad plus L and R. Diagonals can be replaced with the two neighboring D-pad directions in any version. Blitzes come with levels, with one exception: Bum Rush can be learned regardless of level through the event at Duncan’s house in the World of Ruin.
| Vigor | Speed | Stamina | Magic |
|---|---|---|---|
| 47 (2nd) | 37 (4th) | 39 (2nd) | 28 (11th) |
| Lv | Blitz | PS Version Input | GBA Version Input | Effect |
|---|---|---|---|---|
| 1 | Pummel | ←→← | ←→← | Defense-ignoring physical attack on one enemy |
| 6 | Aura Cannon | ↓↙← | ↓←← | Holy-element attack on one enemy that scales with Magic |
| 10 | Suplex | XY↓↑ | RL↓↑ | A throw on one enemy; no effect on enemies immune to throws |
| 15 | Fire Dance | ←↙↓↘→ | ←←↓→→ | Fire-element attack on all enemies |
| 23 | Mantra | RLRLXY | RLRL↑↓ | Restores HP to everyone but Sabin and cures poison, blind, silence and more |
| 30 | Air Blade | ↑↗→↘↓↙← | ↑↑→→↓↓← | Wind-element attack on all enemies |
| 42 | Spiraler | RLXY→← | RL↑↓→← | Trades Sabin’s own life to fully restore the party’s HP and cure every status ailment |
| 70 | Bum Rush | ←↖↑↗→↘↓↙← | ←←↓→→↓↓← | Colossal Magic Defense-ignoring damage to one enemy; also learned through Duncan’s event |
Desperation Attack: Tiger Break. [GBA] Godhand (Attack 220, holy element), dropped by the upgraded Earth Dragon in the Dragons’ Den, is Sabin’s ultimate weapon.
Celes (former Imperial general and rune knight, joins in South Figaro)
Like Terra, Celes is a Magitek warrior who learns magic without Magicite, and her special command, Runic, absorbs exactly one incoming spell and converts it into her own MP. It does not care which side cast it, so be careful: it will swallow your own party’s Cure too. Her stats are strong across the board, and since she is the character you control first in the World of Ruin, she holds the front line for a long stretch.
| Vigor | Speed | Stamina | Magic |
|---|---|---|---|
| 34 (9th) | 34 (6th) | 31 (7th) | 36 (4th) |
| Lv | Spell Learned | MP | Effect |
|---|---|---|---|
| Start | Blizzard | 5 | Weak ice-element spell |
| Start | Cure | 5 | Restores a small amount of HP |
| 8 | Poisona | 3 | Cures poison and sap |
| 13 | Imp | 10 | Inflicts or cures the imp status |
| 18 | Libra | 3 | Reveals an enemy’s HP and weaknesses |
| 22 | Protect | 12 | Reduces physical damage |
| 26 | Blizzara | 21 | Mid-tier ice-element spell |
| 32 | Haste | 10 | Raises action speed |
| 32 | Confuse | 8 | Confuses the target |
| 40 | Berserk | 16 | Inflicts the berserk status |
| 42 | Blizzaga | 52 | High-tier ice-element spell |
| 48 | Vanish | 18 | Turns the target invisible |
| 52 | Hastega | 38 | Casts Haste on the whole party |
| 72 | Holy | 40 | Single-target holy-element attack |
| 81 | Flare | 45 | Single-target non-elemental attack that ignores Magic Defense |
| 98 | Meteor | 62 | Non-elemental damage to all enemies, ignores Magic Defense |
Desperation Attack: Spin Edge. [GBA] Save the Queen (Attack 240, Evade and Magic Evade +40), dropped by the upgraded Blue Dragon in the Dragons’ Den, is Celes’s ultimate weapon.
Cyan (the samurai of Doma, joins at the Imperial Camp)
Cyan’s special command, Bushido, is a charge move: the gauge fills, and whatever number it lands on decides which technique comes out. His Vigor ranks 4th among the 14 characters, but his Speed and Magic sit near the bottom, so he is a poor fit for a spellcaster. Bushido techniques are normally picked up by leveling, but in the World of Ruin you can beat Wrexsoul in the dream dungeon inside Doma Castle and get all eight at once, regardless of level. None of it works unless he has a katana equipped.
| Vigor | Speed | Stamina | Magic |
|---|---|---|---|
| 40 (4th) | 28 (13th) | 33 (5th) | 25 (14th) |
| Bushido Lv | Ability | Level Learned | Effect |
|---|---|---|---|
| 1 | Dispatch | 1 | Strong attack on one enemy |
| 2 | Retort | 6 | Counters if Cyan takes a physical attack before his next turn |
| 3 | Slash | 12 | Halves one enemy’s HP and inflicts Sap |
| 4 | Quadra Slam | 15 | Four random attacks at half power |
| 5 | Empowerer | 24 | Drains HP and MP from one enemy |
| 6 | Stunner | 34 | Damage to all enemies plus Stop |
| 7 | Quadra Slice | 44 | Four random attacks at normal attack power |
| 8 | Cleave | 70 | Instantly kills all enemies |
Desperation Attack: Fang. [GBA] The Zanmato (Attack 245, holy element), dropped by the enhanced White Dragon in the Dragons’ Den, is the best weapon you can hand Cyan.
Shadow (the assassin, a mercenary who works for money)
Shadow’s special command, Throw, attacks by hurling shuriken and ninjutsu scrolls. The Fire Skean, Water Edge and Bolt Edge scrolls hit with the same elements as magic and lose no power from the back row. The other quirk is his dog, Interceptor, who sometimes takes a physical attack for him and counters. In the World of Balance he comes and goes every time you hire him, and if you do not wait until the timer is down to five seconds while escaping the Floating Continent, he never joins again.
| Vigor | Speed | Stamina | Magic |
|---|---|---|---|
| 39 (5th) | 38 (2nd) | 30 (9th) | 33 (8th) |
| Ninjutsu / Throw item | Price | Effect |
|---|---|---|
| Fire Skean | 500 | Fire-element damage to all enemies |
| Water Edge | 500 | Water-element damage to all enemies |
| Bolt Edge | 500 | Lightning-element damage to all enemies |
| Inviz Edge | 200 | Turns Shadow invisible |
| Shadow Edge | 400 | Puts Shadow in Image status |
| Shuriken / Fuma Shuriken | Sold in shops | Throwing damage to one enemy. Weapons can be thrown as well |
Desperation Attack: Shadow Fang. [GBA] The Oborozuki (Attack 225, Evade +50), dropped by the Pudding Princess in the Dragons’ Den treasure room, is the best weapon you can hand Shadow.
Gau (the wild boy of the Veldt, joins on the Veldt)
Gau has no Fight command at all. His special command, Rage, reproduces a monster’s behavior instead. You use Leap on the Veldt, and when he comes back he has learned the techniques of the monsters that were out there. While a Rage is active you lose control of him, and he alternates roughly fifty-fifty between normal attacks and the monster’s special attack. His starting stats are excellent — 3rd in Vigor, 2nd in Speed, 3rd in Stamina — and since he cannot equip weapons, you make up the difference with armor and relics.
| Vigor | Speed | Stamina | Magic |
|---|---|---|---|
| 44 (3rd) | 38 (2nd) | 36 (3rd) | 34 (6th) |
| Recommended Rage | Where to learn it | Ability it triggers |
|---|---|---|
| Stray Cat | Lone house and the area around Doma Castle (World of Balance) | Cat Scratch (4x normal attack damage) |
| Mu | Around South Figaro (World of Balance) | Snare (instantly kills one enemy) |
| Chimera | Forest around Thamasa (World of Balance) | Aqua Breath (water and wind element on all enemies) |
| Tyrannosaur | Dinosaur Forest (World of Ruin) | Meteor (hits all enemies, ignores Magic Defense) |
| Magic Urn | Cultists’ Tower (World of Ruin) | Curaga (big HP recovery for an ally) |
The pool of Rages grows with every monster Gau meets on the Veldt, and a full collection runs past 250 entries. The table above is trimmed down to the ones that pull real weight in the early game and the endgame.
Desperation Attack: none (Gau does not have one). [GBA] The Duel Mask found in the Dragons’ Den treasure room is the head armor to put on Gau.
Setzer (the gambler, owner of the airship Blackjack)
Setzer’s special command, Slot, leaves it all to luck: three reels spin, and the symbols that line up decide the effect. Hit 7-7-7 and Joker Doom wipes out every enemy. Hit 7-7-BAR and it wipes out your own party instead. That is the gamble. Equip the Coin Toss and Slot turns into GP Rain, which throws gil for guaranteed damage. His stats are average across the board, so the safe plan is to grow his Magic with Magicite and run him as a caster.
| Vigor | Speed | Stamina | Magic |
|---|---|---|---|
| 36 (8th) | 32 (10th) | 32 (6th) | 29 (9th) |
| Reel symbols | Ability | Effect |
|---|---|---|
| Chocobo x3 | Chocobop | Non-elemental magic damage to all enemies |
| Airship x3 | H-Bomb | Non-elemental magic damage to all enemies |
| Diamond x3 | 7-Flush | Non-elemental magic damage to all enemies |
| BAR x3 | Random summon | Summons a random Esper |
| Dragon x3 | Megaflare | Damage to all enemies, ignoring Magic Defense |
| 7-7-7 | Joker Doom | Instantly kills all enemies. Works on bosses too |
| 7-7-BAR | Joker Doom | Your entire party is knocked out |
| Anything else | Lagomorph | Restores a little HP to the whole party and cures Poison, Blind and Sleep |
Desperation Attack: Red Card. [GBA] The Last Resort (Attack 215, no power loss from the back row), dropped by the enhanced Ice Dragon in the Dragons’ Den, is the best weapon you can hand Setzer.
Strago (the blue mage of Thamasa, joins in the village of Thamasa in the World of Balance)
Strago’s special command, Lore, is blue magic: he learns specific enemy techniques by watching them used in battle. There are 24 in all, and two of them carry the endgame — the defense-ignoring Grand Delta and the party-wide heal Pearl Wind. His Stamina and Speed are dead last, so commit to the obvious role: pump his Magic with Magicite and fire off Lores from the back row.
| Vigor | Speed | Stamina | Magic |
|---|---|---|---|
| 28 (12th) | 25 (14th) | 19 (14th) | 34 (6th) |
| Ability | MP | Effect | Main source |
|---|---|---|---|
| Doom | 20 | Inflicts Condemned | Narakamiche |
| Roulette | 10 | Instantly kills one random target | Nerapa |
| Tsunami | 30 | Water element on all enemies | Enuo |
| Aqua Breath | 22 | Water and wind element on all enemies | Chimera |
| Aero | 41 | Wind element on all enemies | Marchosias |
| 1000 Needles | 50 | 1000 damage | Cactuar |
| Mighty Guard | 80 | Protect and Shell on the whole party | Mover |
| Revenge Blast | 31 | Damage equal to the HP Strago has lost | Pandora |
| Pearl Wind | 45 | Heals the whole party for Strago’s current HP | Marchosias |
| L5 Doom | 22 | Instantly kills enemies whose level is a multiple of 5 | Trapper |
| L4 Flare | 42 | Casts Flare on enemies whose level is a multiple of 4 | Trapper |
| L3 Confuse | 28 | Confuses enemies whose level is a multiple of 3 | Trapper |
| Reflect??? | 0 | Inflicts Blind, Silence and Slow on enemies under Reflect | Dullahan |
| L? Holy | 50 | Casts Holy on enemies whose level is a multiple of the last digit of your gil | Charmy Ride |
| Step Mine | 1 | Damage based on your step count | Tonberry |
| Force Field | 24 | Nullifies one of the elements | Magic Master |
| Dischord | 68 | Halves one enemy’s level | Figaliz |
| Bad Breath | 32 | Inflicts Poison, Blind, Silence, Confuse, Sleep and Imp | Malboro |
| Pep Up | 1 | Fully restores one ally at the cost of Strago’s own life | Mousse |
| Rippler | 66 | Swaps Strago’s statuses with an enemy’s | Gigantoad |
| Stone | 22 | Non-elemental damage plus Confuse | Motor Drive |
| Quasar | 50 | Hits all enemies, ignoring Magic Defense | Dark Force |
| Grand Delta | 64 | Heavy damage to all enemies, ignoring Magic Defense | Hidon |
| Self-Destruct | 1 | Deals damage equal to Strago’s current HP and knocks him out | Bomb |
Desperation Attack: Sun Bath. [GBA] The Stardust Rod (Attack 180, 25% chance of casting Meteor), found in the Dragons’ Den treasure room, is the best weapon you can hand Strago.
Relm (the girl from Thamasa, a pictomancer; joins in the village of Thamasa in the World of Balance)
Relm’s Magic of 44 is 1st among the 14 characters, which makes her flatly the strongest magic user in the game. Her special command, Sketch, draws an enemy and has the illusion use its abilities, and equipping the Fake Mustache swaps it for Control, which lets her puppet enemies directly. Her Stamina is low, so the standard build is to park her in the back row, push her Magic higher still with Magicite and let her spam Ultima.
| Vigor | Speed | Stamina | Magic |
|---|---|---|---|
| 26 (13th) | 34 (6th) | 22 (12th) | 44 (1st) |
Abilities learned: none (Sketch and Control are both available from the start). She is the only character who starts with a relic equipped, the Memento Ring. Sketch’s success rate changes depending on how the enemy looks, and a failure costs you nothing.
Desperation Attack: Star Prism. [GBA] The Angel Brush (Attack 170, 25% chance of inflicting Confuse), dropped by the Plague in the Dragons’ Den treasure room, is the best weapon you can hand Relm.
Mog (the Narshe moogle; joins in Narshe during the World of Balance)
Mog’s special command, Dance, learns a routine tied to whatever terrain he fought on, then fires off one of four random abilities every turn until the battle ends. Match the dance to the terrain and it lands every single time; use it on the wrong terrain and he trips over his own feet half the time. The Moogle Charm, which you pick up in the moogle cave after the world breaks, switches off random encounters entirely while it is equipped, and that makes it the trump card for walking your third party safely through the split-party stretches of Kefka’s Tower and the Dragons’ Den.
| Vigor | Speed | Stamina | Magic |
|---|---|---|---|
| 29 (11th) | 36 (5th) | 26 (11th) | 35 (5th) |
| Dance | Terrain Learned On | Abilities Triggered (odds in order: 6/16, 6/16, 3/16, 1/16) |
|---|---|---|
| Wind Song | Plains | Wind Slash, Sun Bath, Plasma, Cockatrice |
| Forest Suite | Forest | Leaf Swirl, Forest Bath, Will-o’-the-Wisp, Wombat |
| Desert Aria | Desert | Sandstorm, Antlion, Wind Slash, Meerkat |
| Love Sonata | Towns and interiors (Zozo, the Phantom Train, and so on) | Will-o’-the-Wisp, Specter, Snare, Tapir |
| Earth Blues | Mountains (Mt. Kolts, Mt. Zozo, the Floating Continent) | Landslide, Sonic Boom, Sun Bath, Wild Boar |
| Water Rondo | Water (the Lete River and the Serpent Trench in the World of Balance; the Leviathan fight too in the GBA version) | El Nino, Plasma, Specter, Raccoon |
| Dusk Requiem | Caves (the Narshe mines, Ebot’s Rock, Daryl’s Tomb) | Cave In, Snare, Will-o’-the-Wisp, Poison Frog |
| Snowman Jazz | Snowfields (Esper Valley) | Snowball, Avalanche, Snare, Snow Hare |
Desperation Attack: Moogle Rush. [GBA] The Gungnir (Attack 240) that Nesragh drops in the Dragons’ Den treasure vault is the strongest spear Mog can hold.
Umaro (the yeti; joins at Yeti’s Cave in the World of Ruin, and you need Mog with you)
Umaro tops all 14 characters in both Vigor (57) and Stamina (46), but you never get to pick his commands; he just does whatever he likes in battle. He cannot equip weapons, armor, or Magicite, so accessories are the only way to build him up. To recruit him, bring Mog along, examine the skeleton at the deepest point of Yeti’s Cave, win the fight, and then talk to him.
| Vigor | Speed | Stamina | Magic |
|---|---|---|---|
| 57 (1st) | 33 (8th) | 46 (1st) | 37 (3rd) |
Abilities learned: none (he acts entirely on his own). He cannot equip Magicite, so he never learns magic either. If you shuffle accessories around between characters, Umaro has a habit of quietly hanging onto the good ones, so check his equipment screen when something goes missing.
Desperation Attack: none (Umaro simply does not have one). [GBA] The Dragons’ Den treasure vault adds an Umaro-specific accessory, the Bone Wrist.
Gogo (the mimic; joins inside Zone Eater in the World of Ruin)
Gogo’s special command, Mimic, repeats whatever the last ally did without spending MP or items. On top of that, you can assign up to three of your other characters’ commands to him from the status screen, so he can use Steal, Blitz, or Bushido at will. His stats are bottom-tier across the board and he cannot equip Magicite, though, so the copies always hit softer than the originals. To recruit him, let Zone Eater on Triangle Island swallow the whole party, then talk to Gogo at the far end of its innards.
| Vigor | Speed | Stamina | Magic |
|---|---|---|---|
| 25 (14th) | 30 (11th) | 20 (13th) | 26 (13th) |
Abilities learned: none (he uses the commands you set for him). For magic, he can cast anything that any of your characters has learned.
Desperation Attack: Punisher. [GBA] The Scorpion Tail (Attack 225, poison element, no damage penalty from the back row) dropped by the Dragons’ Den’s upgraded Skull Dragon is Gogo’s strongest weapon.
The Verdict on Party Building: Who to Run Early, Mid, and Late
| Stage | Recommended | Why |
|---|---|---|
| World of Balance, early game | Terra, Edgar, Sabin + Locke | Multi-targeted Fire, Auto Crossbow, and Blitz give you three sources of party-wide damage, and Locke steals gear on the side |
| World of Balance, Floating Continent | Celes, Sabin, Shadow + anyone | Bring Shadow along before the Guardian fight, and wait until five seconds are left during the escape |
| World of Ruin, recruiting | Celes, Sabin, Setzer + Mog | The Moogle Charm lets you tour the whole map without fighting a thing |
| Kefka’s Tower and the Dragons’ Den | Relm, Terra, Celes, Sabin | Ultima on your three highest-Magic characters, plus Sabin’s Bum Rush to ignore magic defense |
Walkthrough: How to Get From the World of Balance to the Dragons’ Den
This section lays out where to go, what you are there for, and which bosses are waiting, all in story order. For floor plans and treasure chests in each dungeon, check the map section.
World of Balance (1): Narshe to the Lete River
| Destination | Objective | Bosses and Notes |
|---|---|---|
| The mining town of Narshe / the Narshe mines | Ride the Magitek Armor to the frozen Esper, then link up with Locke and Mog | Whelk. Leave two of the chests in the Narshe mines shut until the World of Ruin |
| Figaro Castle | Edgar joins, and Kefka sets the castle on fire | Two Magitek Armors |
| South Figaro Cave to the town of South Figaro | Head for Mt. Kolts | Leave three of the chests in South Figaro Cave shut until the World of Ruin |
| Mt. Kolts | Sabin joins | Vargas (finish him with Sabin’s Blitz, Pummel) |
| Returner Hideout | Meet Banon, then head for the Lete River | Chests, plus the choice of whether to side with the Empire. This is also the only window for the Genji Glove |
| Lete River | The three of them get split up | Ultros. From here you pick the three scenarios and play them one at a time |
World of Balance (2): The Three Scenarios and the Battle for Narshe
| Scenario | Destination | Bosses and Notes |
|---|---|---|
| Locke’s scenario | The town of South Figaro to South Figaro Cave | Celes joins. Steal clothes in town and work your way through in disguise. Tunnel Armor |
| Terra and Edgar’s scenario | Figaro Castle to South Figaro to Narshe | No boss. Duncan’s house can only be visited in the World of Balance, so take the detour |
| Sabin’s scenario | Imperial Camp to the Phantom Forest to the Phantom Train to Baren Falls to the Veldt to Mt. Crescent to the Serpent Trench to Nikeah | Cyan, Shadow (temporarily), and Gau join. On the Phantom Train, a Phoenix Down is an instant kill |
| After everyone regroups | The battle to defend the Esper at Narshe | Hold off the imperial troops with three parties. Once Kefka falls, Terra loses control and leaves the group |
World of Balance (3): The Search for Terra to the Floating Continent
| Destination | Objective | Bosses and Notes |
|---|---|---|
| Jidoor to the town of Zozo | Find Terra and pick up four pieces of Magicite (Ramuh, Kirin, Siren, Cait Sith) | Dadaluma. Set the clocks correctly for the Chainsaw |
| Jidoor to the Opera House | Celes stands in for the diva Maria, and Setzer joins | Ultros. Picking the right lyrics, and a five-minute time limit |
| The Blackjack to the imperial capital of Vector to the Magitek Factory to the Magitek Research Facility | Take back the Magicite and meet Cid. You walk out with a pile of Esper Magicite | Number 024, Number 128, two Cranes |
| Narshe to Esper Valley | Terra rejoins. Finish every World of Balance side trip before this point | Lone Wolf the pickpocket (either Mog joins or you take the Gold Hairpin) |
| The Sealed Gate lookout post to the Cave to the Sealed Gate | Terra and Locke open the Sealed Gate | The Espers break loose and tear off toward the imperial castle. Do not walk past the chest holding the Ultima Weapon |
| The imperial castle (the banquet with the Emperor) | Answer the questions correctly for a reward, and the armory opens up | Depending on your answers, 13 chests at the Sealed Gate lookout post become available |
| Albrook to the cargo ship to the village of Thamasa to the burning house | Strago and Relm join | Flame Eater. Kefka attacks Thamasa |
| The Esper Caves to the Floating Continent | Make for the Warring Triad on the Floating Continent, and bring Shadow with you. If your answers at the banquet pulled the imperial army out of Doma Castle, you can sweep Doma’s chests first | Ultima Weapon (the boss) and Nerapa. During the escape, wait for Shadow until five seconds are left |
World of Ruin: From the Solitary Island to Kefka’s Tower
| Destination | Objective | Bosses and Notes |
|---|---|---|
| Solitary Island | You start with Celes alone, nursing Cid | Feed him the fresh, fast-swimming fish and Cid pulls through |
| Albrook to Tzen (the collapsing house) | Sabin joins | There is a timer running inside the house in Tzen |
| Mobliz | Reunite with Terra and pick up Fenrir | Humbaba (you fight it twice) |
| Nikeah to South Figaro to the Figaro Castle basement to Kohlingen to Daryl’s Tomb | Edgar and Setzer join, and you get the airship Falcon | Tentacles, Dullahan |
| Free roam from here on | Maranda to Mt. Zozo (Cyan), the Veldt (Gau), the Veldt Cave to the Colosseum (Shadow), Narshe (Mog, Umaro), Jidoor and Owzer’s house (Relm), the Phoenix Cave (Locke), Triangle Island (Gogo), the Cultists’ Tower (Strago), the Ancient Castle (Odin, Raiden), the dream dungeon in Doma Castle (Cyan’s Bushido) | Beat all eight Legendary Dragons and you get Crusader. The GBA version also unlocks the Dragons’ Den |
| Kefka’s Tower | The final dungeon, tackled with three parties | Doom, Goddess, and Poltergeist, then the Statues, then Kefka |
The GBA Version’s Postgame: The Dragons’ Den and the Soul Shrine
| Destination | Objective | Bosses and Notes |
|---|---|---|
| Dragons’ Den | It appears on the island north of the Colosseum once you have killed all eight dragons. Run it with three parties, beating the upgraded dragons to strip away the elemental barriers one by one | The order is Ice, Storm, Earth, Blue, Red, Skull, Holy, then Gold. Kaiser Dragon waits at the very bottom, and Omega Weapon shows up if you come back |
| The treasure vault in the dragons’ shrine | It opens when you carve the words for king of the dragons into the stone tablet | Plague (Angel Brush), Nesragh (Gungnir), and Pudding Princess (Oborozuki) come out of the chests |
| Soul Shrine | It appears on the island west of Mobliz after you beat Kaiser Dragon. Ten groups, 128 fights back to back | The final group is the upgraded eight dragons plus Kaiser Dragon. Clear it for the Master Crown |
Six Things Players Trip Over
(1) Leave the chests in the Narshe mines and South Figaro Cave alone until the World of Ruin
Open the chests in those two spots after the world breaks and the contents change into a Ribbon, an Elixir, a Hero Ring, and a Guard Bracelet. Open them beforehand and you walk away with a Phoenix Down and an Ether. The tables in the map section list the World of Balance and World of Ruin contents side by side, so check there before you lift a lid.
(2) Wait for Shadow when you escape the Floating Continent
During the escape scene, keep choosing Wait until the counter is down to five seconds, and only then pick Go. If you leave early, Shadow is gone for good. In the World of Ruin you rescue him in the Veldt Cave and bet the Striker at the Colosseum to get him back.
(3) It is Mog or the Gold Hairpin, not both
In the Lone Wolf event at Narshe, saving Mog puts him in the party during the World of Balance, while saving Lone Wolf hands you the Gold Hairpin and pushes Mog’s recruitment back to the World of Ruin. In the PS version, Water Rondo can only be learned on the Lete River or in the Serpent Trench before the world breaks, but the GBA version also lets Mog learn it during the Leviathan fight, so there is far less reason to hold out for the early Mog there.
(4) Vanish-Doom works in the PS version and does nothing in the GBA version
Casting Vanish and then wiping a target out with Doom or Banish was the go-to trick in the Super Famicom and PS versions, but in the GBA version it no longer lands on enemies that resist instant death. On PS it is a fine way to cut boss fights short; on GBA, plan on winning the honest way and get your levels and spell list in shape first.
(5) Never level up without a Magicite bonus equipped
Magicite bonuses only apply at the moment a character levels up. From the early game on, keep Bismarck (Vigor +2) or Zona Seeker (Magic +2) on your core fighters, and always check who is holding what before you start grinding. In the World of Ruin you can design for durability too, with Diabolos (HP +100 percent) or Bahamut (HP +50 percent).
(6) Put Mog in the third party for the Dragons’ Den
The Dragons’ Den uses the same three-party structure as Kefka’s Tower, and its enemies are several notches nastier. The standard play is to stack your real fighters into two parties and leave the third party as Mog by himself with the Moogle Charm equipped, acting purely as a switch-puller. You earn no magic AP in there, so finish learning your spells before you walk in.
Map Guide: World Maps and Floor Diagrams with Chest Lists for All 58 Locations and 483 Maps
From here on we present 483 floor diagrams covering all 58 locations. Each dungeon is split into sections labeled Map 1, Map 2 and so on; the red markers are items in chests, pots, barrels and the like, and their numbers match the table directly below. For chests whose contents change between the World of Balance and the World of Ruin, each period is written out separately.
The maps were generated mechanically from walkthrough diagrams whose layout is shared by the PS version and the GBA version, so fine details such as wall thickness and door shapes may differ from the actual game. Chests whose numbers could not be read off the floor diagram are shown as red markers without a number, and their contents are still listed in the table. The world maps include only the spots whose place-name labels could be read.
World map (World of Balance)
World map (World of Ruin)
Floor diagrams for dungeons, towns and the Dragons’ Den (with chests)
Chest contents are the same in both versions, except that some chests in the Cave to the Sealed Gate and Owzer’s house were changed in the GBA version. Those chests are written with both, as in GBA version: Gold Needle (PS version: Remedy). The Dragons’ Den is a GBA-version-only dungeon.
How to read the maps
Walkable floor Floor that shifts with a switch Items in chests, pots, barrels and the like (numbers match the table below; contents are the same in the PS version and the GBA version, and where they differ both are listed)
Note: map numbers are the section numbers within each area. A red marker without a number is a chest whose position could be confirmed but whose number could not be read. Contents follow the in-game item names. If you open a chest in the World of Balance, you cannot get its World of Ruin contents.
Can You Still Play the PS and GBA Versions of Final Fantasy VI on Current Hardware? A Platform-by-Platform Guide
The Bottom Line: As of October 2026, you can still buy the PS version as a PSone Classics release through the PS3 and PS Vita storefronts. There is no official way to play the GBA version itself, the one with the Dragons’ Den, the Soul Shrine and the new Magicite, on current hardware. If all you want is the main story, the Pixel Remaster is on Switch, PS4, Steam and mobile.
(1) Playable on a Subscription or for Free
Neither the Super Famicom version nor the GBA version of Final Fantasy VI is included in Nintendo Switch Online (as of October 2026). There is no way to play it through a subscription.
(2) Playable With a Standalone Purchase
| Platform | Title | Price | Notes |
|---|---|---|---|
| Switch / PS4 | Final Fantasy VI Pixel Remaster | 2,200 yen (about US$14, tax included) | Released April 20, 2023. None of the GBA version’s added content is here |
| Steam / iOS / Android | Final Fantasy VI Pixel Remaster | 2,200 yen (about US$14, tax included) | Released February 24, 2022 |
| PS3 / PSP / PS Vita | Final Fantasy VI (PSone Classics, the PS version) | 1,200 yen (about US$8, tax included) | Released April 20, 2011. This is the exact PS version this guide covers. Buy it through the PS3 or Vita store |
(3) Playable via a Remaster or Remake
The Pixel Remaster is the remaster built on the Super Famicom version. Its selling points are the boost options that let you change the multipliers for experience, gil and Magic AP and switch encounters on and off, plus auto-battle and a fully voiced opera scene. It does not include the Dragons’ Den, the Soul Shrine, the four new pieces of Magicite or the extra bestiary entries, so none of the GBA-only content in this guide is playable there.
(4) Hard to Get on Current Hardware
The PS version is easy to track down, since used discs are plentiful and the PSone Classics release is still for sale. For the GBA version, a used cartridge is the only physical option left: the Wii U Virtual Console release (December 22, 2015) could no longer be bought once the Nintendo eShop closed in March 2023. The old mobile version, which was based on the GBA release, was delisted on July 28, 2021. If you want to play the Dragons’ Den, your only move is to dig out real hardware, whether that is a GBA, a Game Boy Micro, or a Nintendo DS or DS Lite.
Enjoying this article? Add us as a preferred source on Google.
Final Thoughts: Final Fantasy VI Is the RPG Where All 14 Characters Get to Be the Lead
The PS version of Final Fantasy VI, which launched March 11, 1999, is a straight port of the Super Famicom version, while the GBA version, Final Fantasy VI Advance, arrived November 30, 2006 at 4,800 yen (about US$31, before tax) as the definitive edition, adding four new pieces of Magicite, three new spells, the Dragons’ Den and the Soul Shrine. This guide serves both versions: GBA-only material is marked [GBA], and treasure chests whose contents differ between the two are listed side by side.
The core of the strategy is Magicite level-up bonuses and the 14 special commands. For Magic, the order is Relm 44, Terra 39, Celes 36; for physical power it is Umaro 57, Sabin 47, Gau 44. Leave the chests in the Narshe mines and the cave to South Figaro shut until the World of Ruin, and on the Floating Continent, wait for Shadow until there are five seconds left.
The final goal is beating Kefka in Kefka’s Tower, and in the GBA version, Kaiser Dragon in the Dragons’ Den and the 128 back-to-back battles of the Soul Shrine are waiting beyond that. The PS version runs 1,200 yen (about US$8) on PSone Classics, and if you only want the main story the 2,200 yen (about US$14) Pixel Remaster will do the job, but the Dragons’ Den is still GBA-only.
What works: throwing out fixed jobs and giving all 14 characters a special command of their own still makes building a party a genuine pleasure today. The GBA version’s Dragons’ Den brings the main game’s Eight Dragons back in beefed-up form, and as the finish line for completionists it is hard to fault. What bothers me: sealing off the Vanish-Doom trick erased the low-level shortcut, and the added content never carried over to the Pixel Remaster on current hardware. The chests that change depending on when you open them, and leaving Shadow behind, are traps that somebody always falls into on a first playthrough.
Design your stats with Magicite and squeeze every one of the 14 characters for all they are worth. That is the right way to play Final Fantasy VI, and it does not change whether you are on the PS version or the GBA version.
Read Next

Snicker Kitamura










Leave a Reply